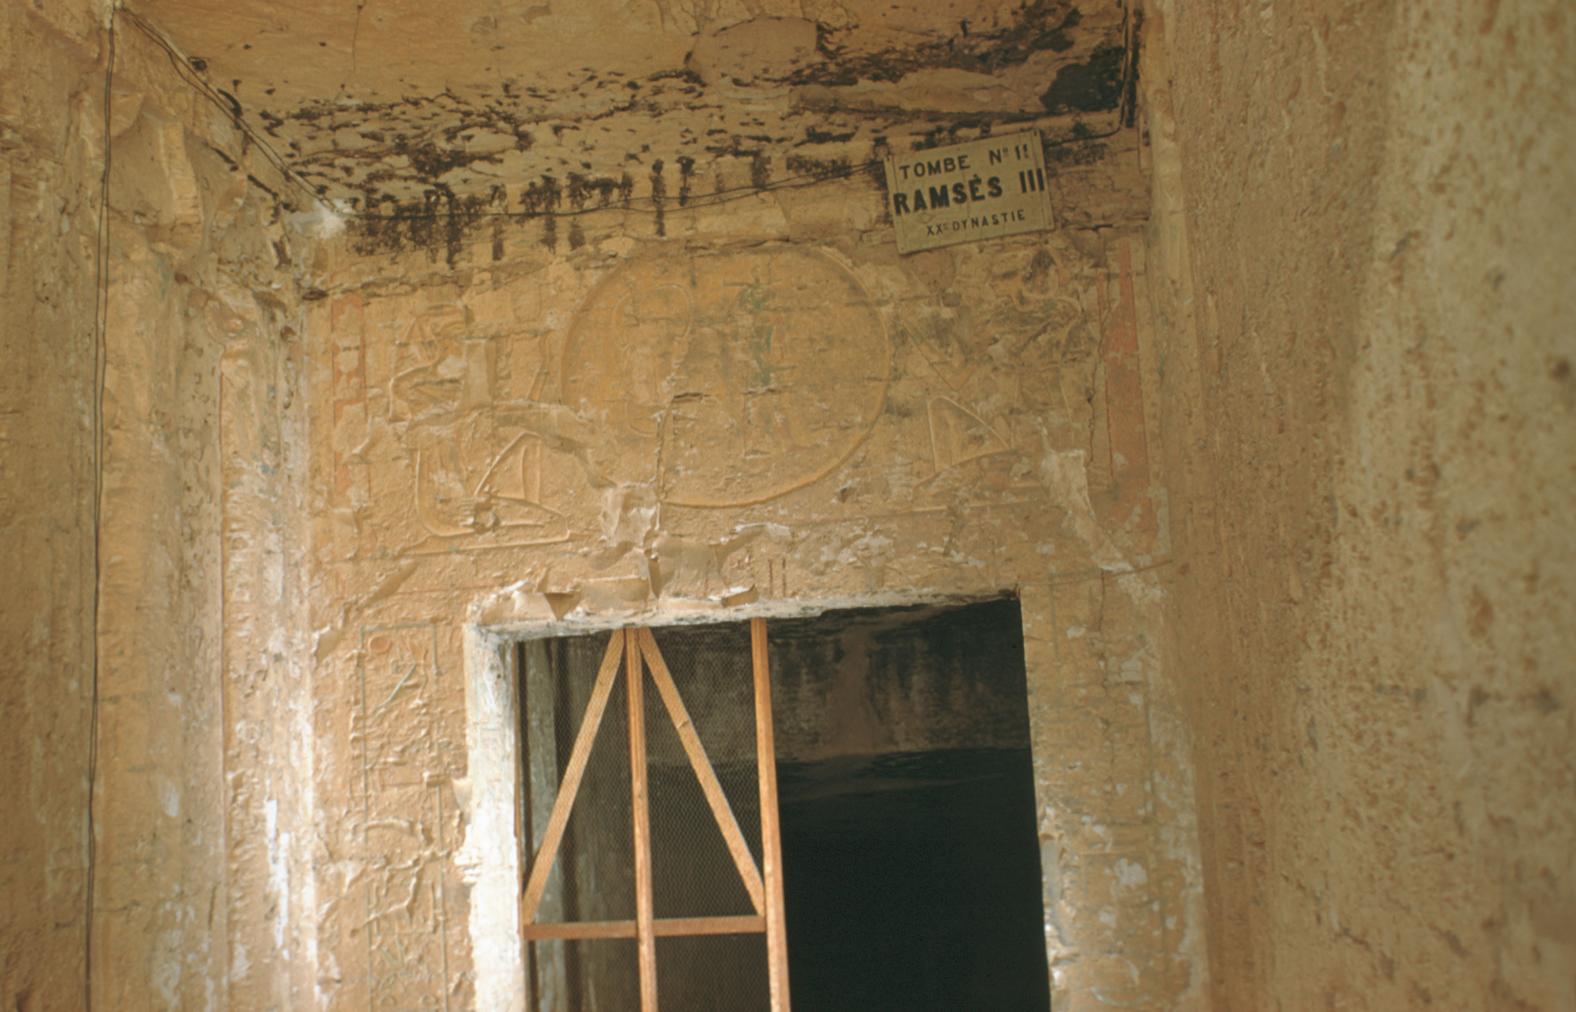
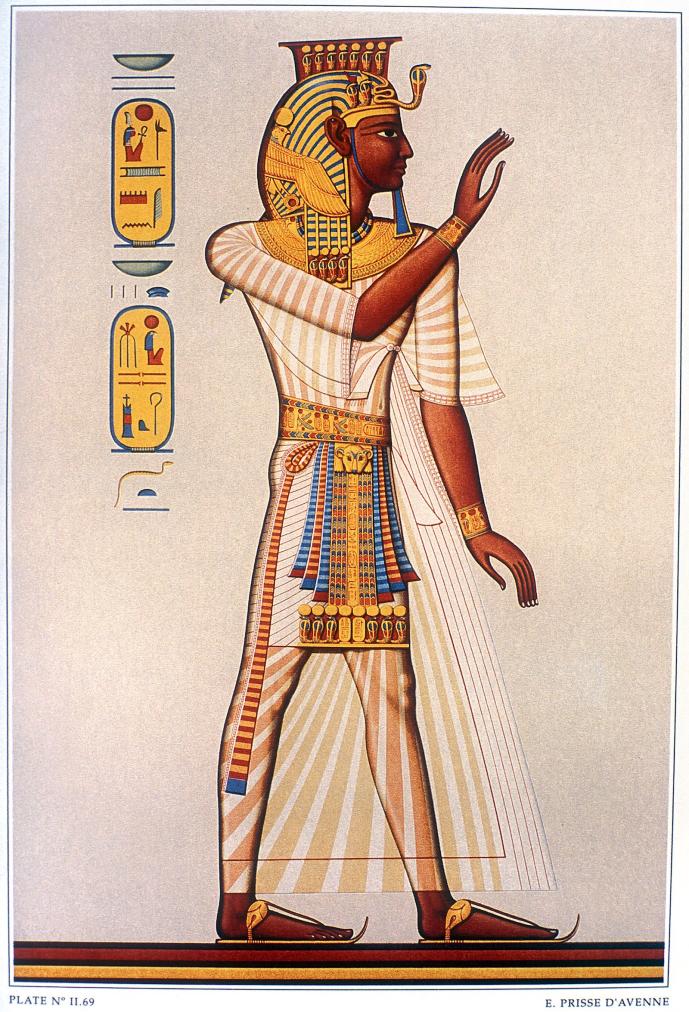
KV 11
Rameses III


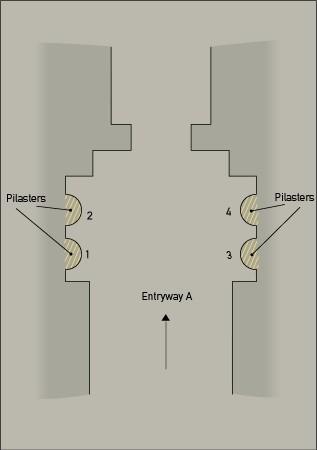
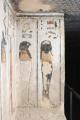
Entryway A
See entire tombPorter and Moss designation:

Gate B
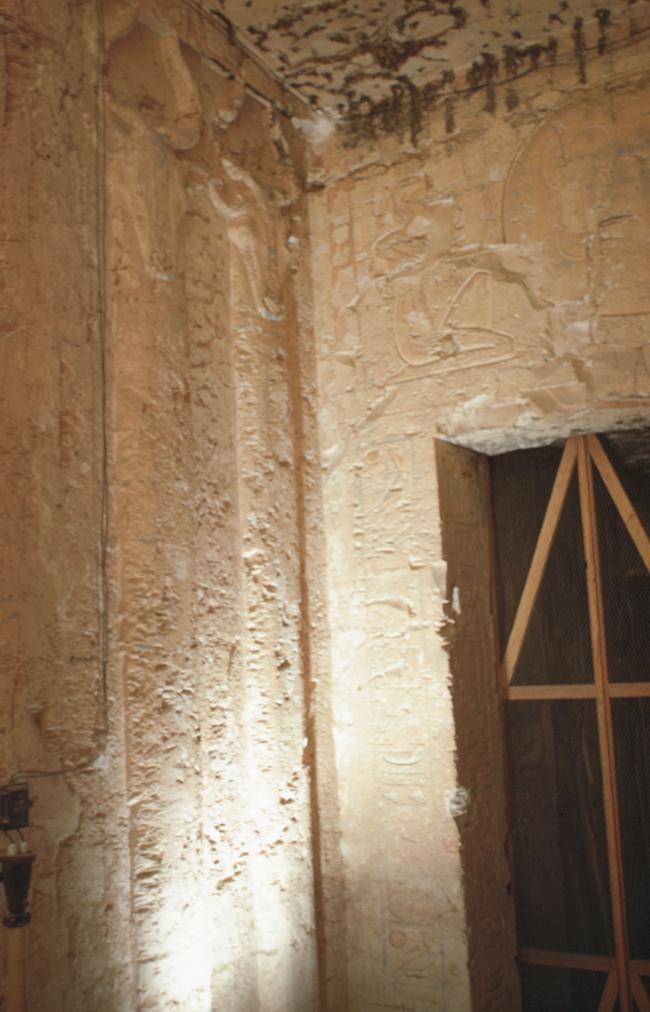
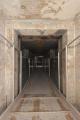
See entire tombA step in the floor of the gate continues the descent from the entryway A into corridor B. The gate has compound jambs, a lintel beam slot, and trenches in the floor for door pivots, all of which show that the gate was to be closed by a pair of door leaves. Below the inner end of the overhang, the lintel shows a sun disk containing the scarab and ram-headed forms of Ra, flanked by Isis and Nephthys. The reveals and outer thicknesses bear the names of Rameses III, and kneeling winged Ma'at figures are shown on the inner thicknesses.
Porter and Moss designation:
Corridor B
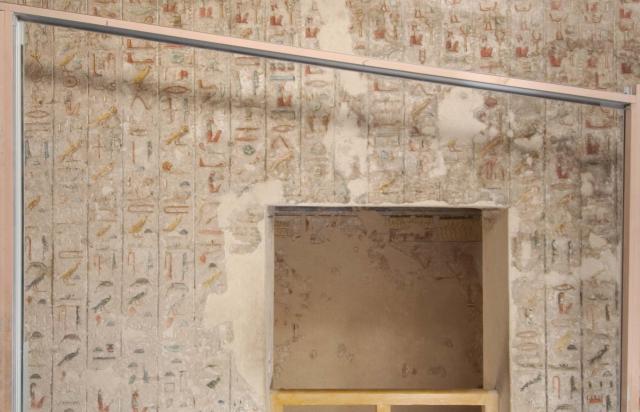
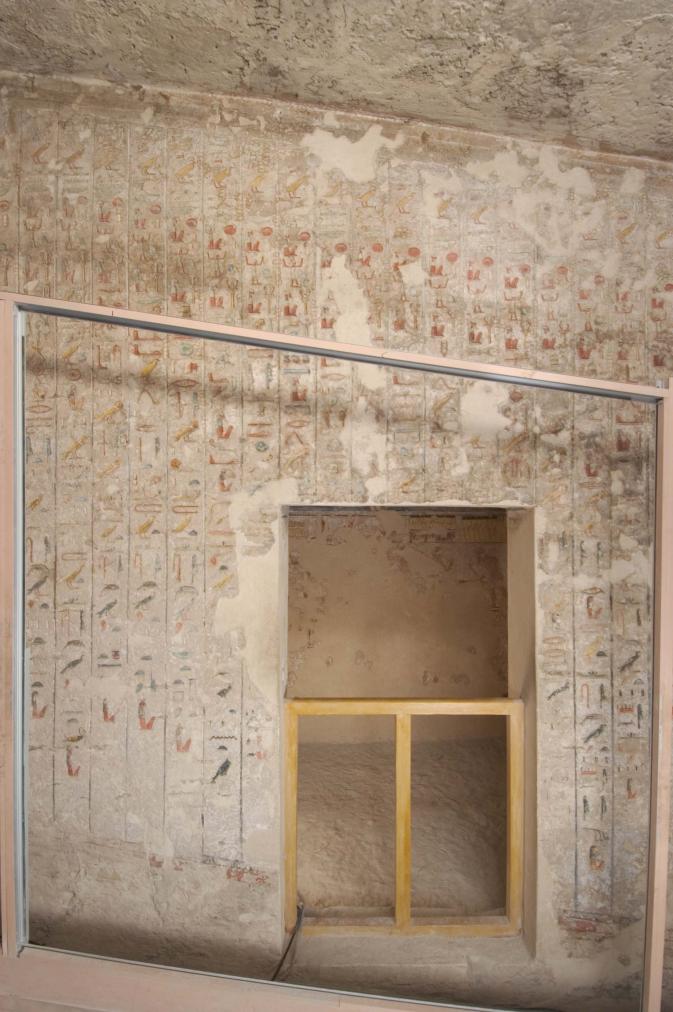
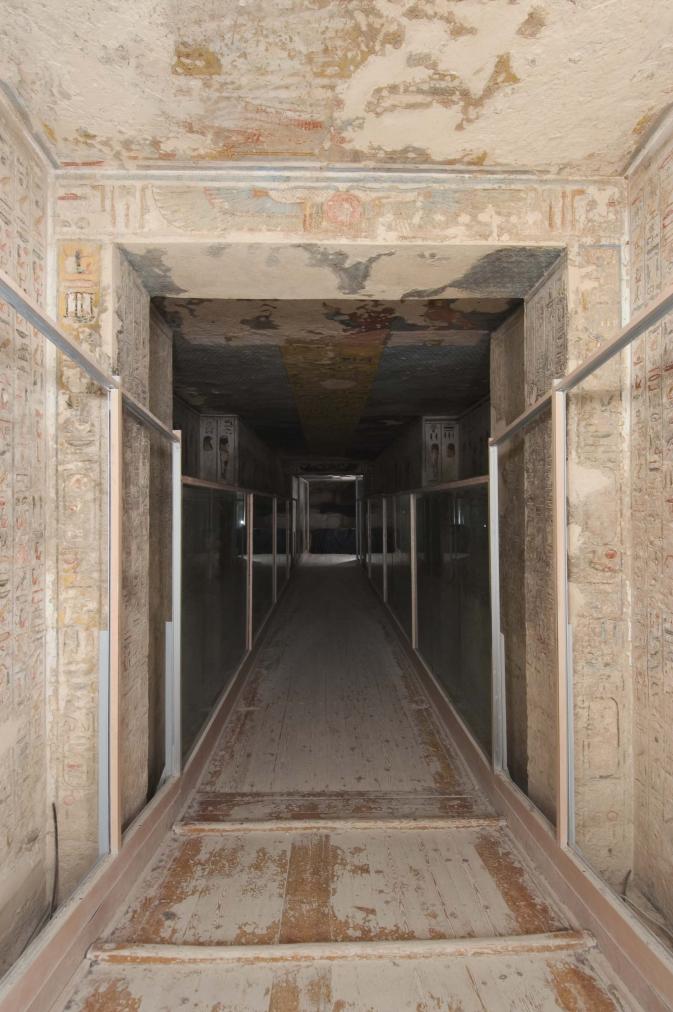
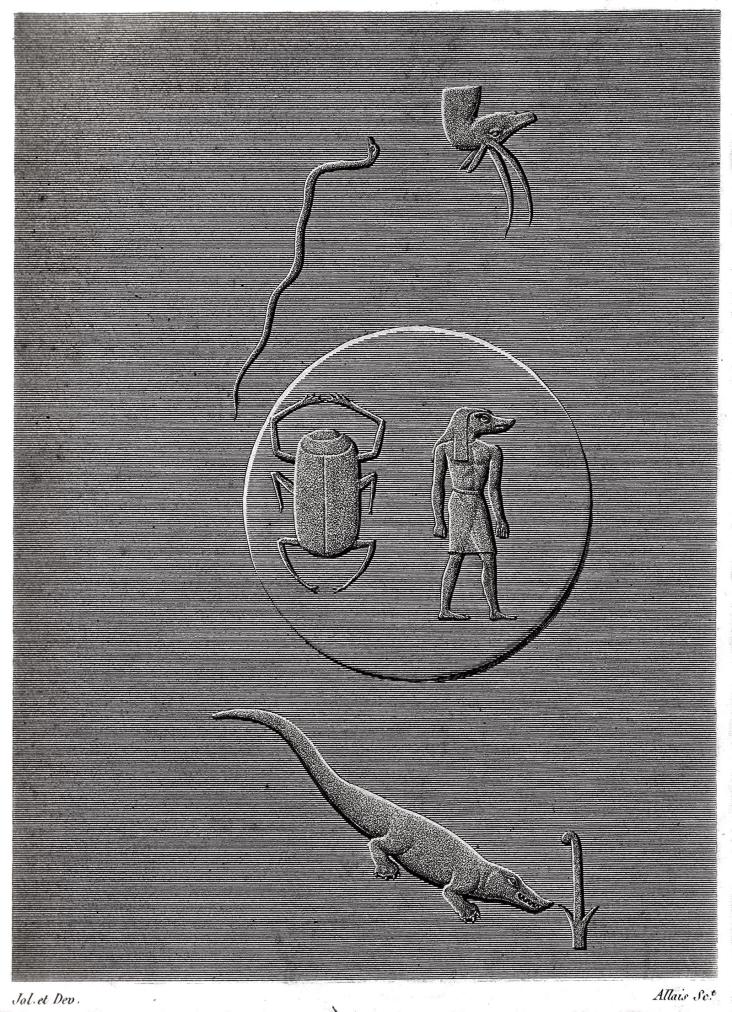
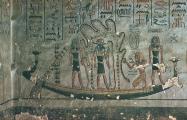
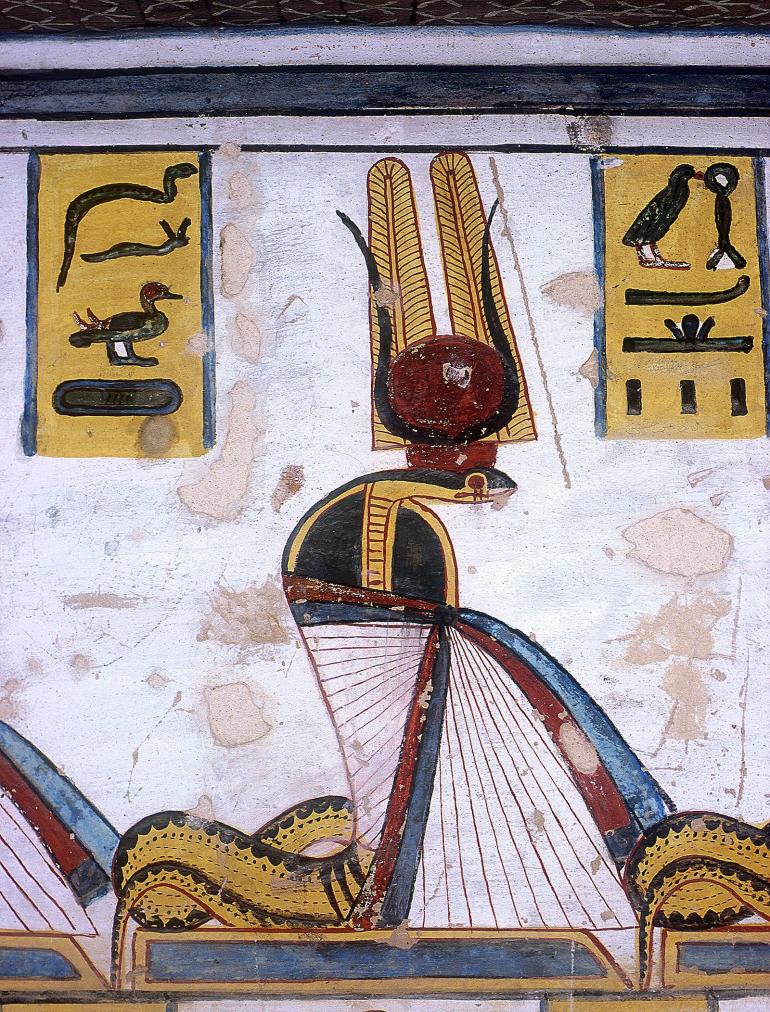
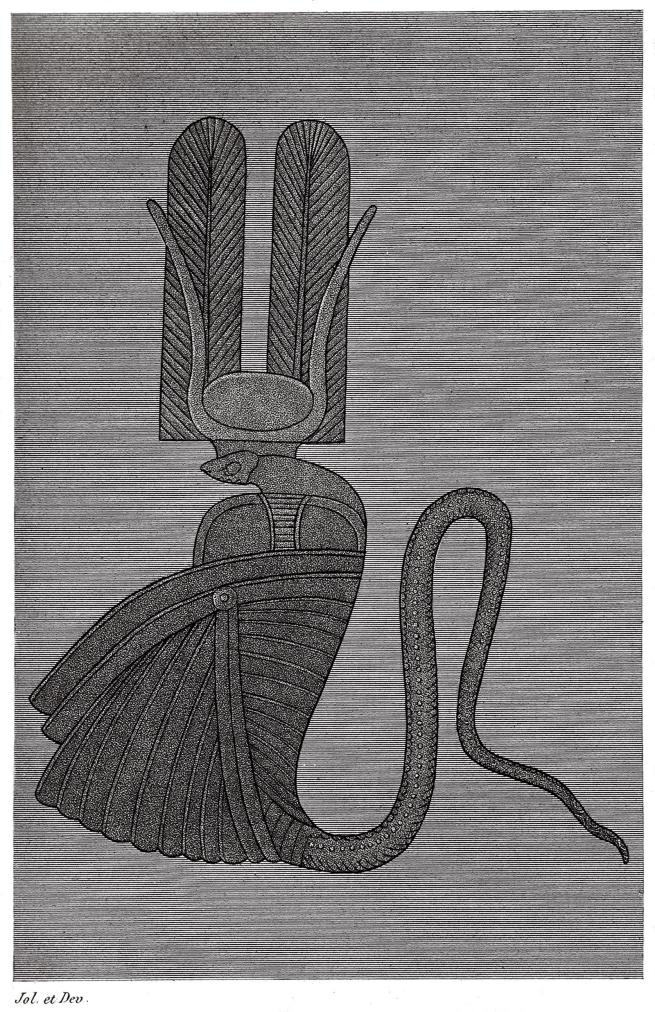
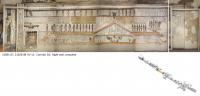
See entire tombThe left (east) wall is decorated with three scenes: Rameses III before Ra-Horakhty; the opening scene of the Litany of Ra with a disk containing a scarab and a ram-headed god between a serpent and a crocodile; and the beginning of the texts of the Litany of Ra, which continue on the right (west) wall. Efforts have been made to conserve this remaining decoration. Two gates, which open into small side chambers, stand opposite each other in the center of the side walls.
Porter and Moss designation:


Gate Ba
See entire tombThis gate leads to a small side chamber on the left (east) side of corridor B. The threshold is raised above the floor levels of corridor B and side chamber Ba. A door bolt hole in the thickness of the gate and a pivot hole in the ceiling of side chamber Ba show that the gate was to be closed by a wooden door.
Porter and Moss designation:
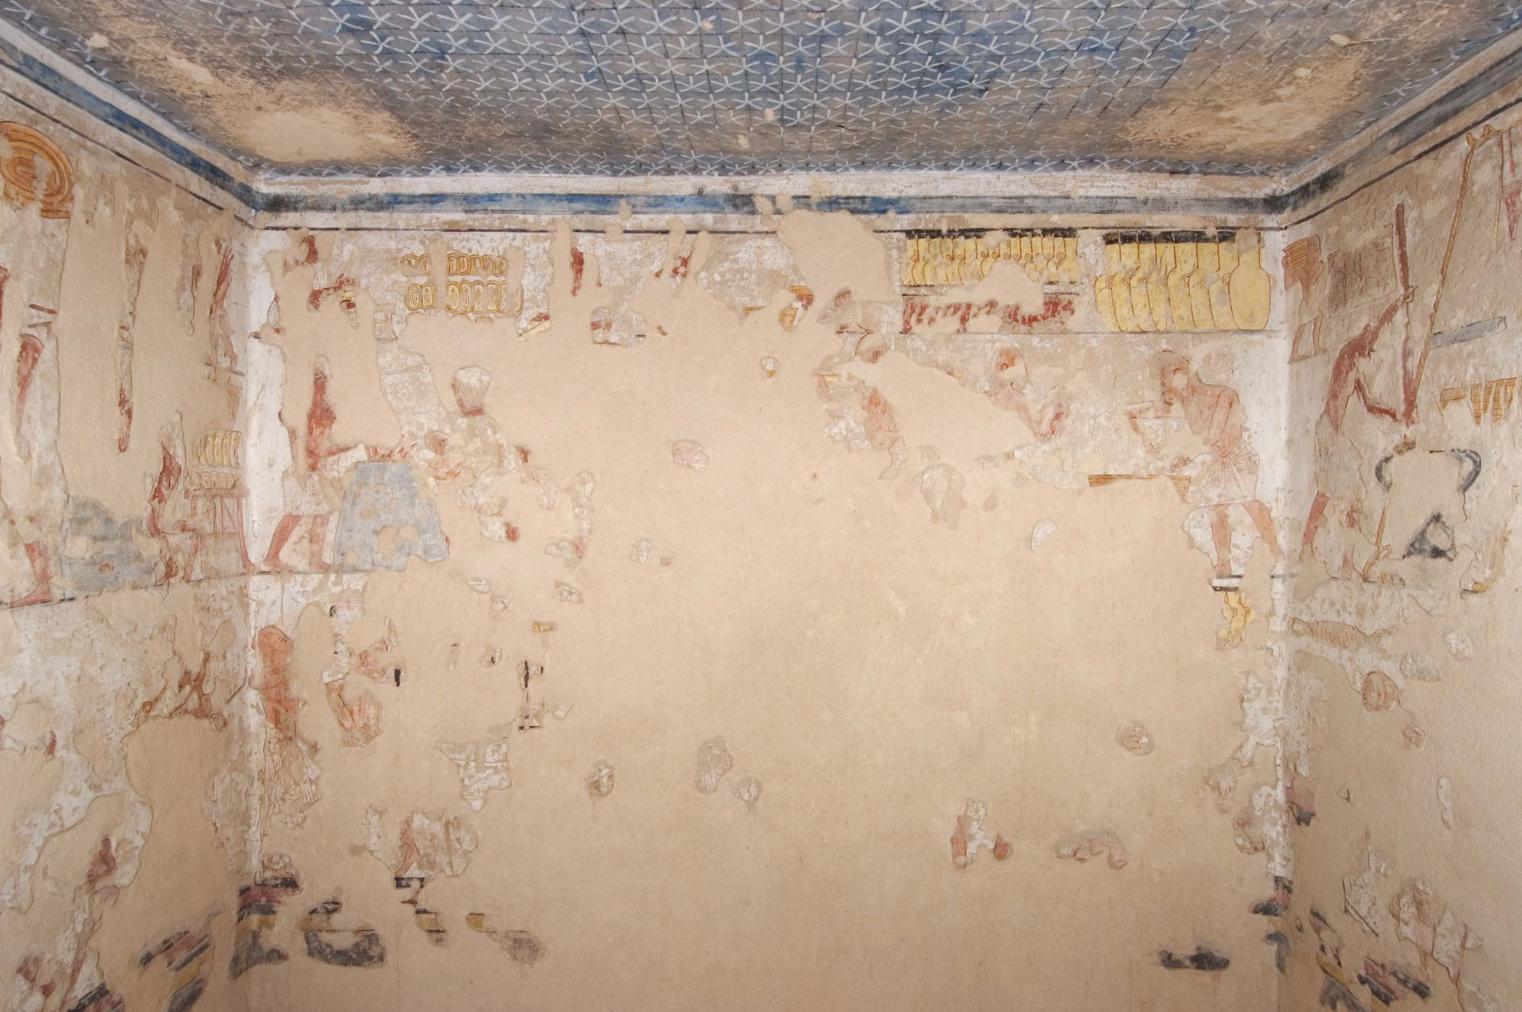
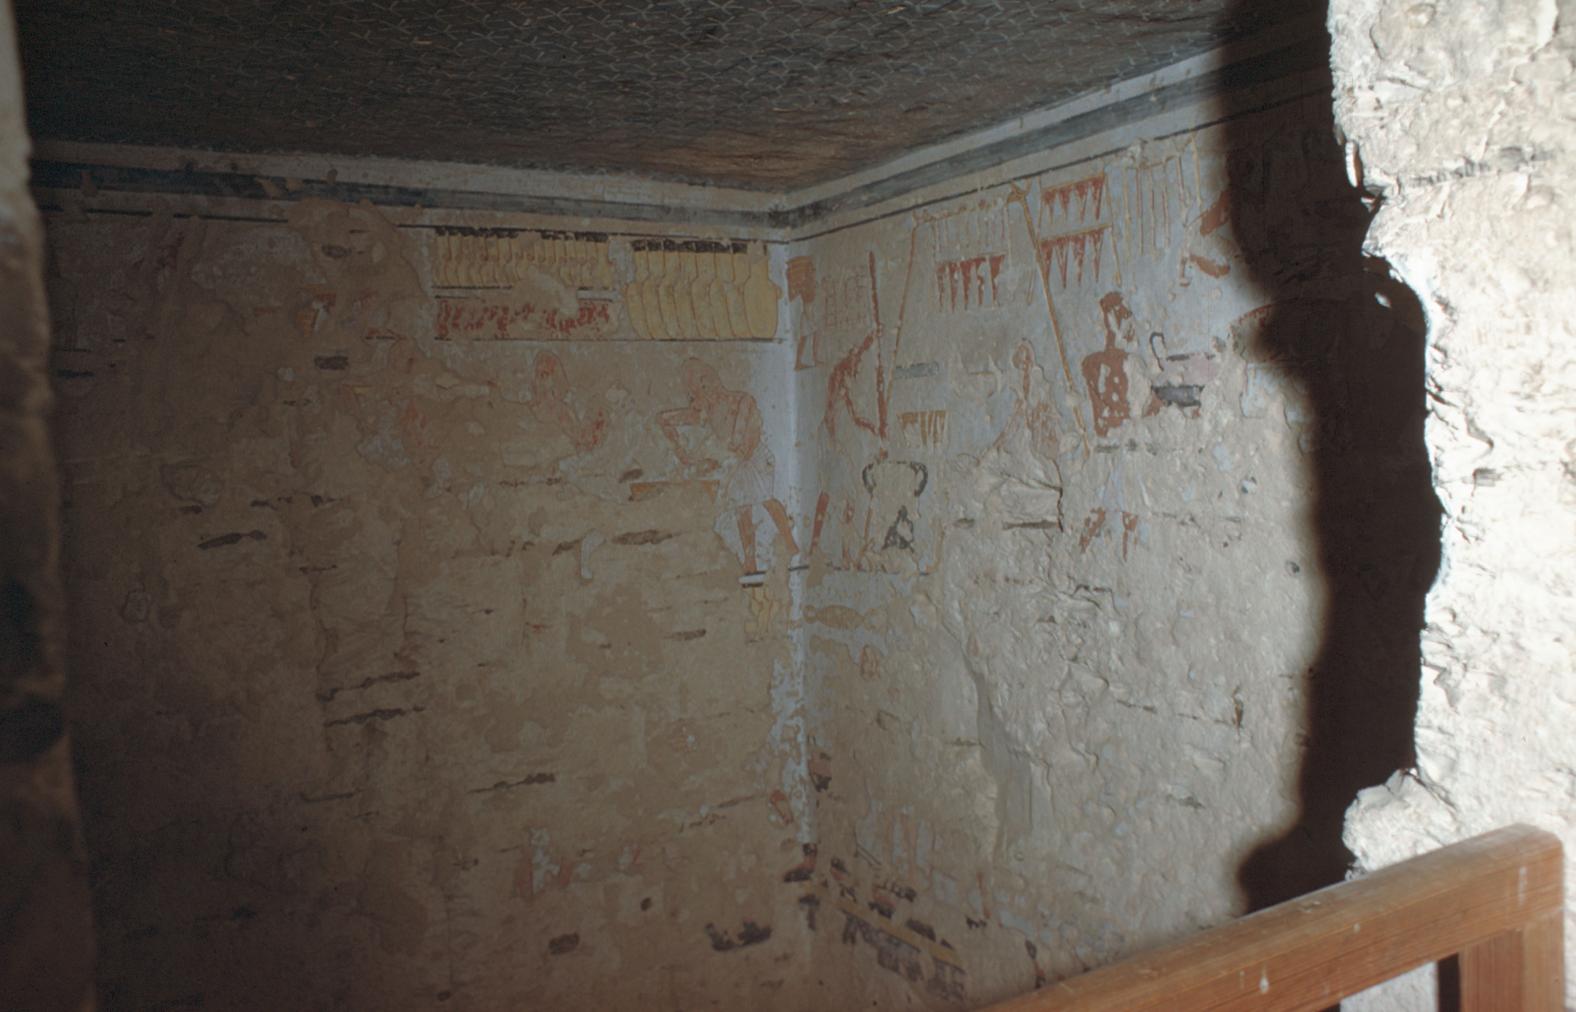
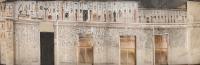
Side chamber Ba
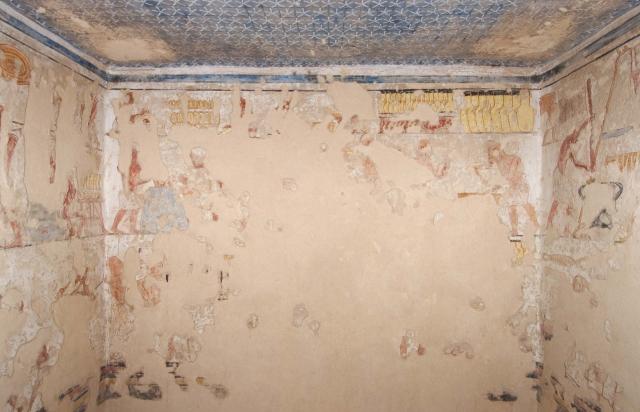
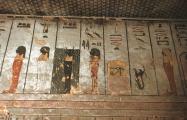
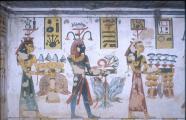
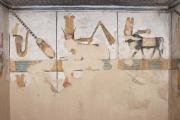
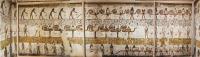
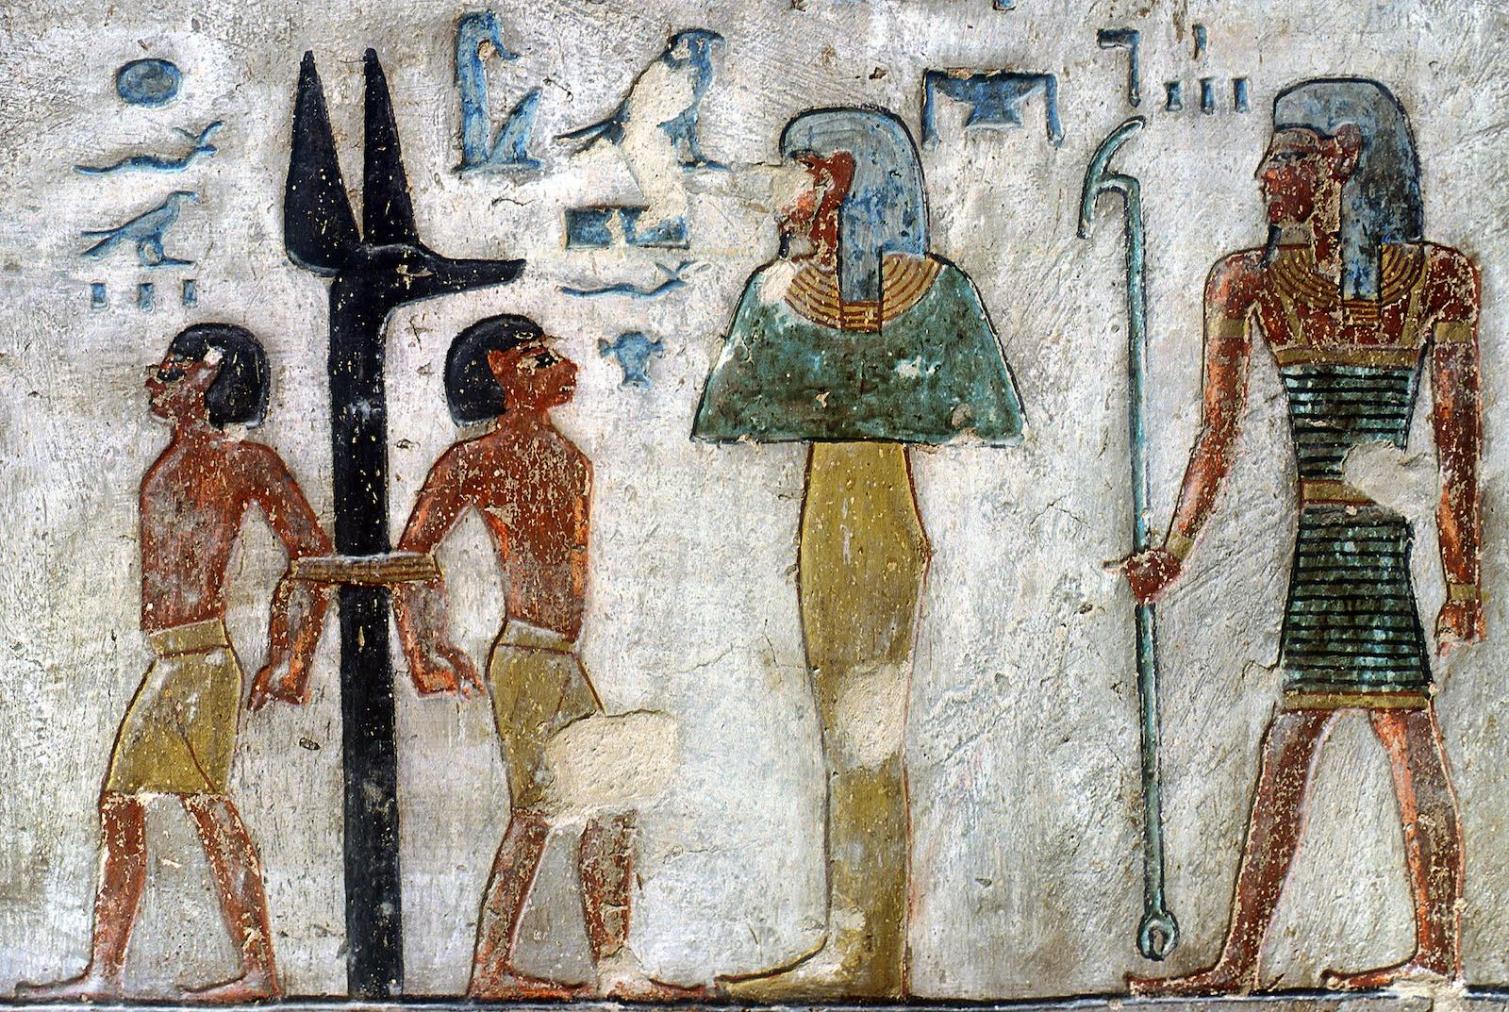
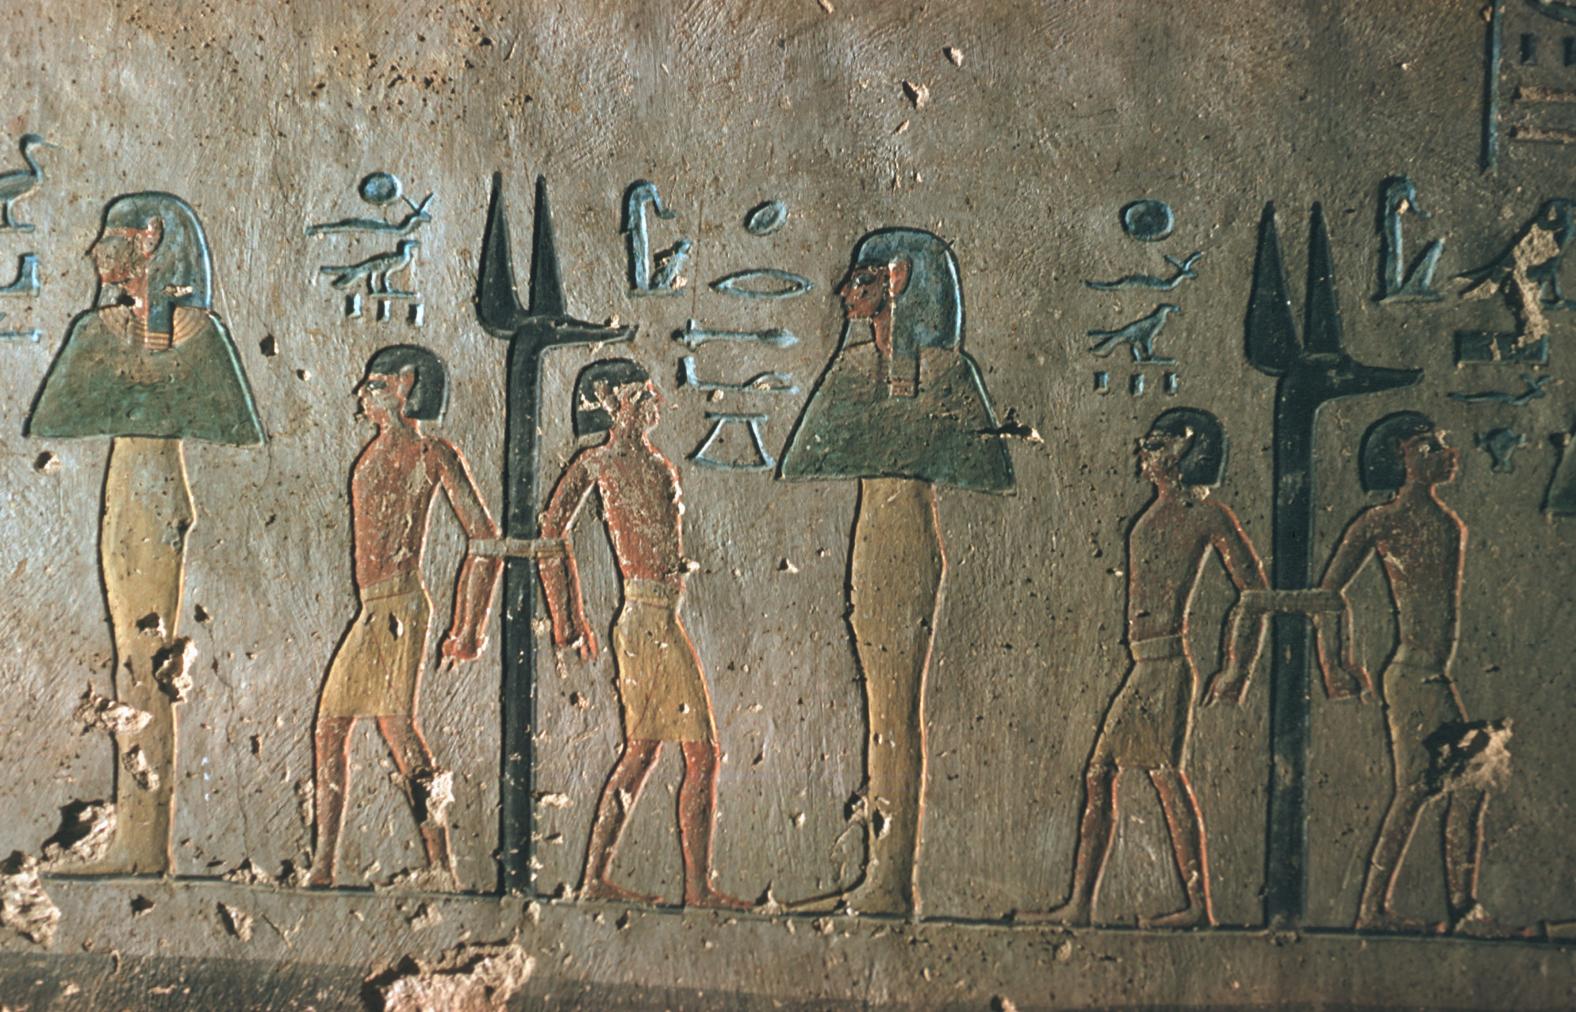
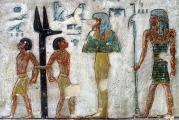
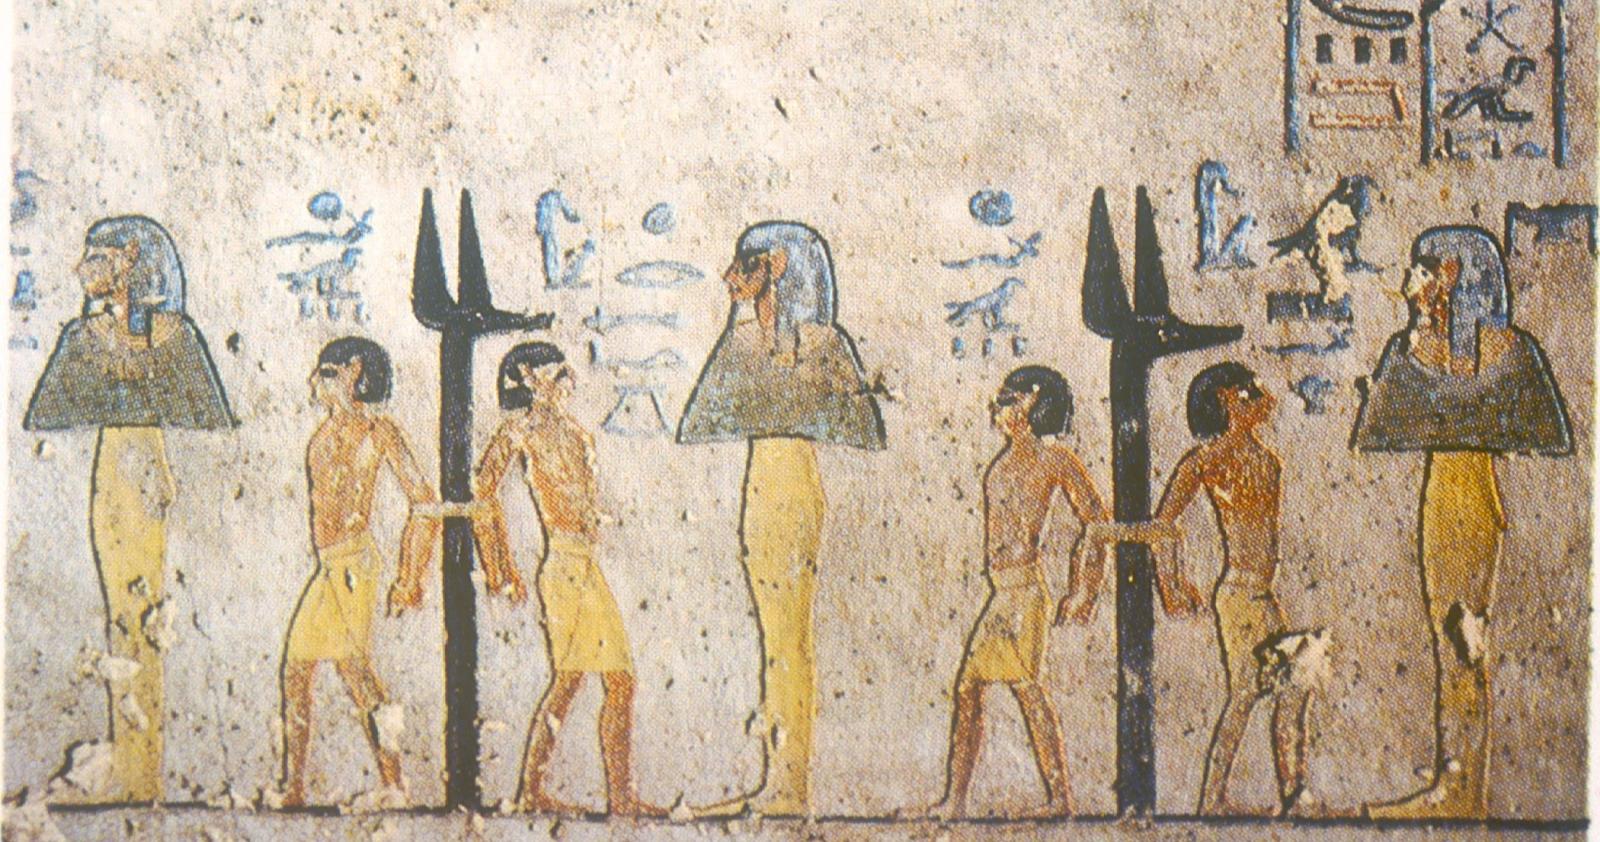
See entire tombThe walls of this side chamber are divided into two registers. The first shows bakers, cooks and butchers, and the second, bakers, brewers and a leather worker. The decoration here has been extensively damaged. A door pivot hole in the ceiling edge to the south of the gate shows that it was closed by a single door leaf.
Porter and Moss designation:
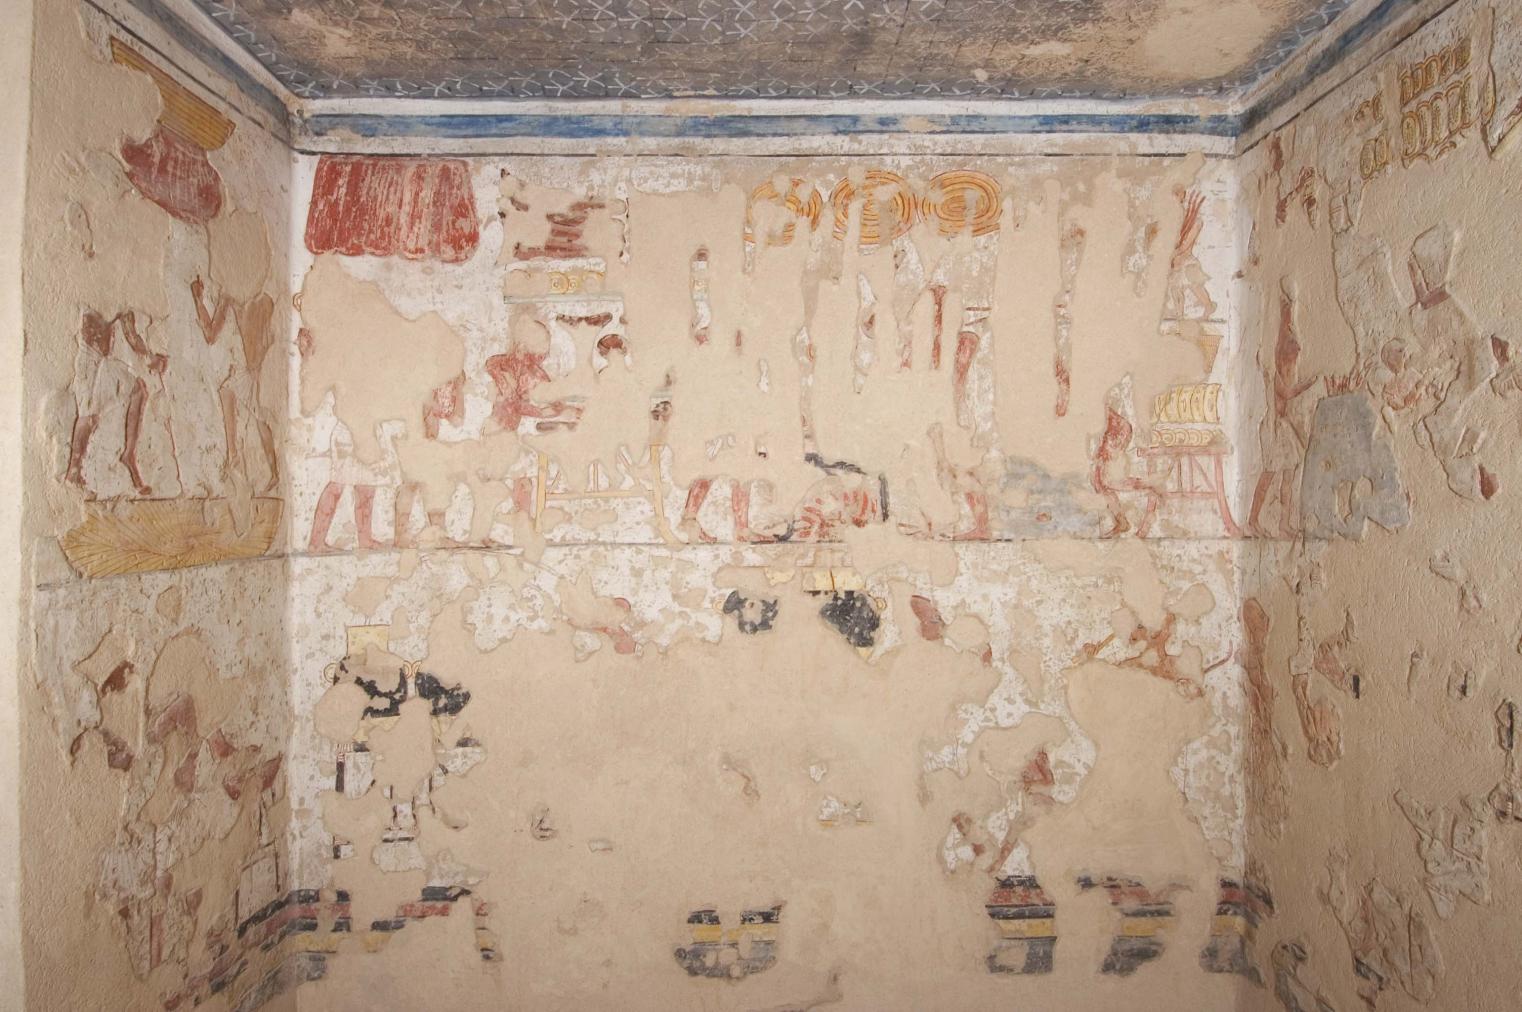


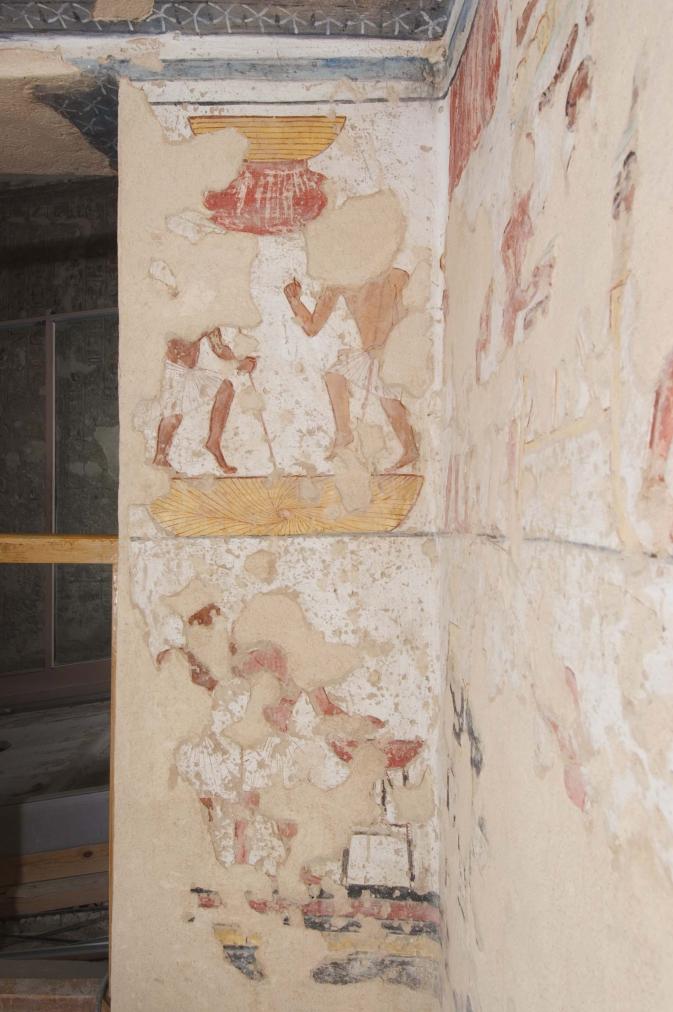


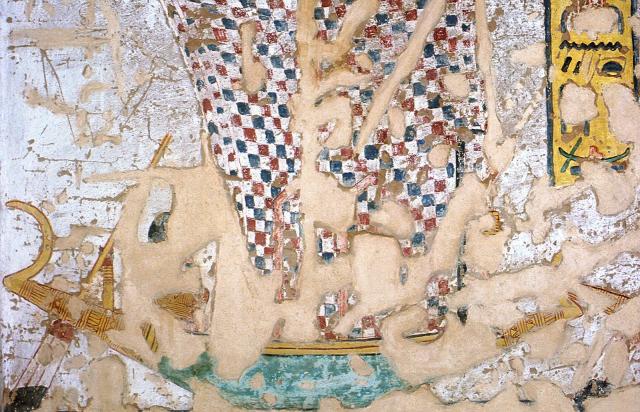
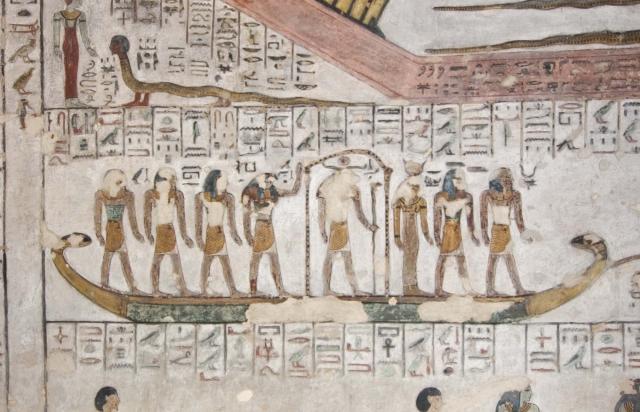
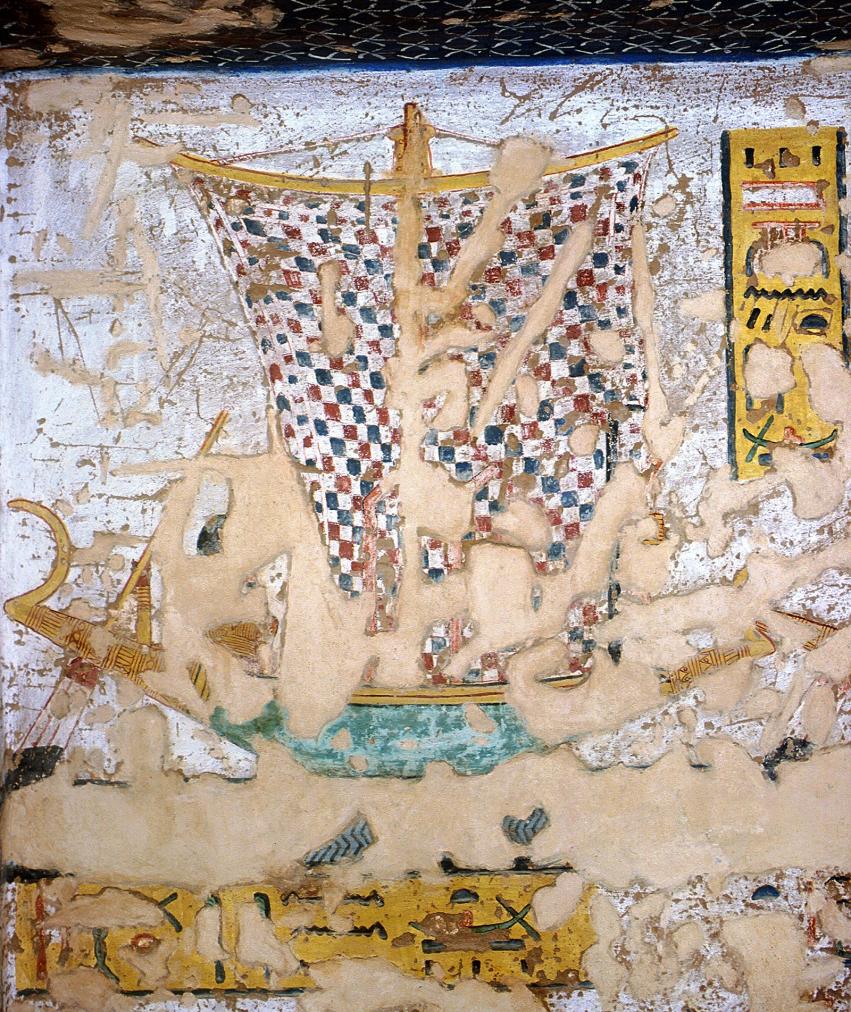
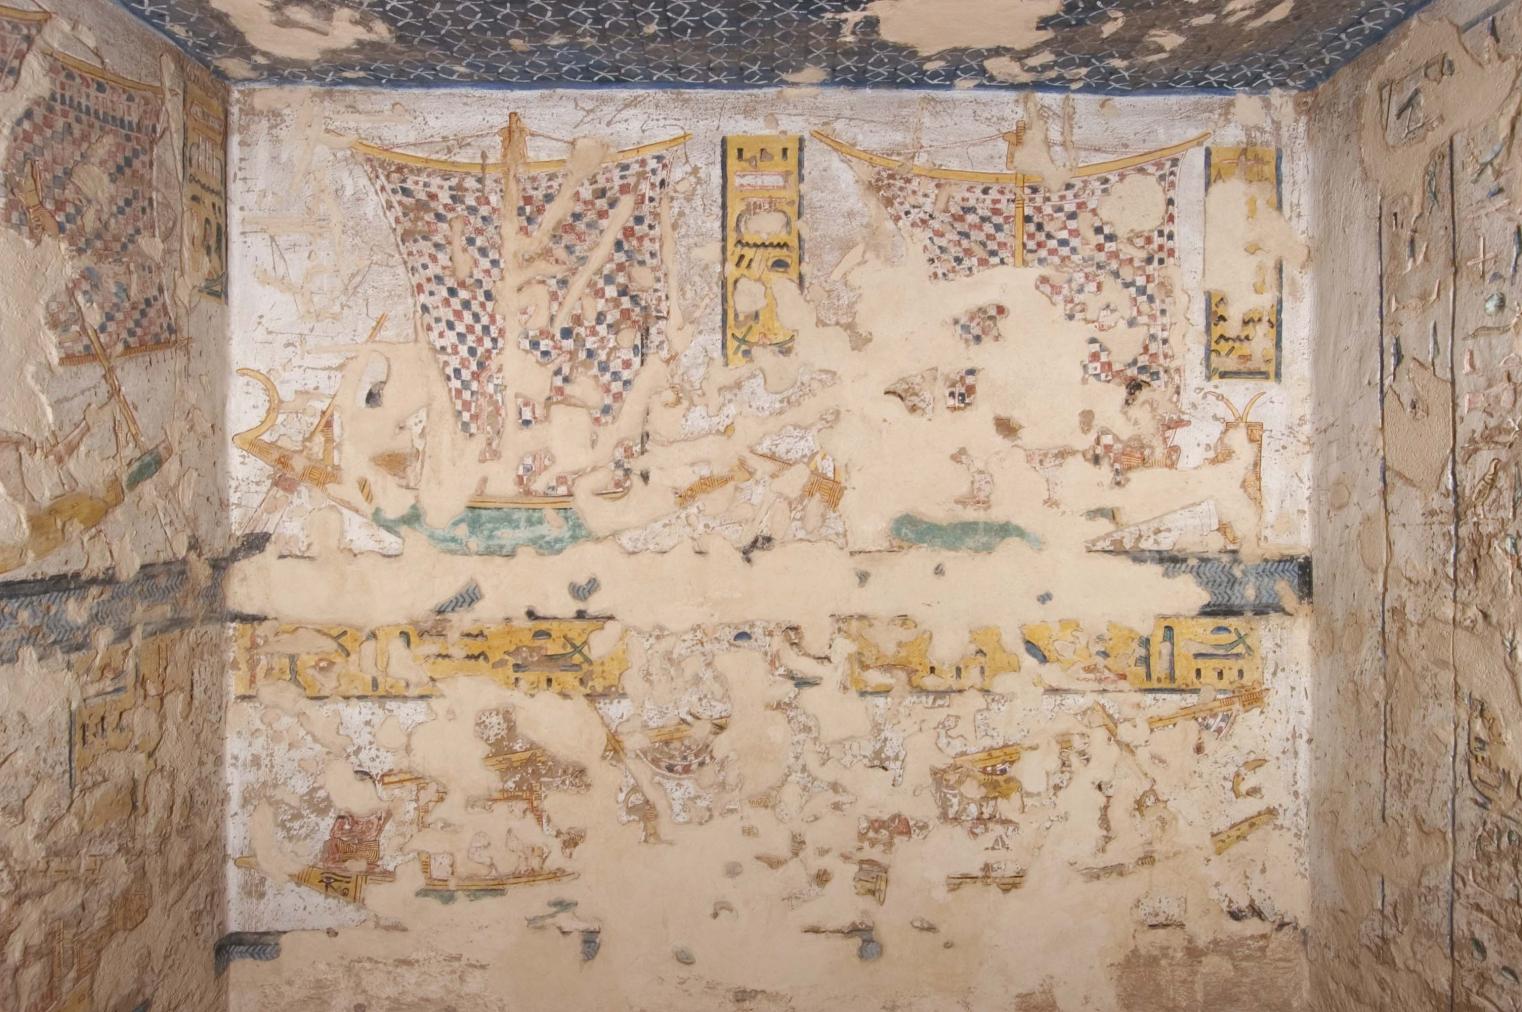
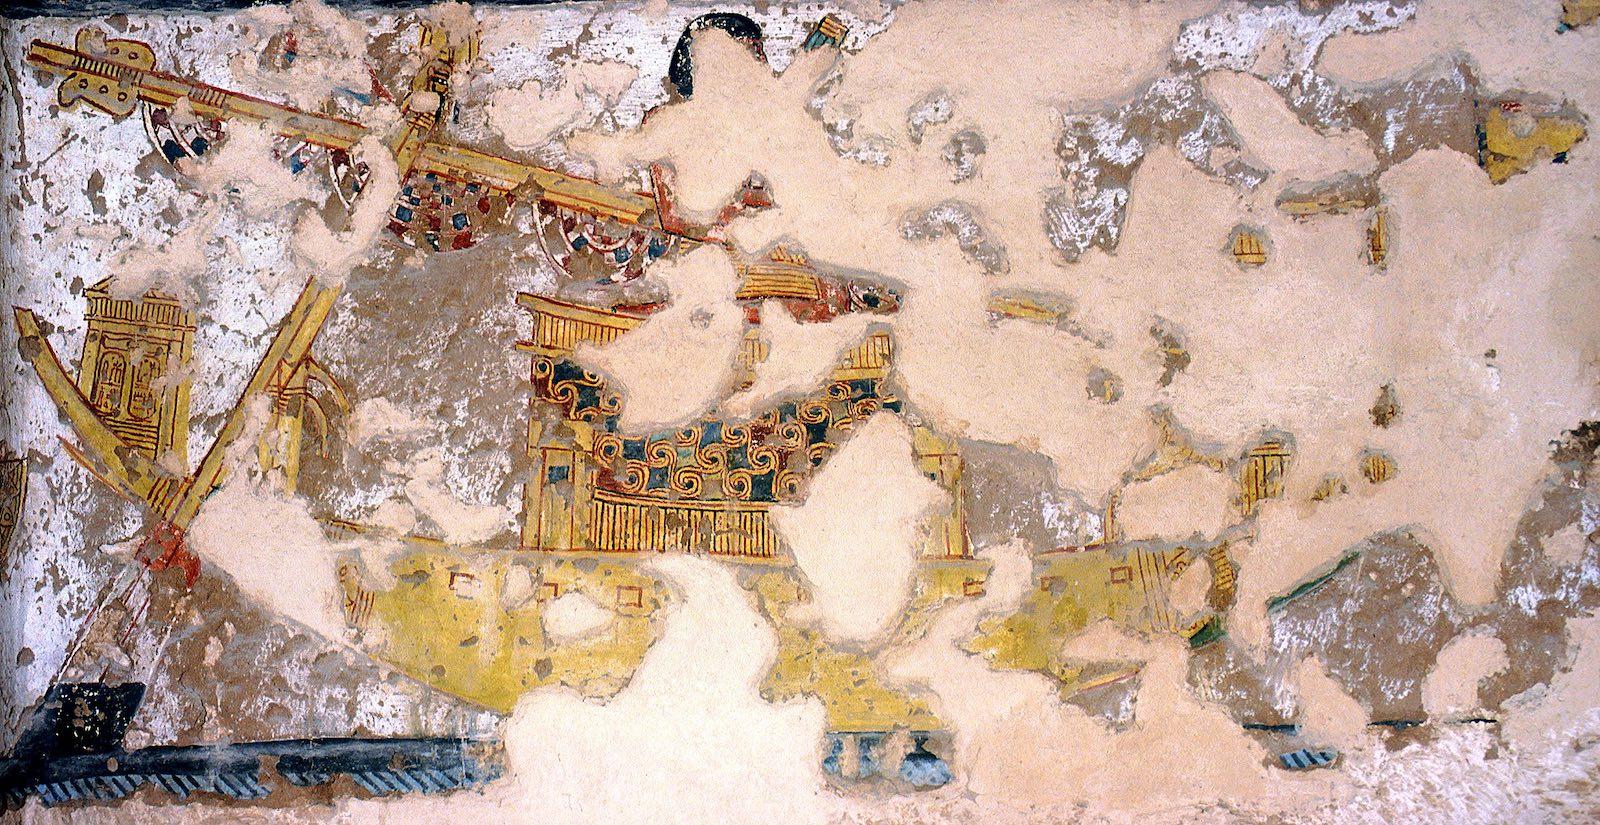
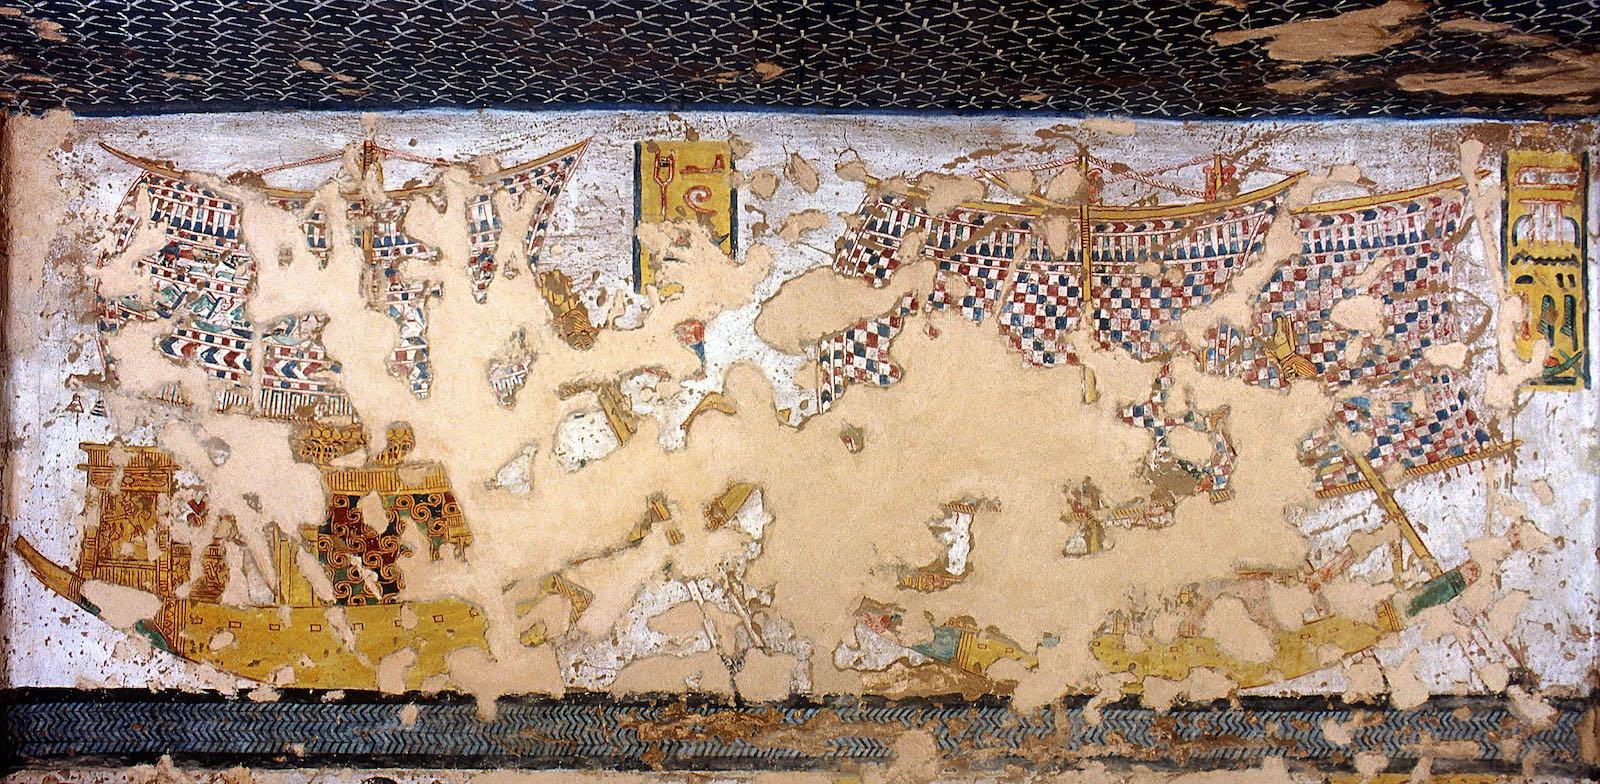
Side chamber Bb
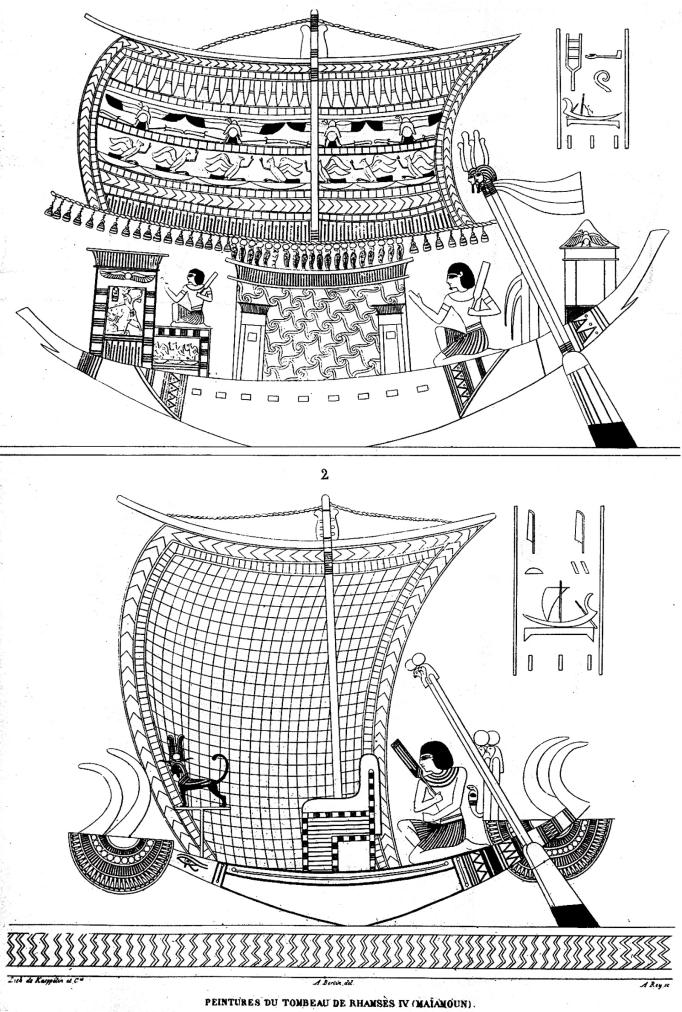
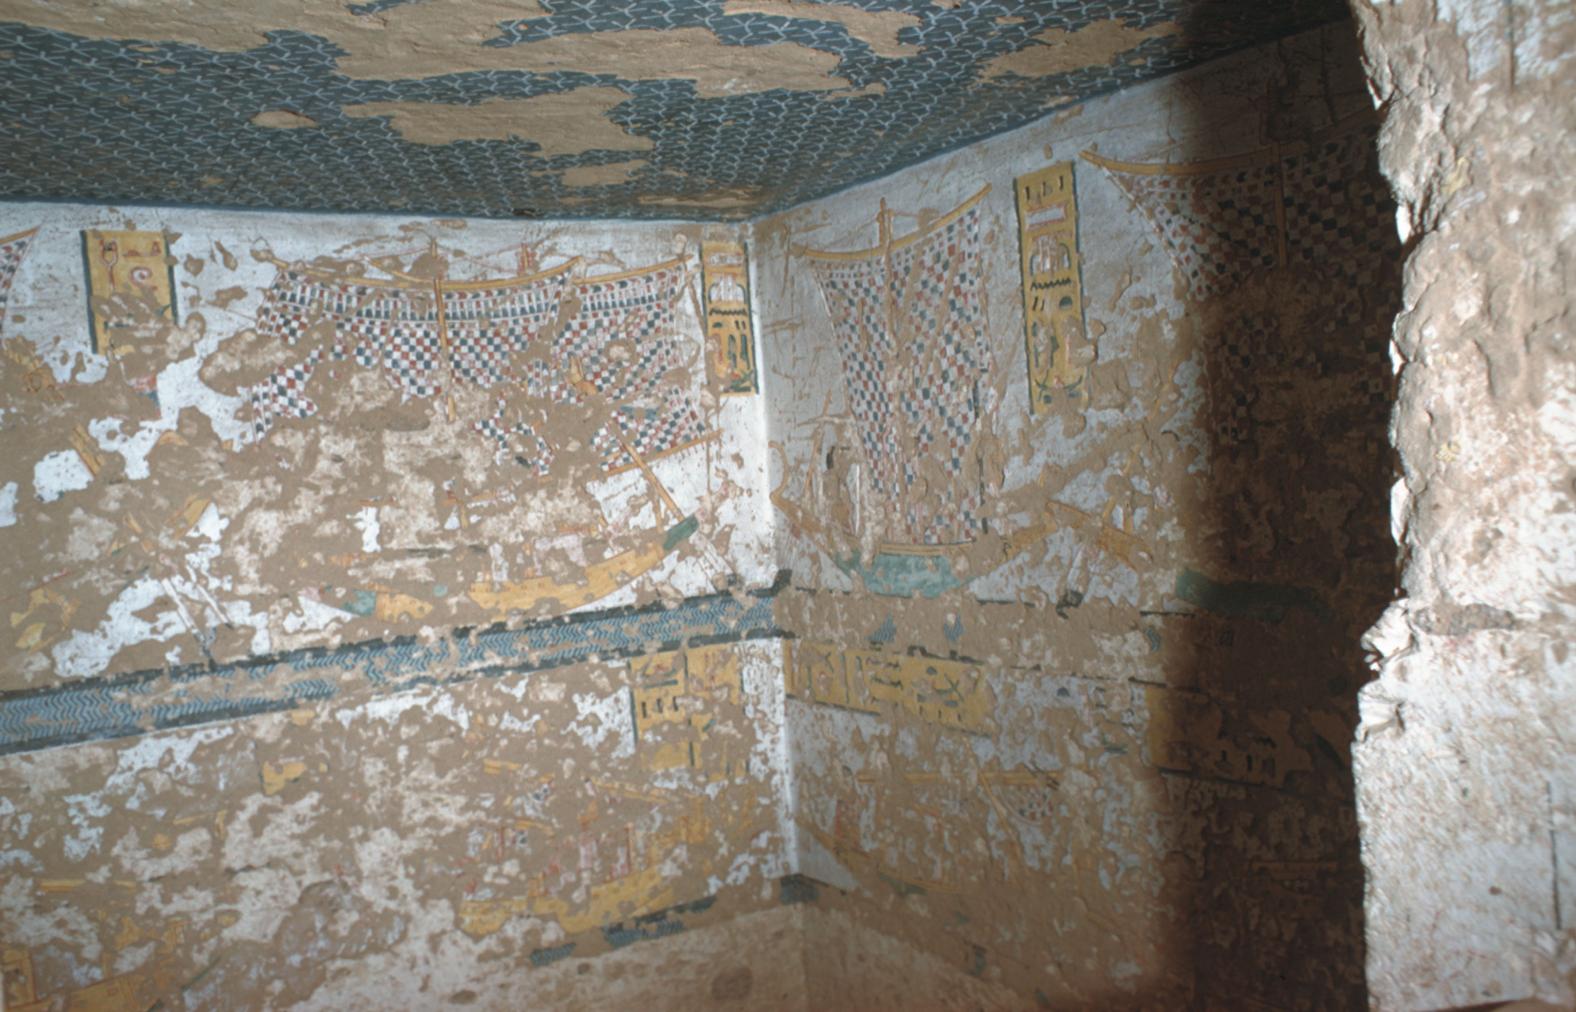
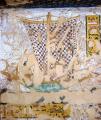
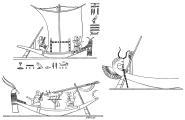
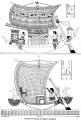
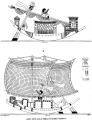
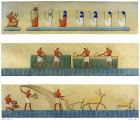
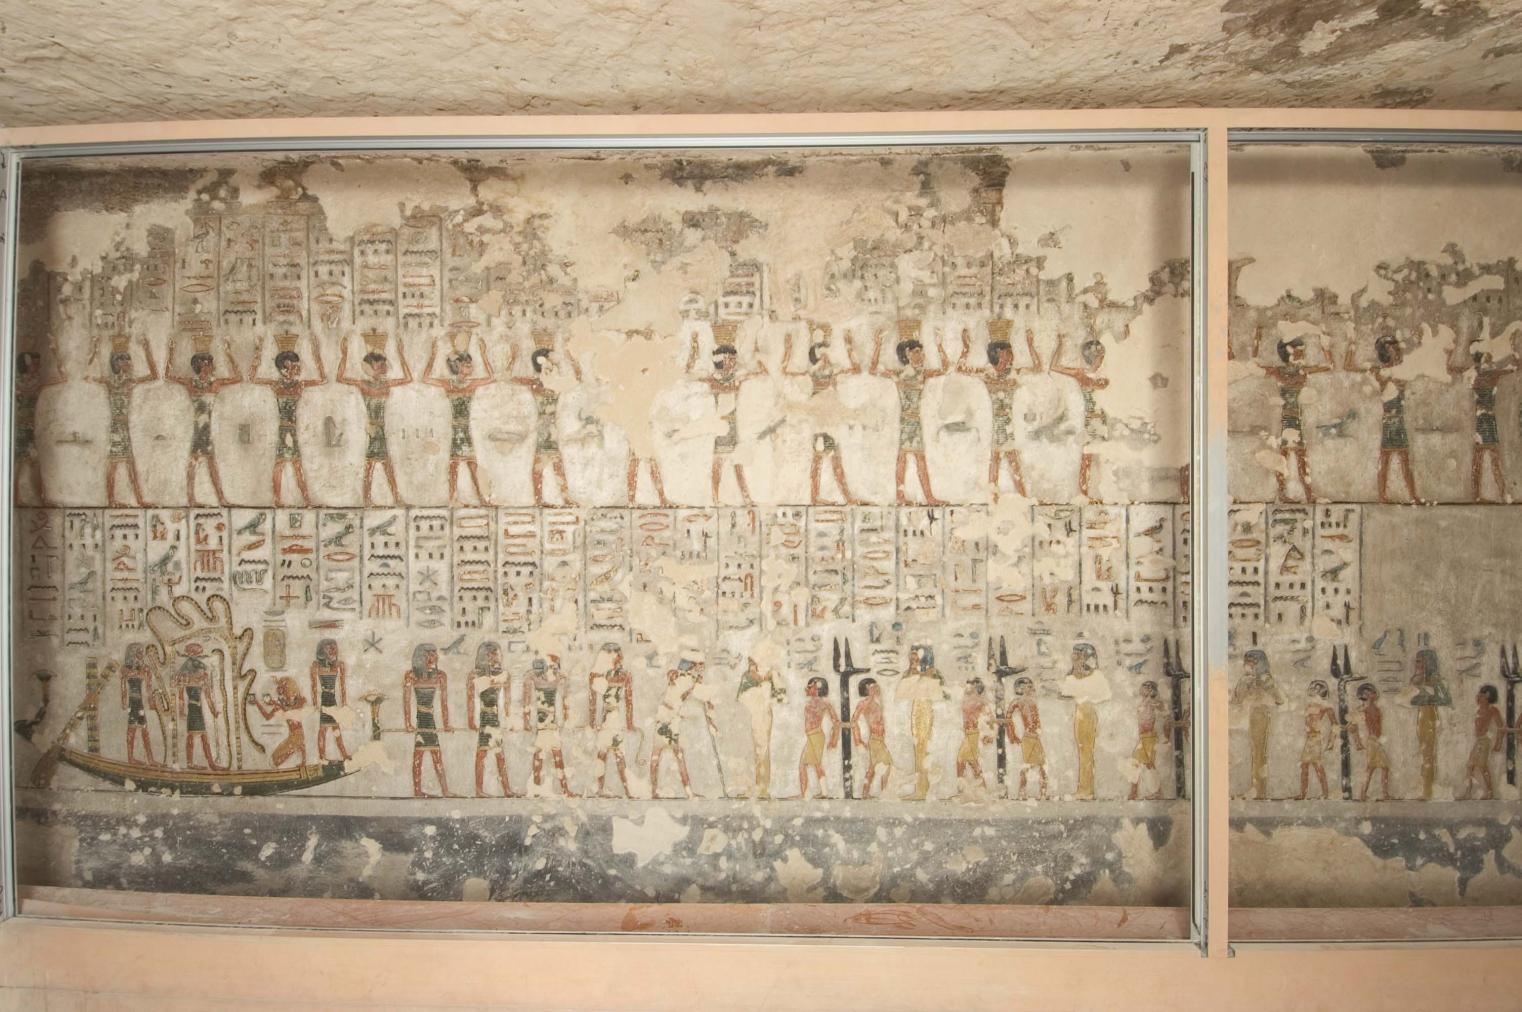
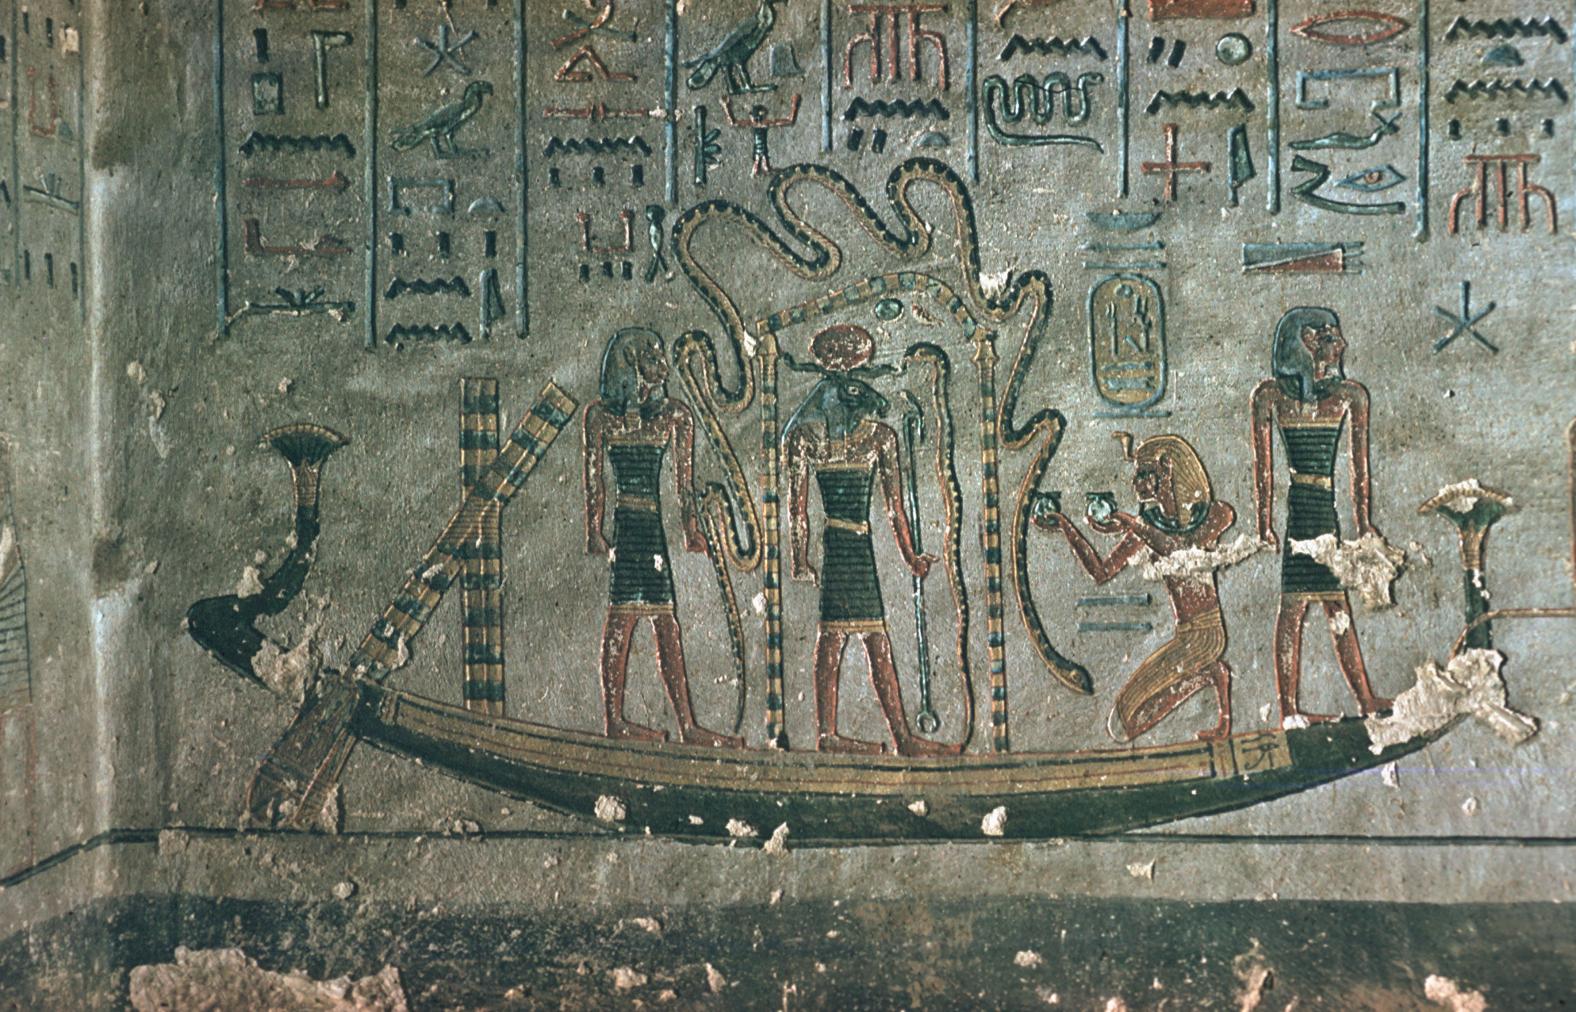
See entire tombThe east wall of this side chamber contains the Litany of Ra and the three remaining walls show sailing boats in two registers. Much of the decoration has been lost. A door pivot hole in the ceiling edge north of the gate shows that the entry was to be closed by a single door leaf.
Porter and Moss designation:


Gate Bb
See entire tombThis gate leads to a small side chamber on the right (west) side of corridor B. A door bolt hole in the left (south) thickness of the gate, as well as a pivot hole in the ceiling of side chamber Bb show that it was to be closed by a wooden door. The threshold is higher than the floor levels of chamber B and side chamber Bb.
Porter and Moss designation:
Gate C
See entire tombTwo door pivot holes at the inner edge of the outer soffit show that the gate was to be closed by double wooden doors. The lintel of gate C is decorated with a winged disk, the reveals bear the names of Rameses III, and the thicknesses contain the Litany of Ra.
Porter and Moss designation:
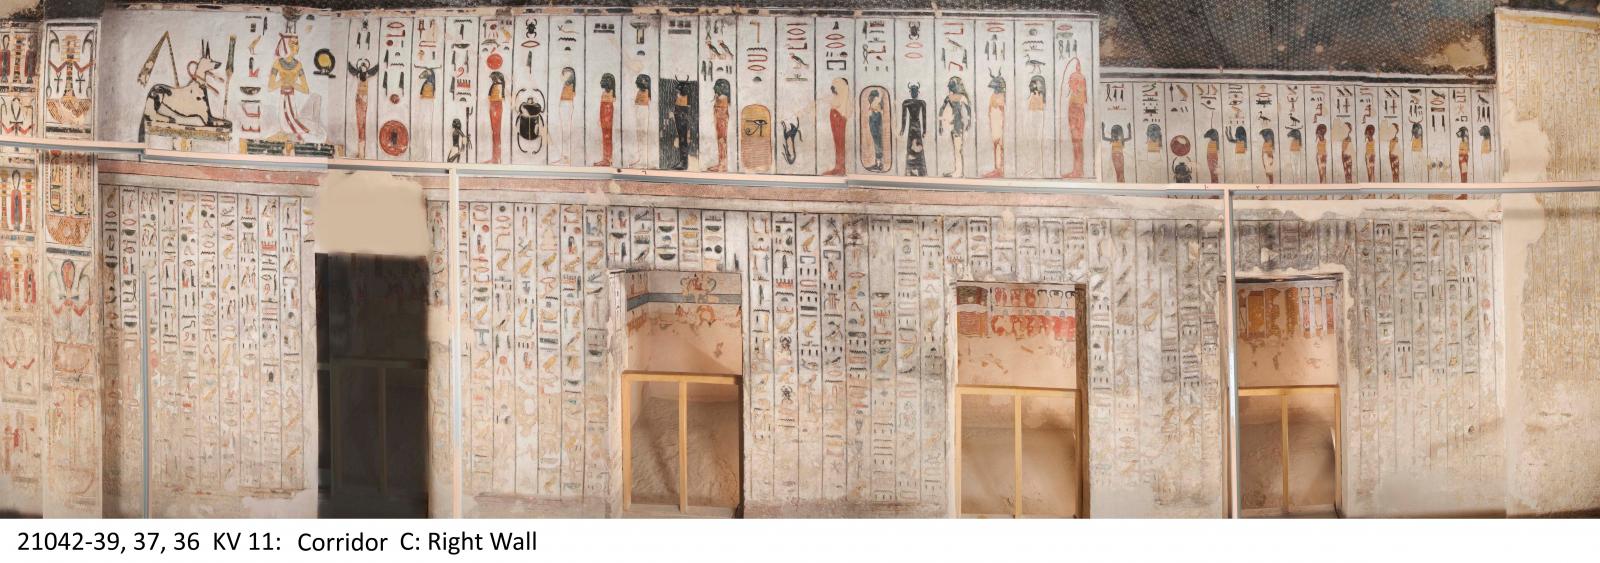
Corridor C
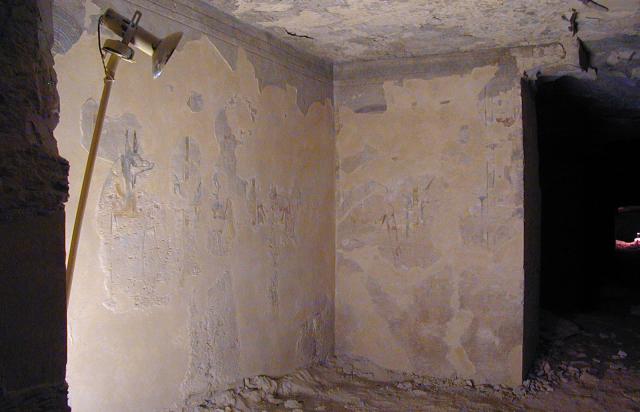
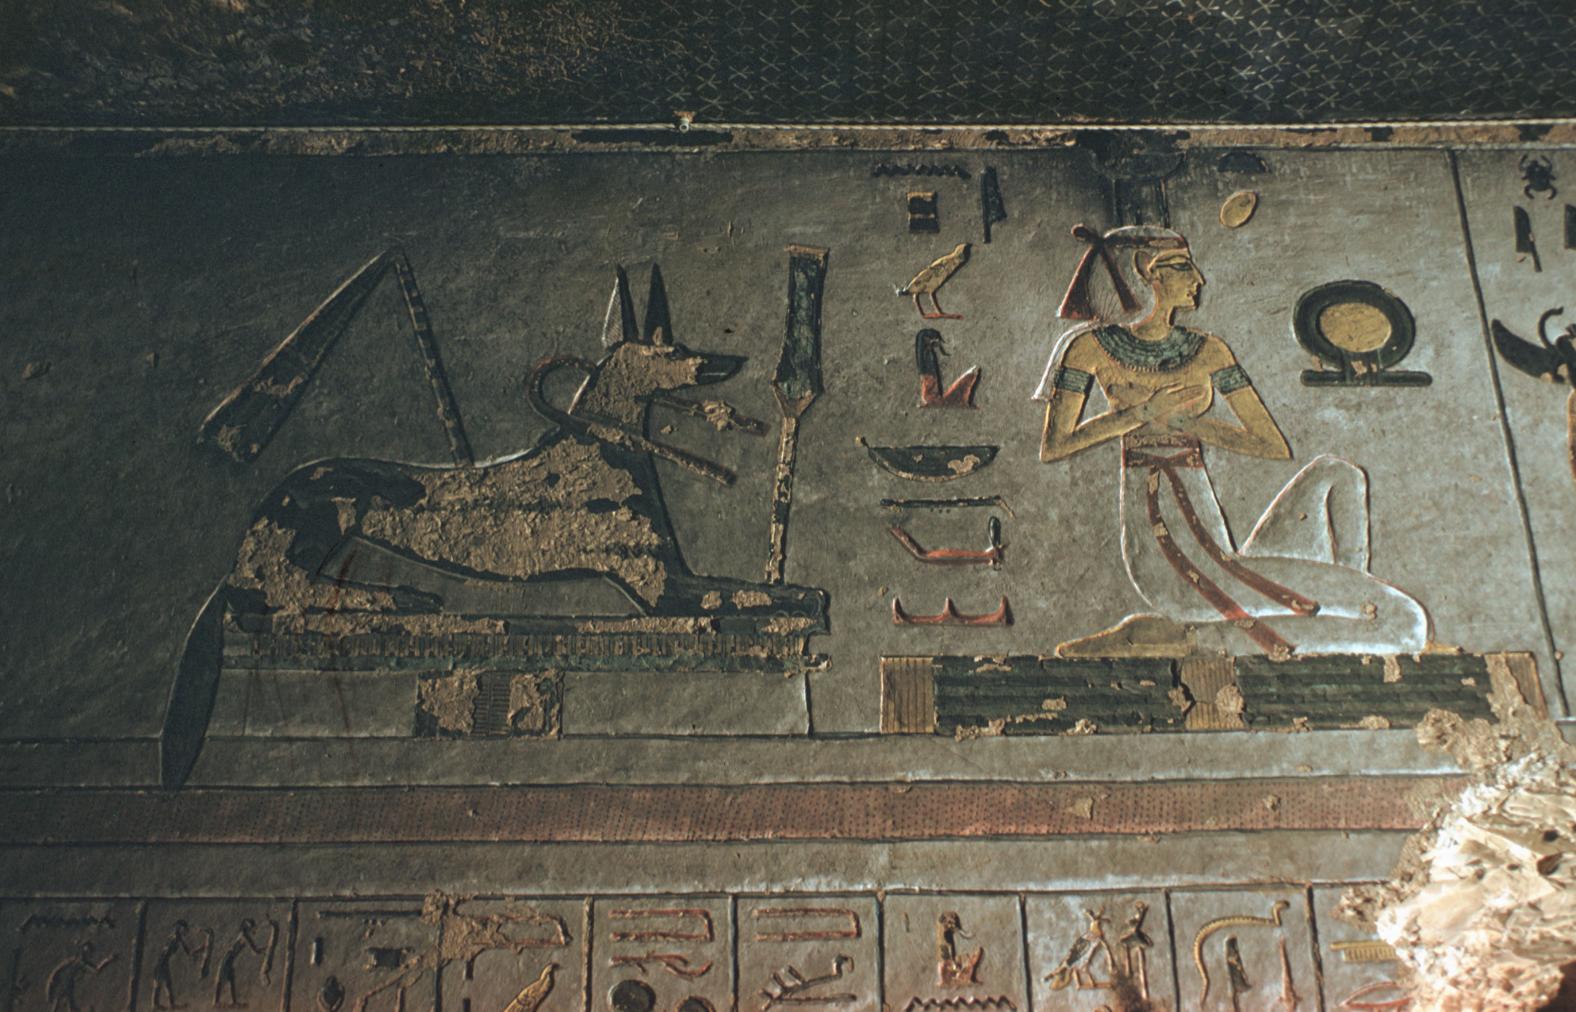
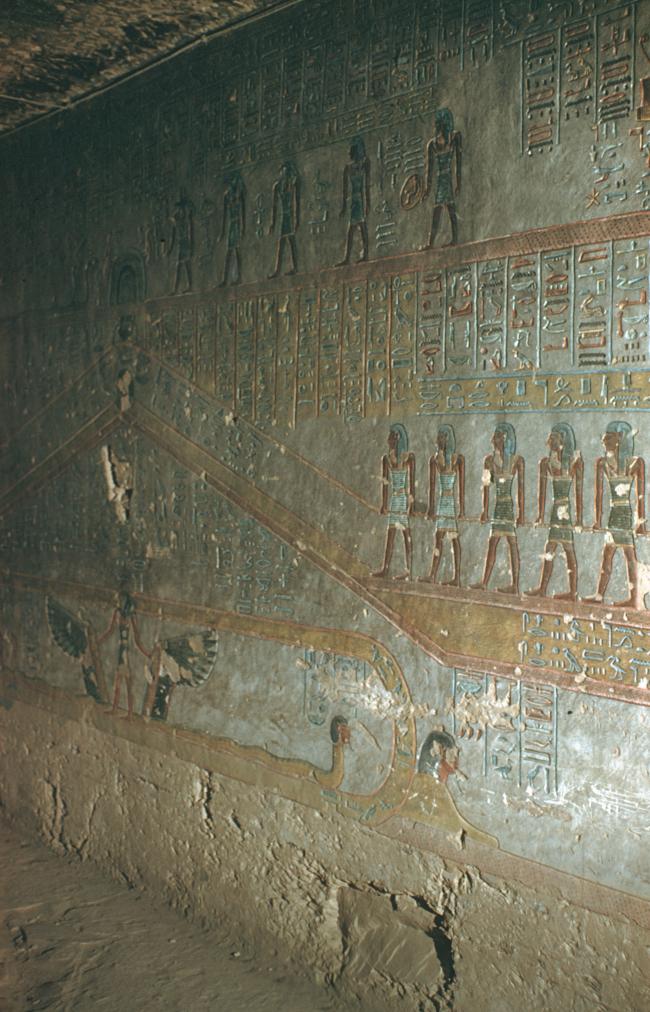
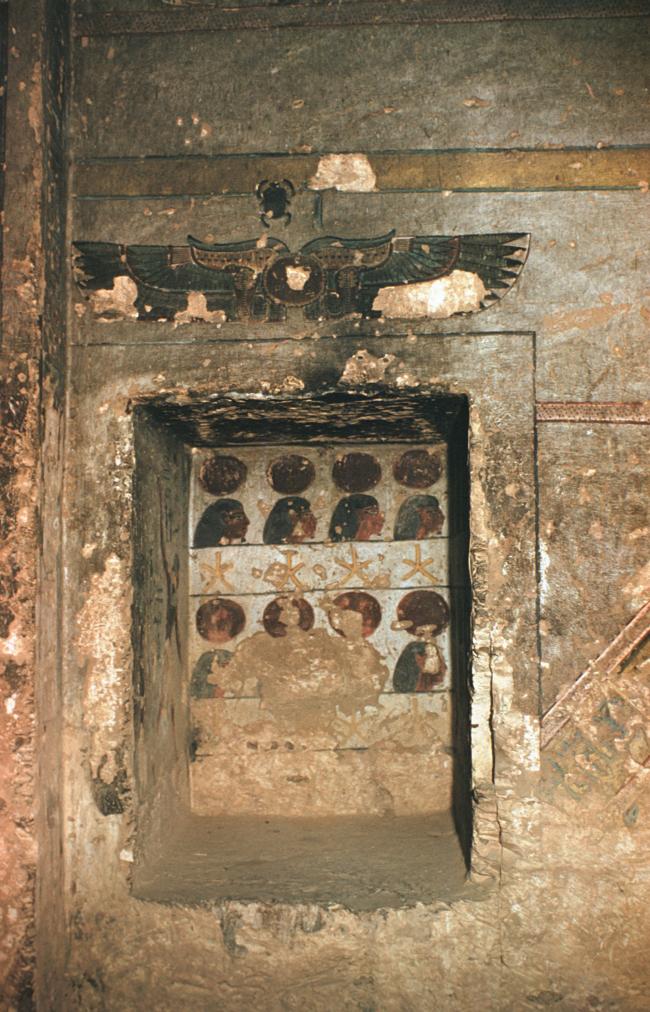
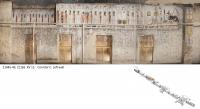
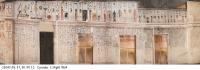
See entire tombLow rectangular recesses are set close to the ceiling at the north end of th east and west side walls. Four gates in each wall open into side chambers. The walls of the corridor are decorated with the Litany of Ra, with scenes from the Book of the Dead, spell 151: an Anubis jackal and Isis on the east wall, and an Anubis jackal and Nephthys on the west. On the ceiling, a sun disk containing a ram-headed hawk is flanked by Isis and Nephthys depicted as hawks, with texts from the Litany of Ra in a central band flanked by star patterns.
Porter and Moss designation:


Gate Ca
See entire tombThis is the first gate beyond the entrance in the eastern wall of corridor C. It was cut beneath the eastern rectangular recess, and the thicknesses of the gate contain portions of the Litany of Ra. There is a door bolt hole in the north thickness and a pivot hole in the ceiling of chamber Ca to the south of the gate, showing that it was to be closed by a single door leaf. The threshold is higher than the level of the floors in chambers C and Ca.
Porter and Moss designation:
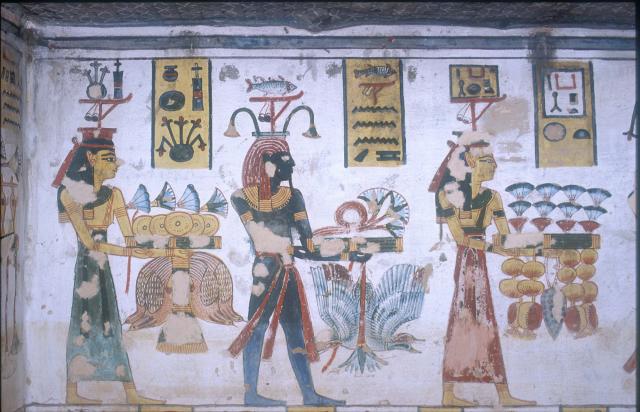
Side chamber Ca
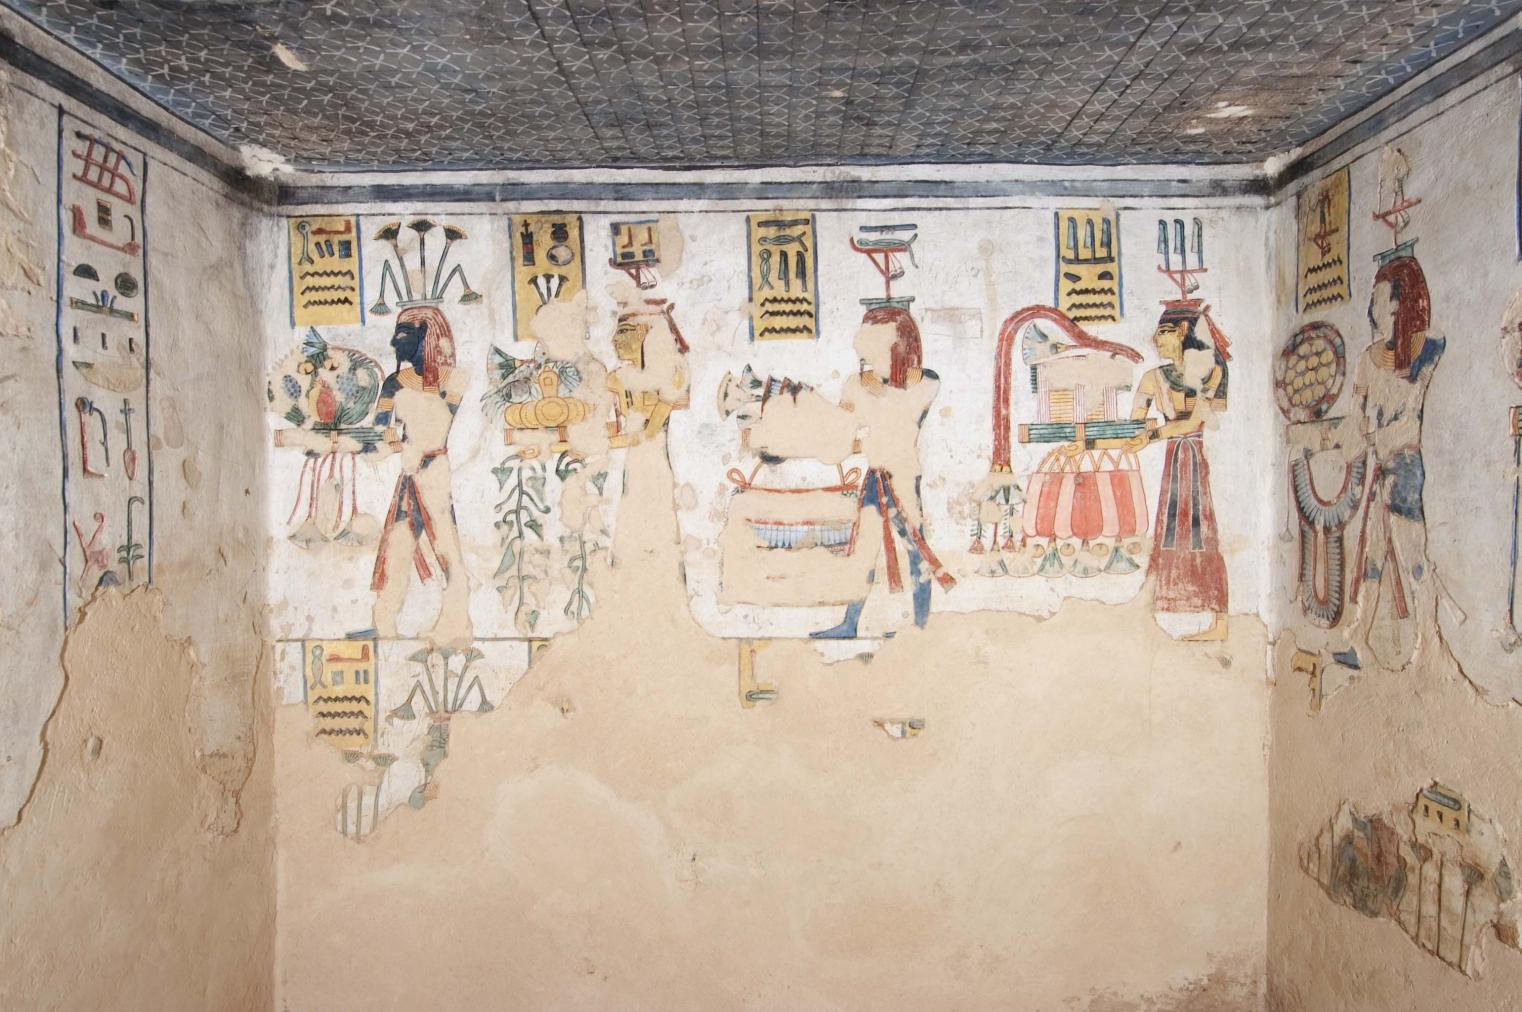
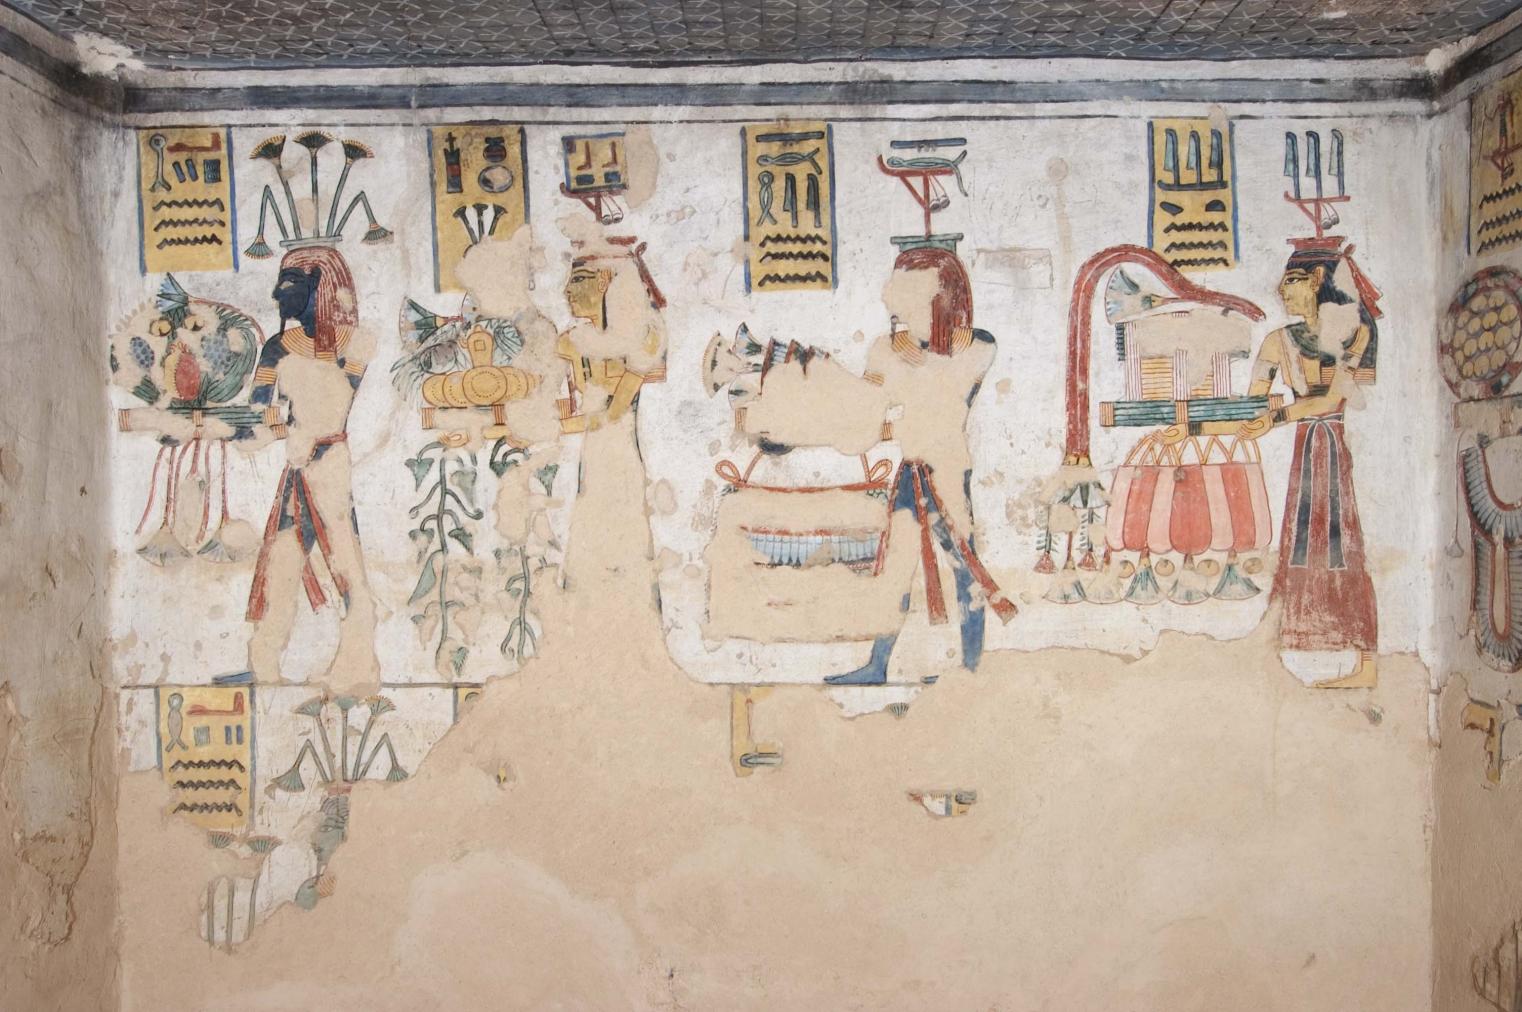
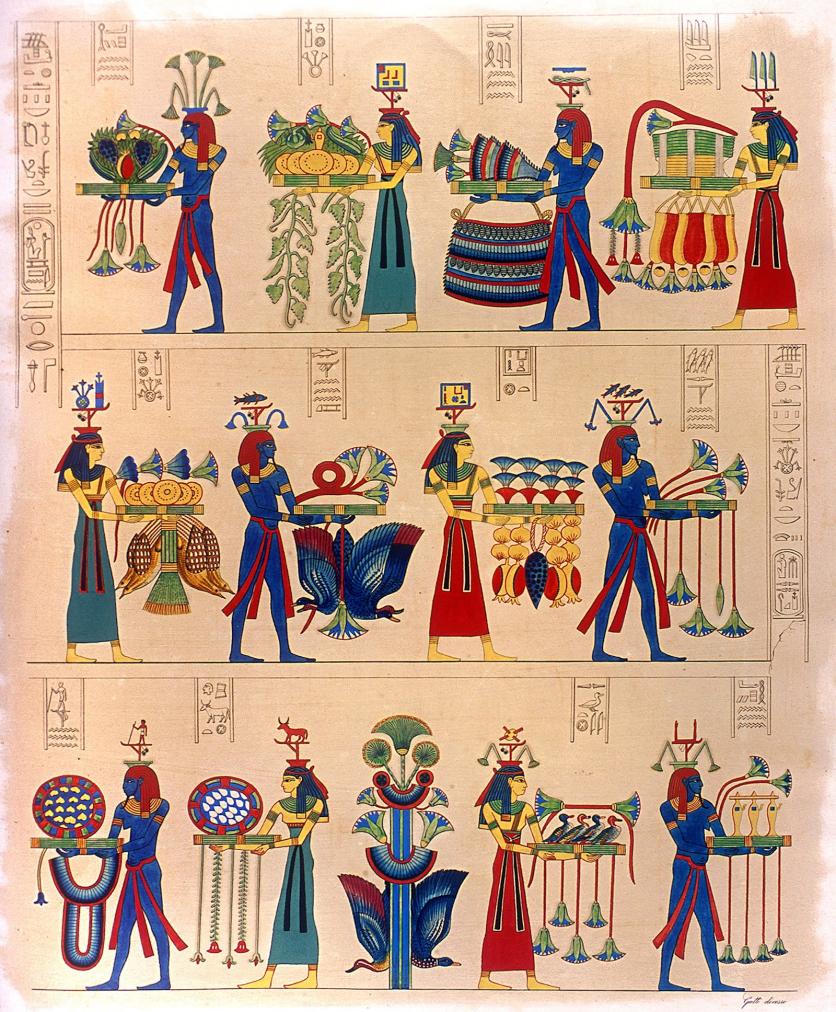
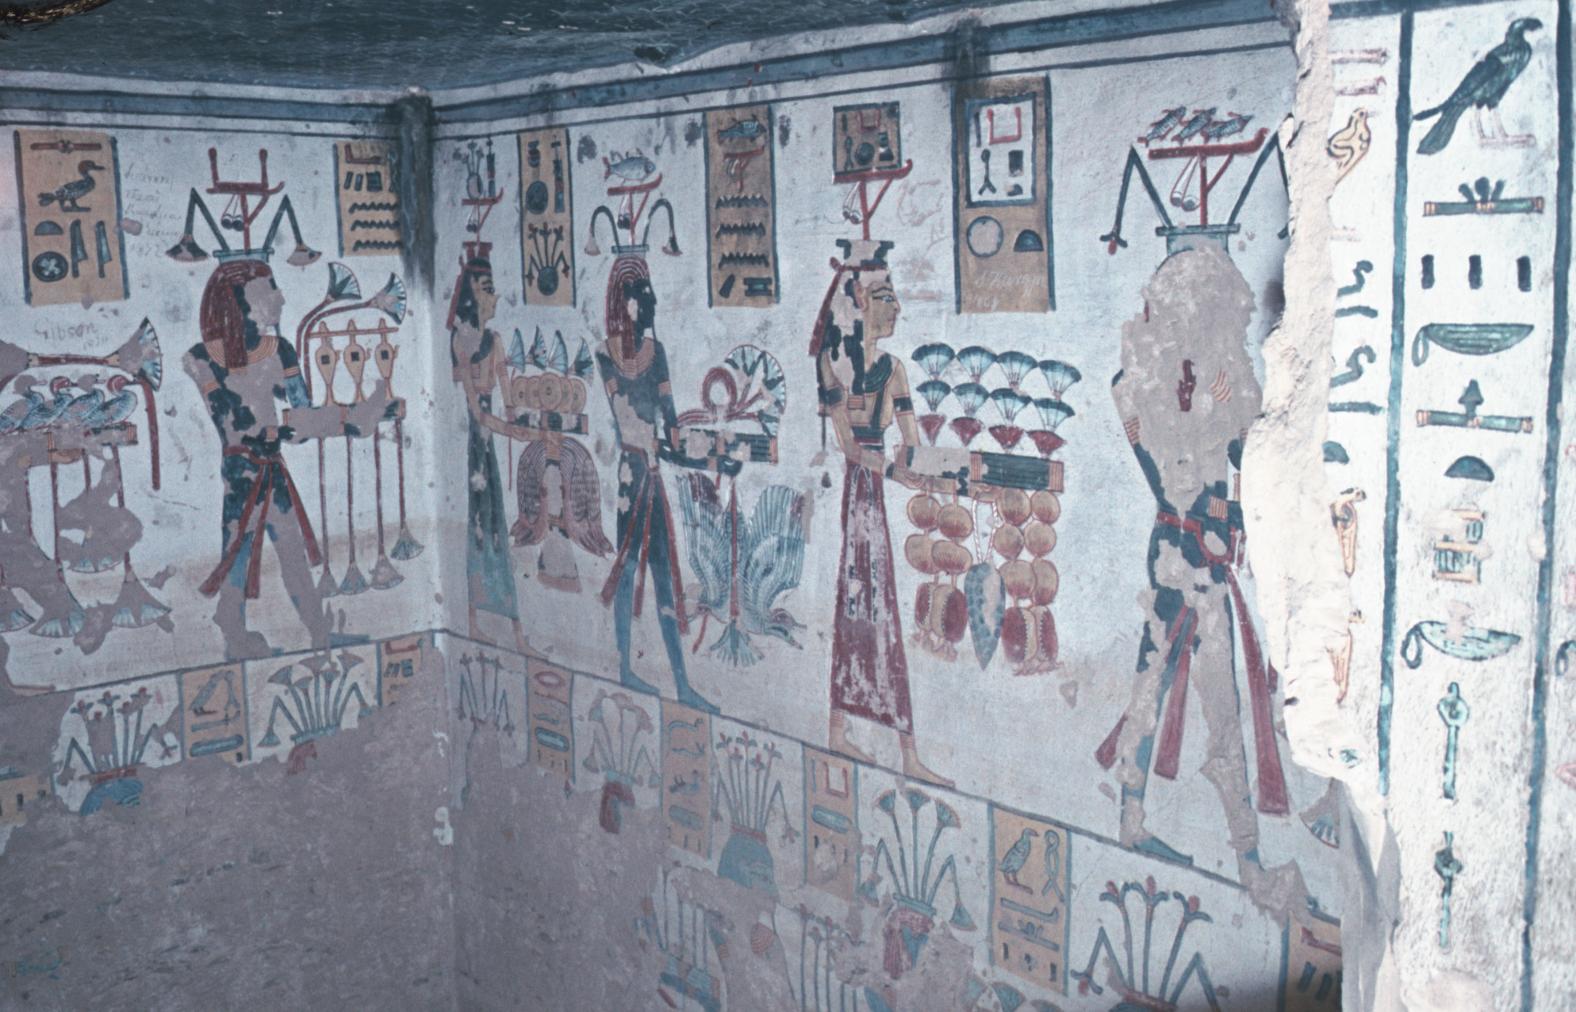
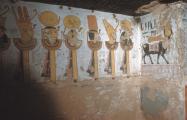
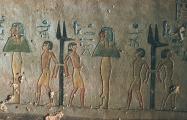
See entire tombThe decoration in this side chamber is in two registers showing personifications of the Nile flood offering to personifications of food and harvest. Below, Nile gods offer to cobras dressed in robes. Much of the decoration in the chamber has been lost. A door pivot hole in the ceiling edge to the south of the gate is evidence that a single door leaf was to close the entrance.
Porter and Moss designation:


Gate Cb
See entire tombThis gate lies in the eastern wall of corridor C. The threshold is higher than the floor levels of chambers C and Cb. A door bolt hole in the north thickness, together with the door pivot hole in chamber Cb, show that a single door leaf was to close this gate.
Porter and Moss designation:
Side chamber Cb
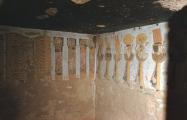
See entire tombThe east wall of this side chamber contains texts while the side and rear walls are each divided into two registers that show a procession of Nile gods, nome divinities above kneeling personifications of the Nile god. Much of the decoration in the chamber has been lost. A door pivot in the ceiling south of the gate shows that a single door leaf was to close the entry.
Porter and Moss designation:
Gate Cc
See entire tombThis is the third gate from the entrance in the eastern wall of corridor C. There is a door bolt hole in the north thickness that has been plastered over, indicating that provision was made to close this gate with a single door leaf.
Porter and Moss designation:
Side chamber Cc
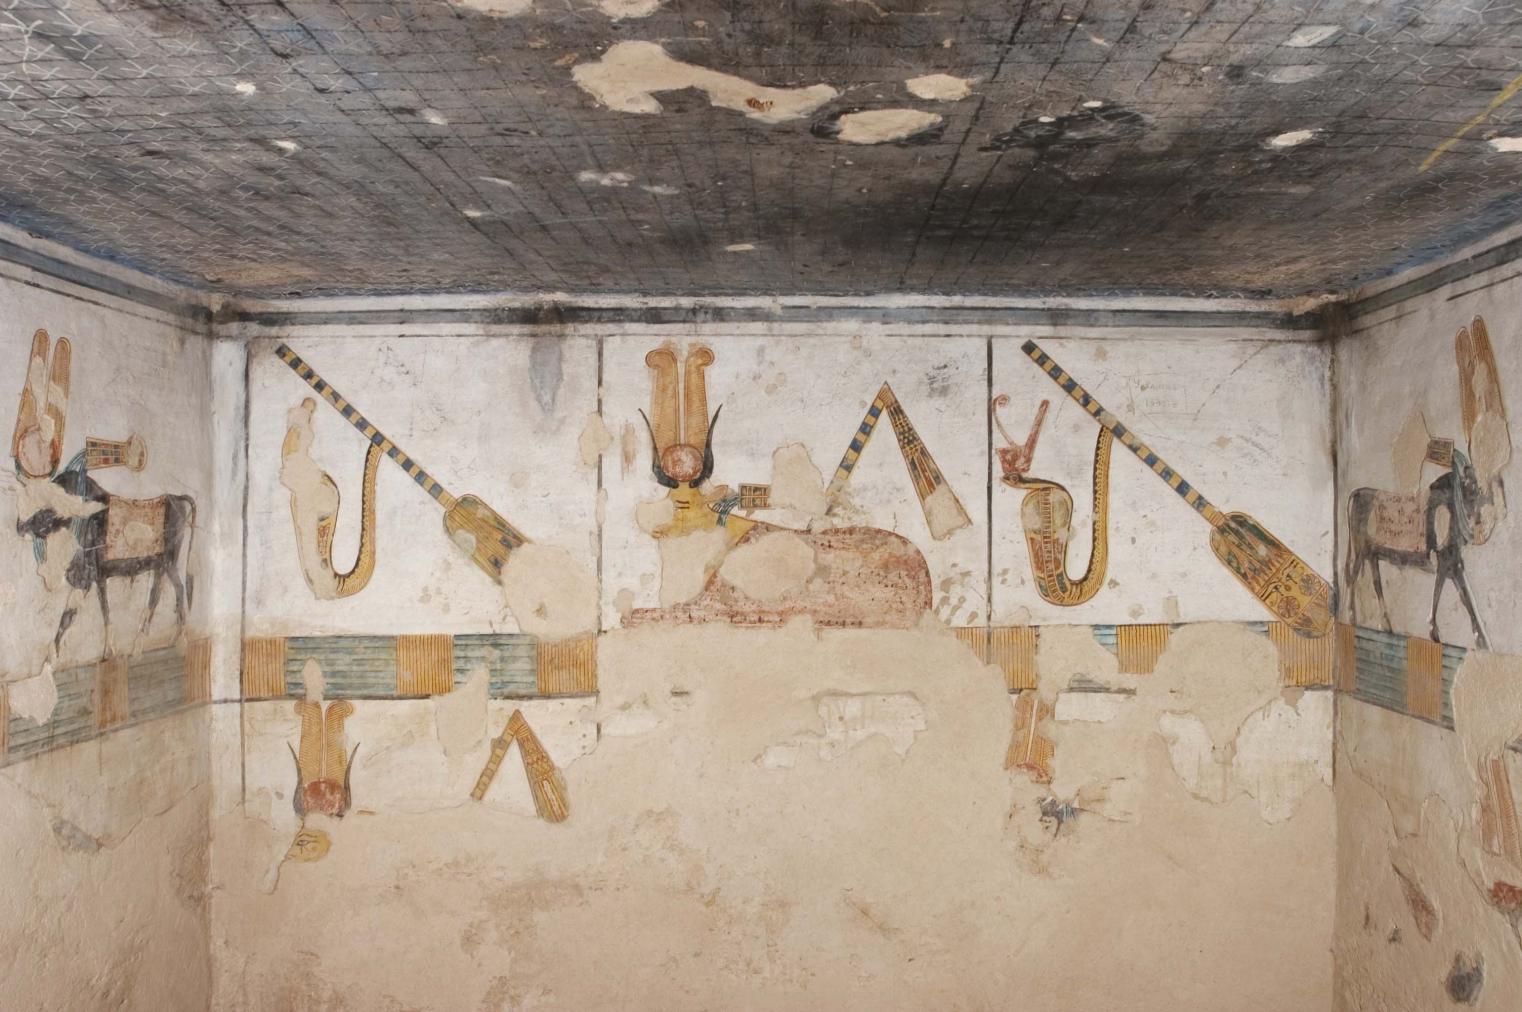
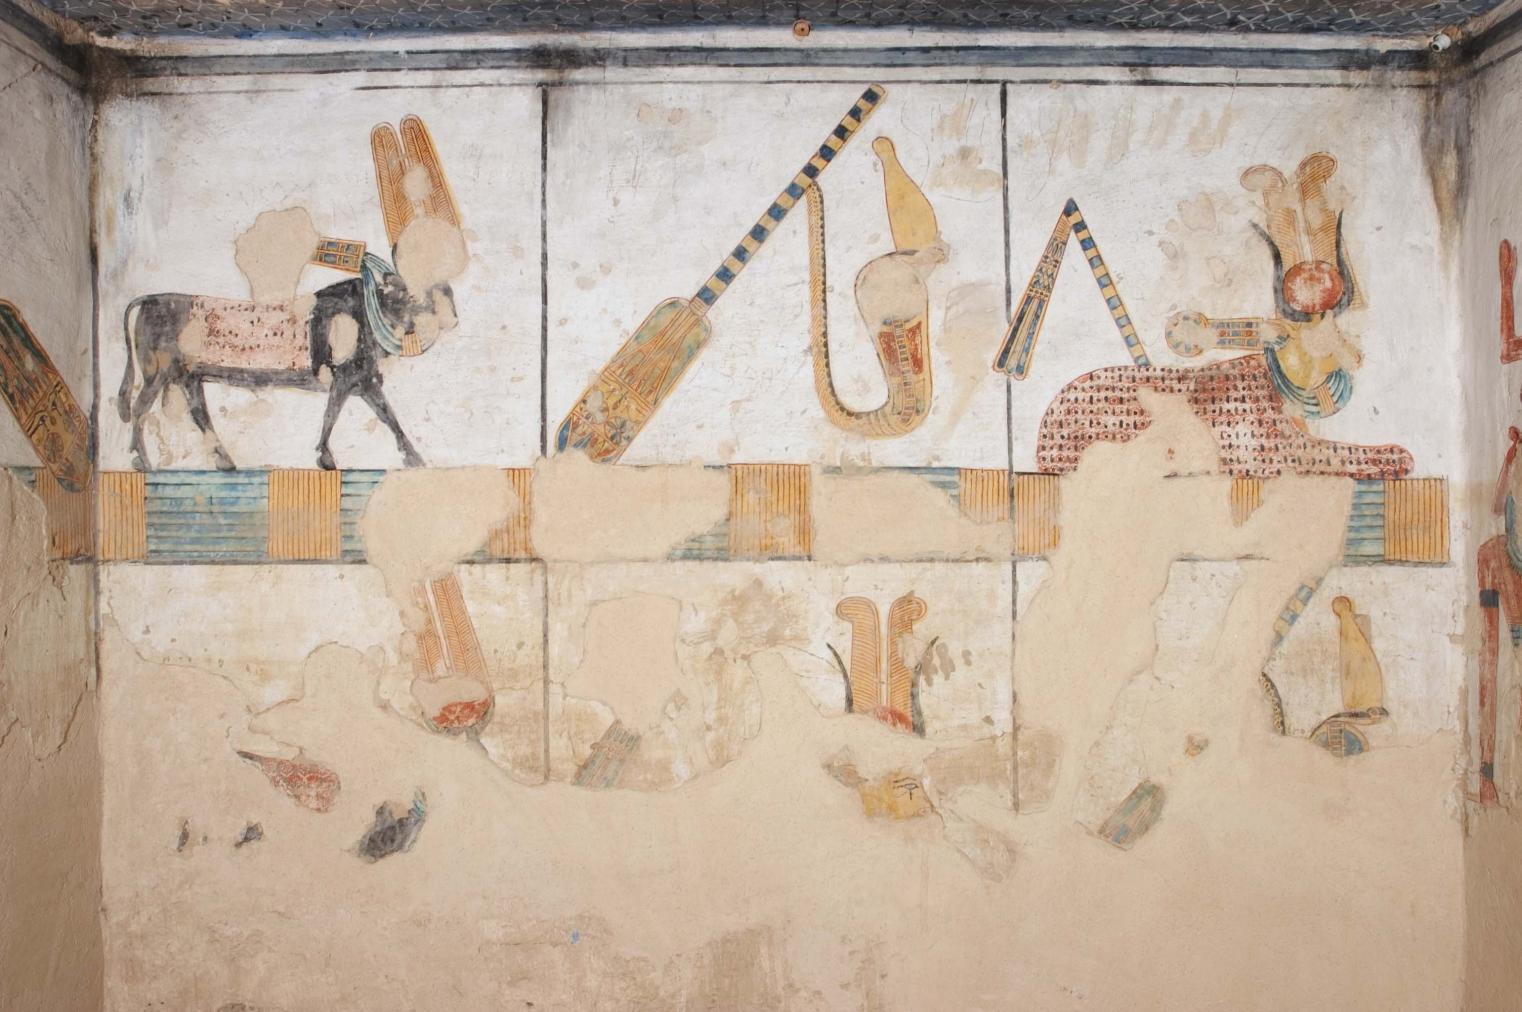
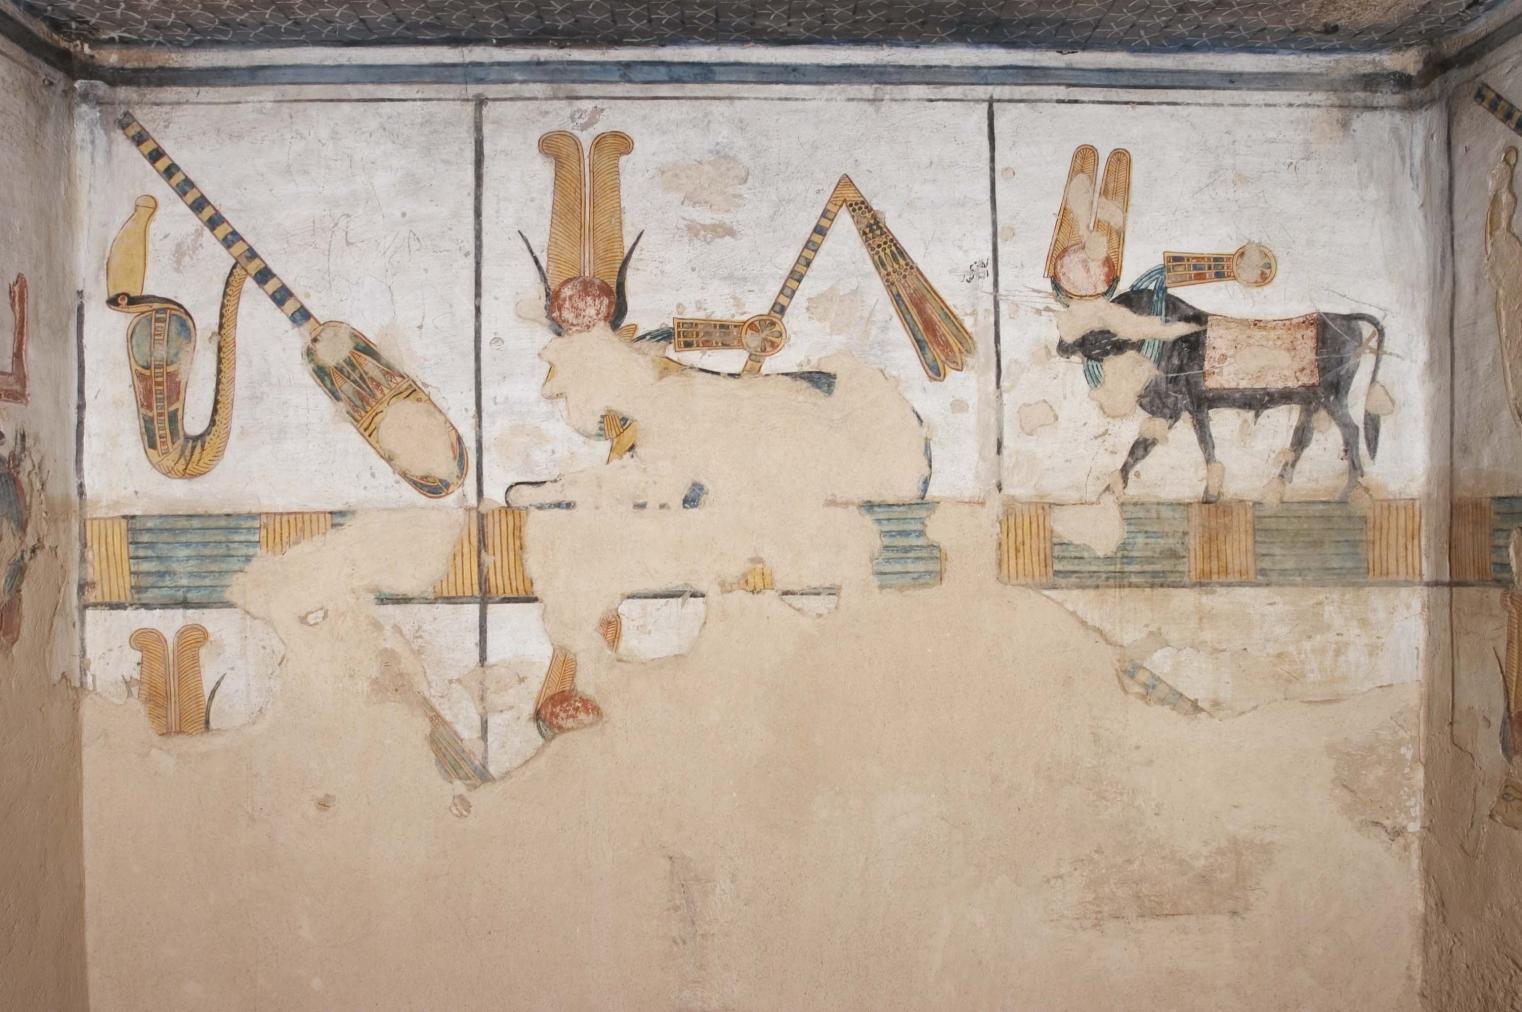
See entire tombThe west wall of this side chamber shows the royal ka holding a standard on each side of the doorway. The remaining three walls are divided into two registers that show a bull, sacred cows, and sacred oars illustrating Book of the Dead spell 148. Much of the decoration in the chamber has been lost. A door pivot hole in the ceiling edge south of the gate shows that the entrance was to be closed by a single door leaf.
Porter and Moss designation:


Gate Cd
See entire tombThis is the fourth gate from the entrance in the east wall of corridor C. There is a rectangular door bolt hole in the north thickness showing that the gate was to be closed by a single door leaf.
Porter and Moss designation:
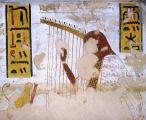
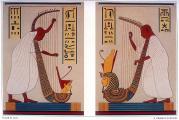
Side chamber Cd
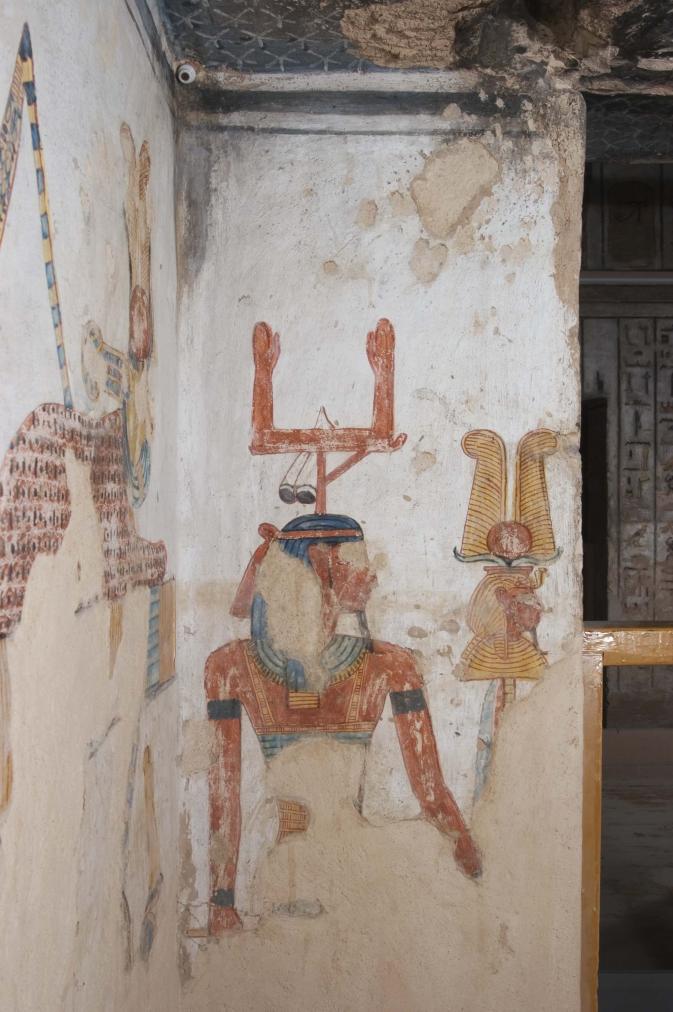
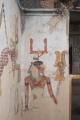
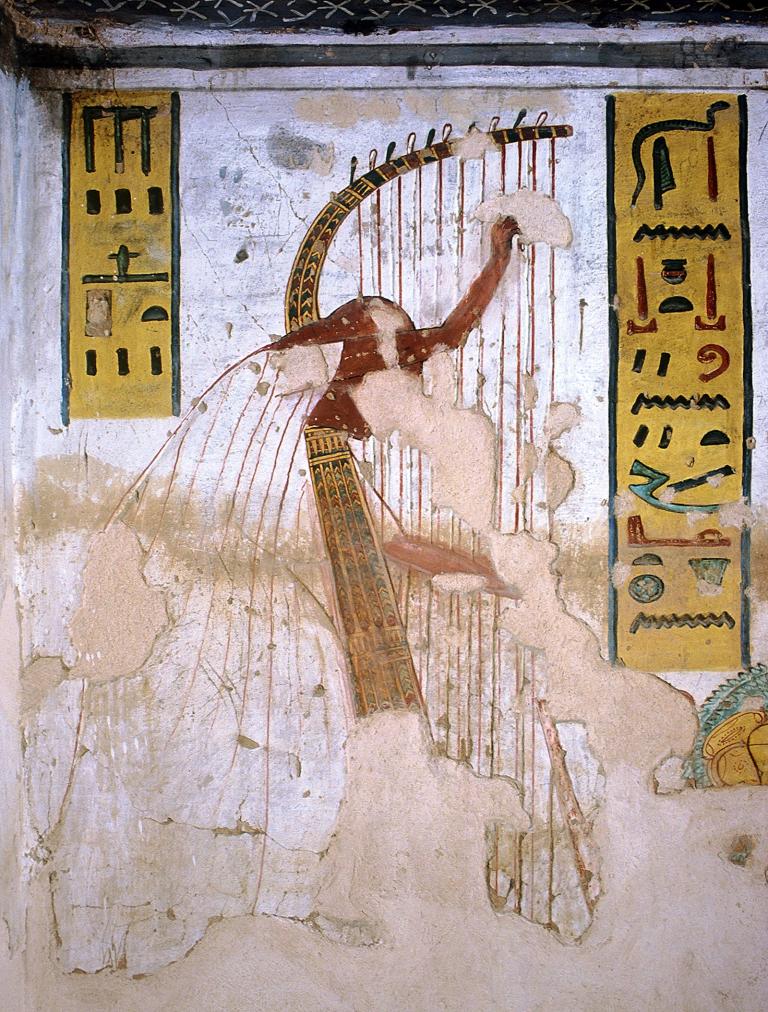
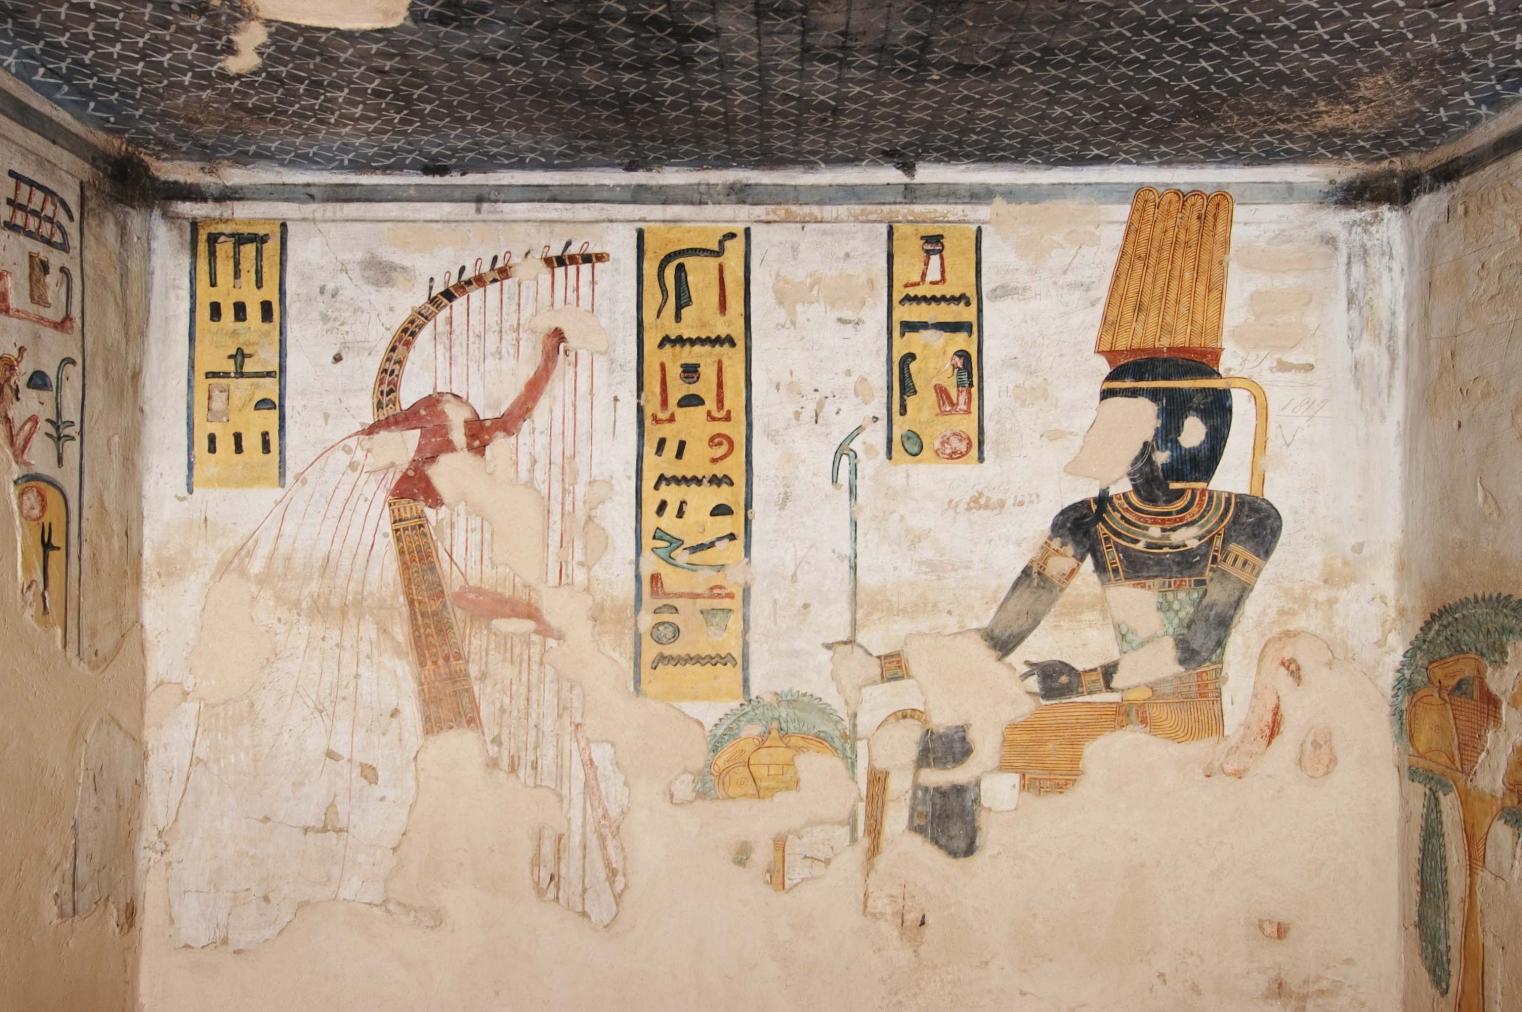
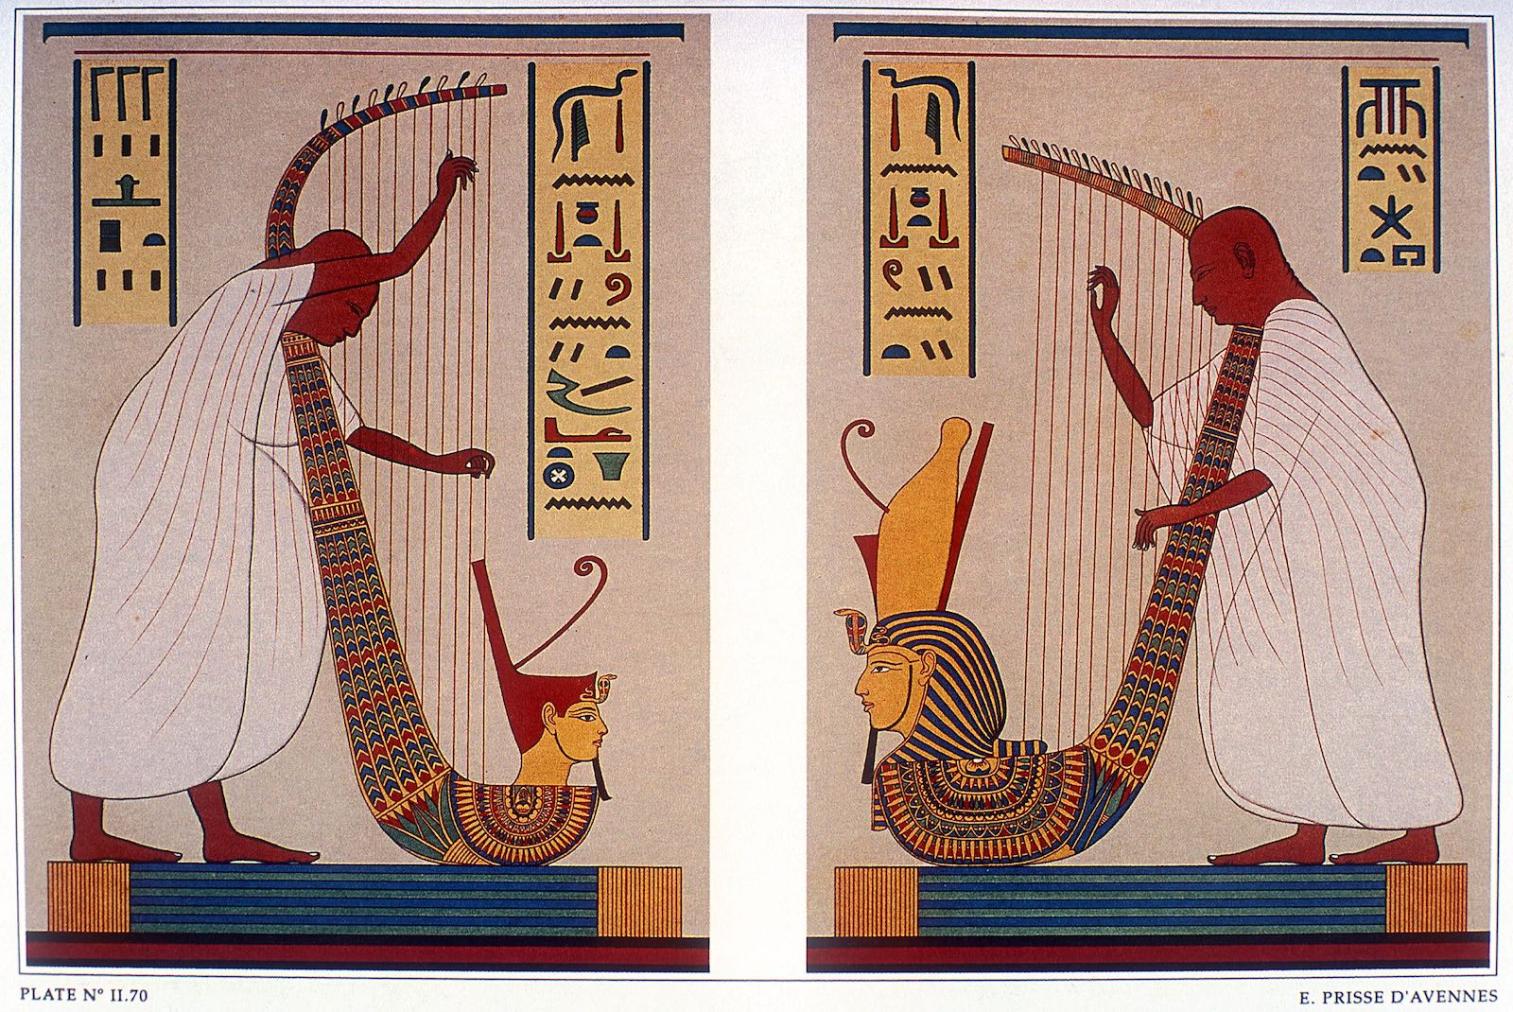
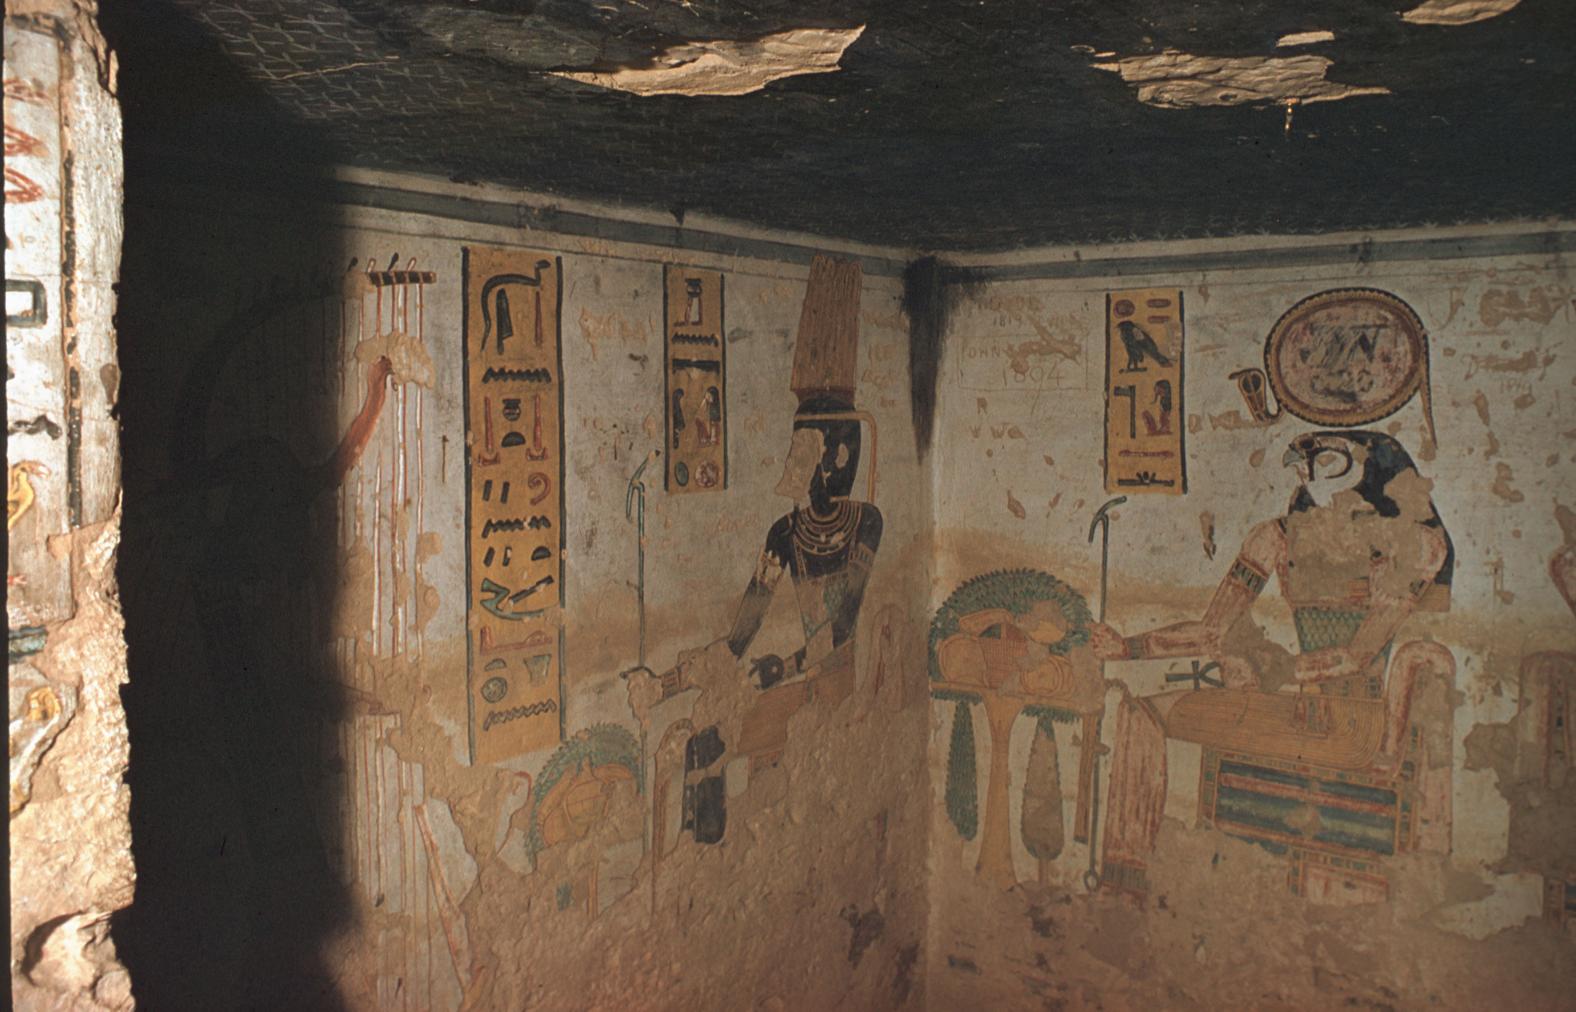
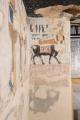
See entire tombThe wall decoration in this side chamber gives the names of Rameses III with a harpist before Onuris-Shu and Ra-Horakhty on the northern half, and a harpist before Shu and Atum on the southern half. Much of the decoration in the chamber has been lost. A door pivot hole in the ceiling edge south of the gate shows that the entry was to be closed by a single door leaf.
Porter and Moss designation:


Gate Ce
See entire tombThis is the fourth gate from the entrance in the western wall of corridor C. There is a door bolt hole in the south thickness showing that the gate was to be closed by a single door leaf.
Porter and Moss designation:
Side chamber Ce
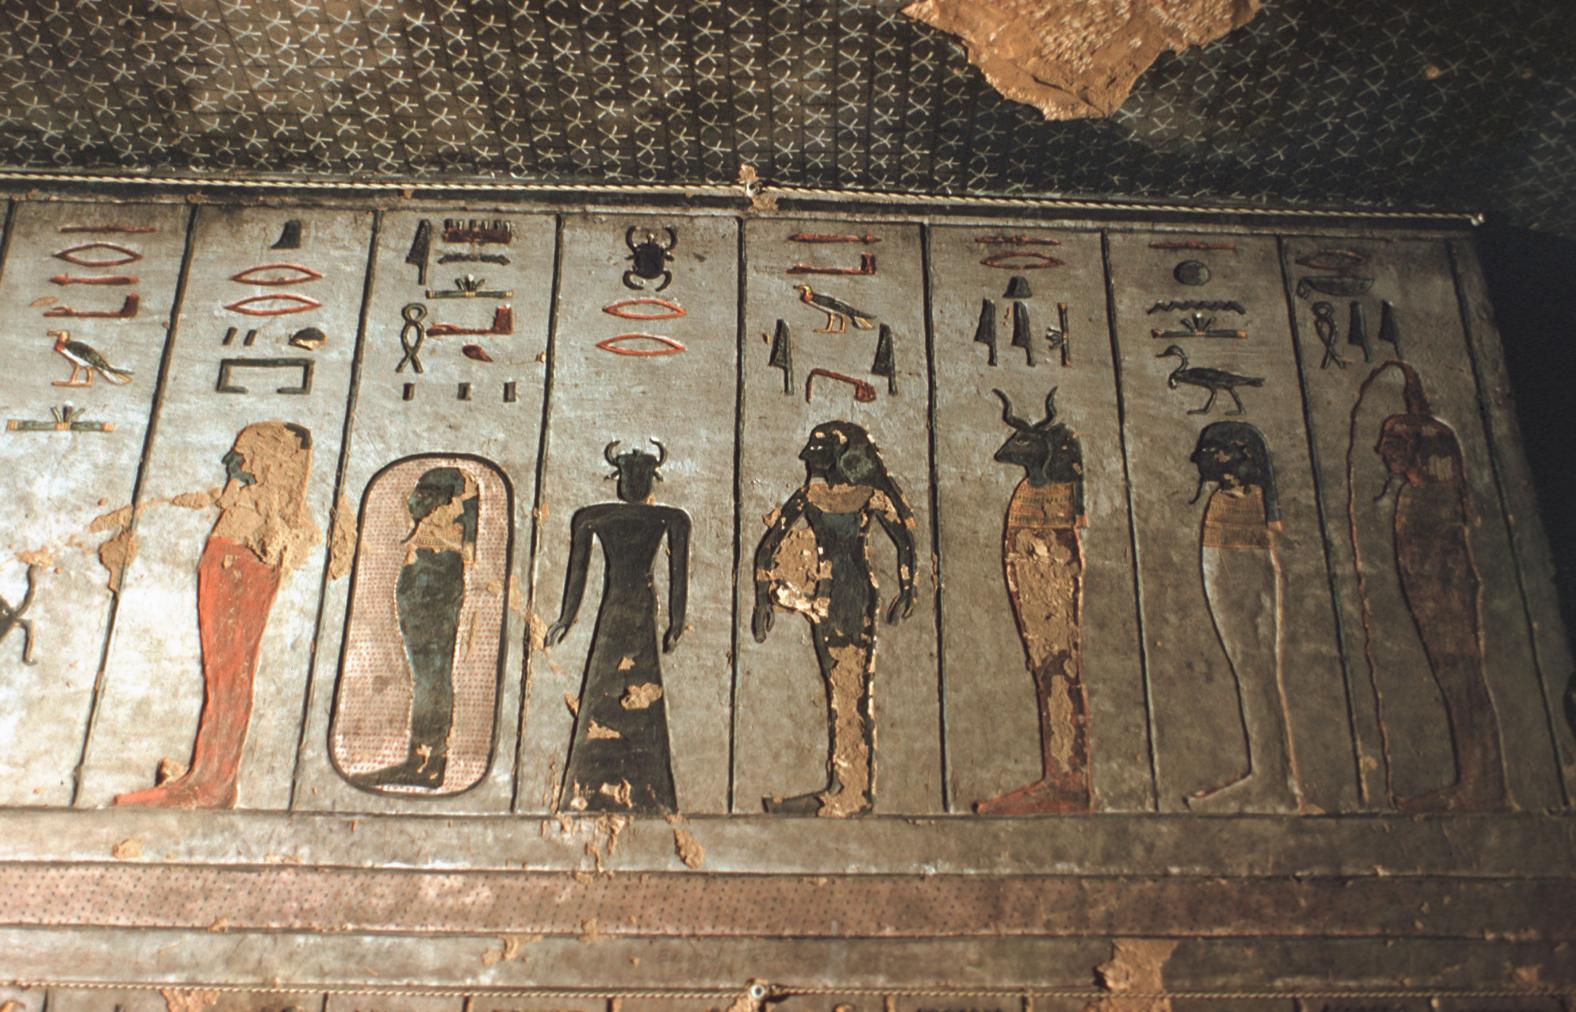
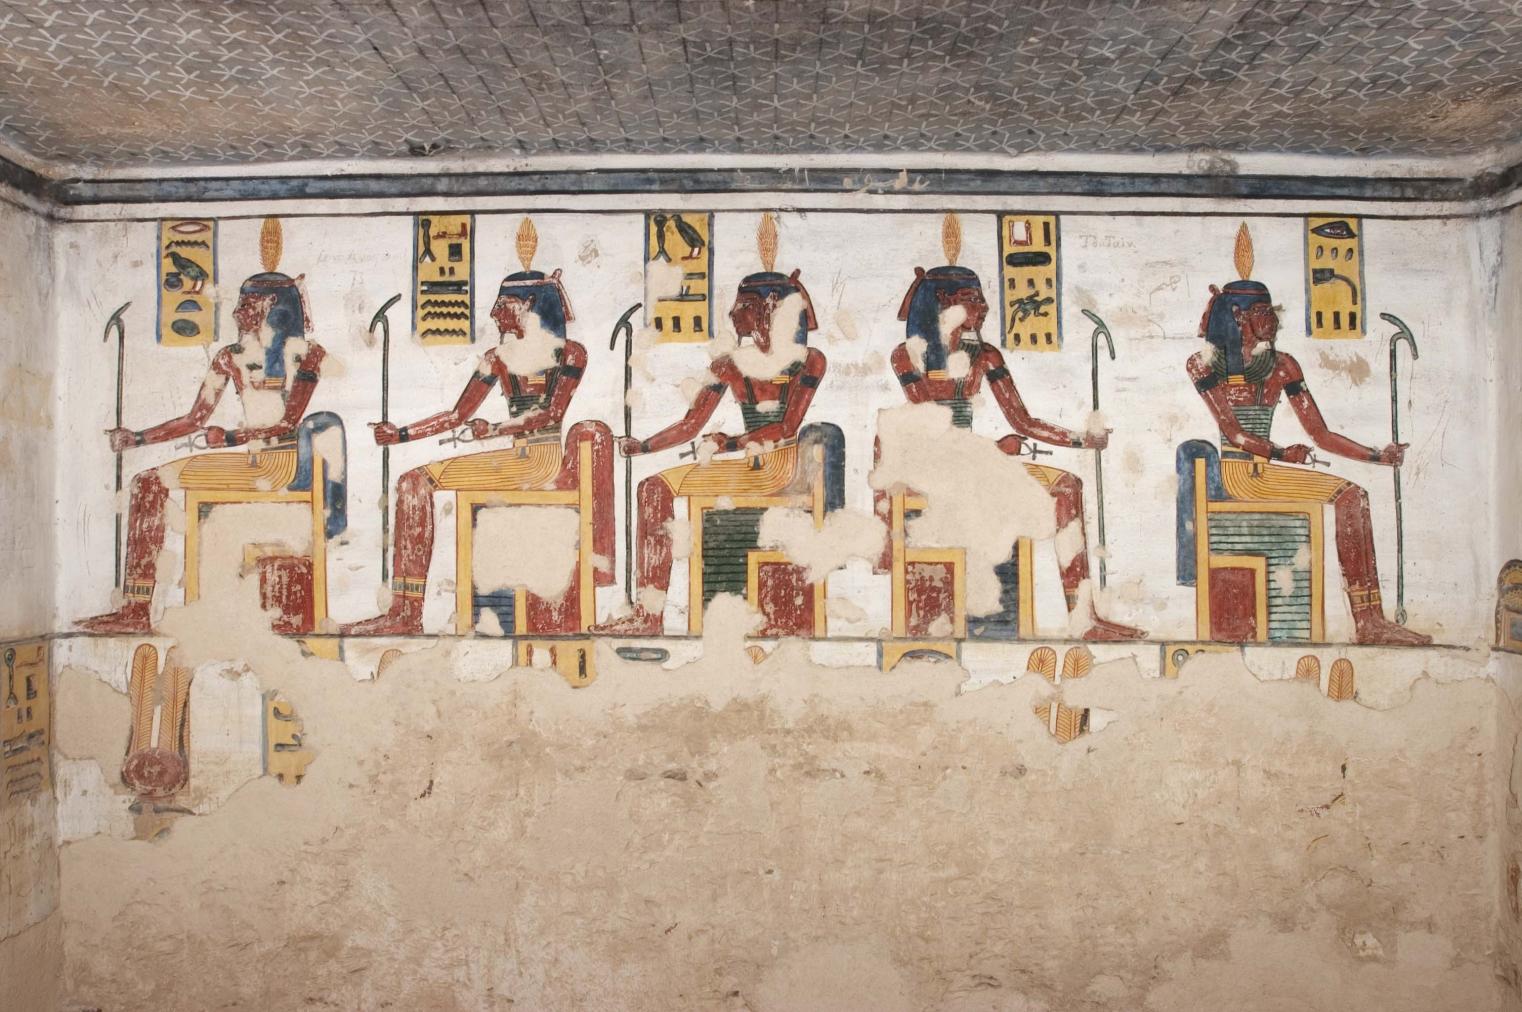
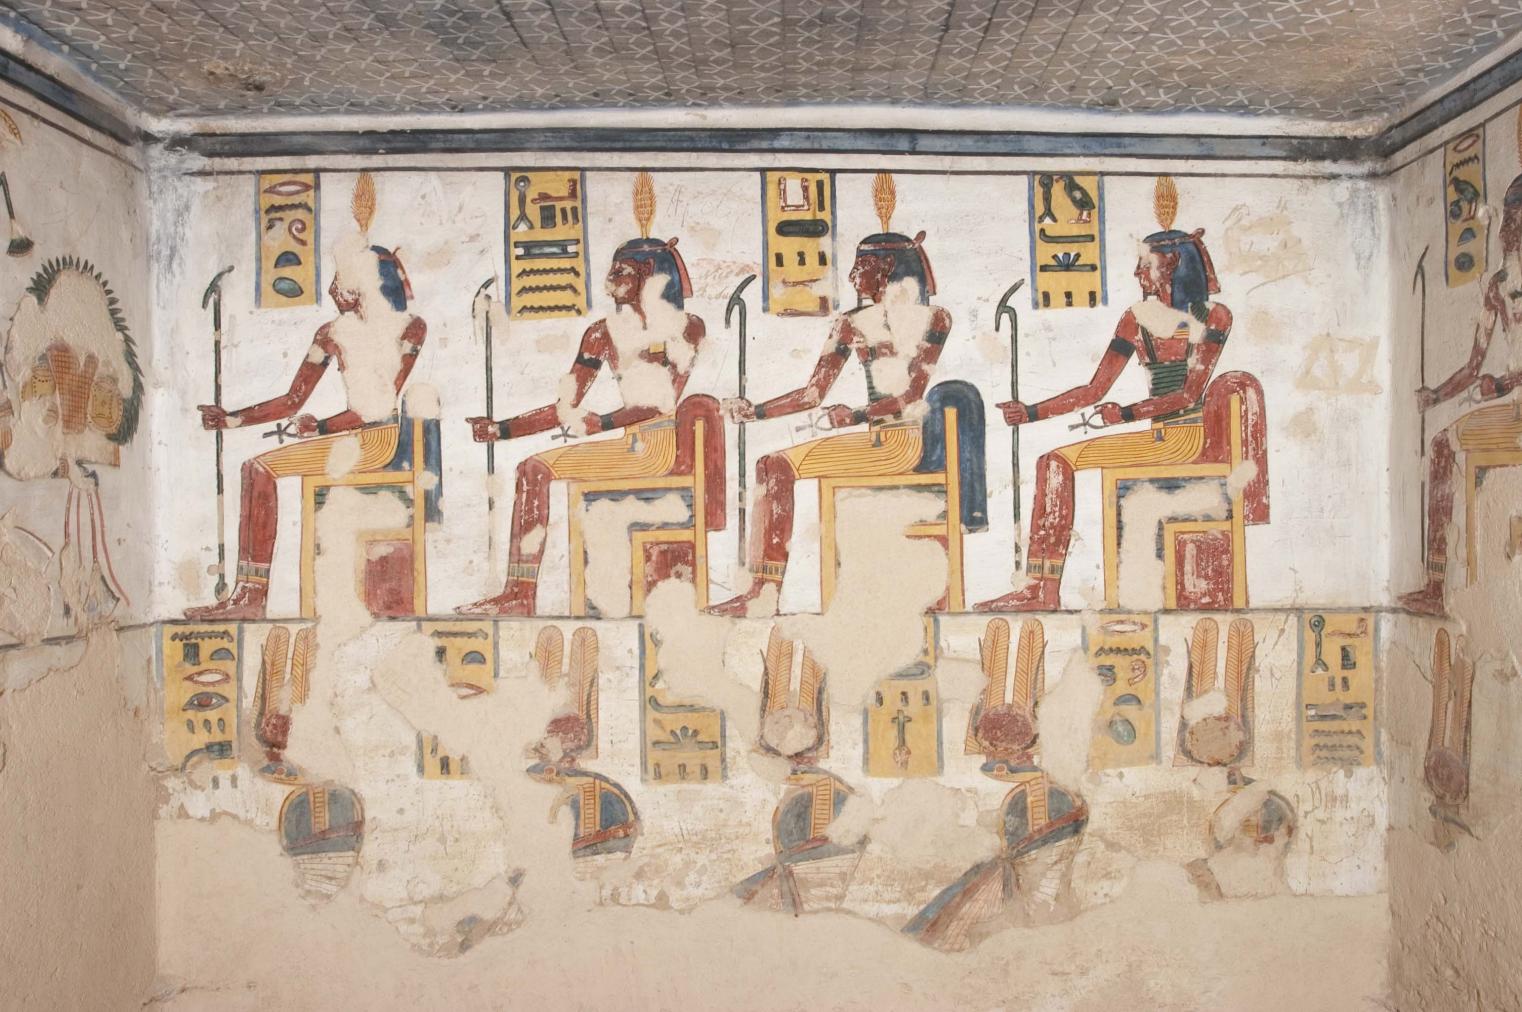
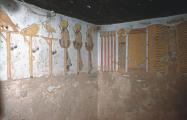
See entire tombAll four walls of this side chamber show twelve figures of Osiris in a seated position. Much of the decoration has been lost. A door pivot hole at the ceiling edge north of the gate shows that the gate was to be closed by a single door leaf.
Porter and Moss designation:

Gate Cf
See entire tombThis is the third gate from the entrance in the western wall of corridor C. A door bolt hole in the south thickness indicates that the gate was to be closed by a single door leaf.
Porter and Moss designation:
Side chamber Cf
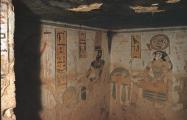
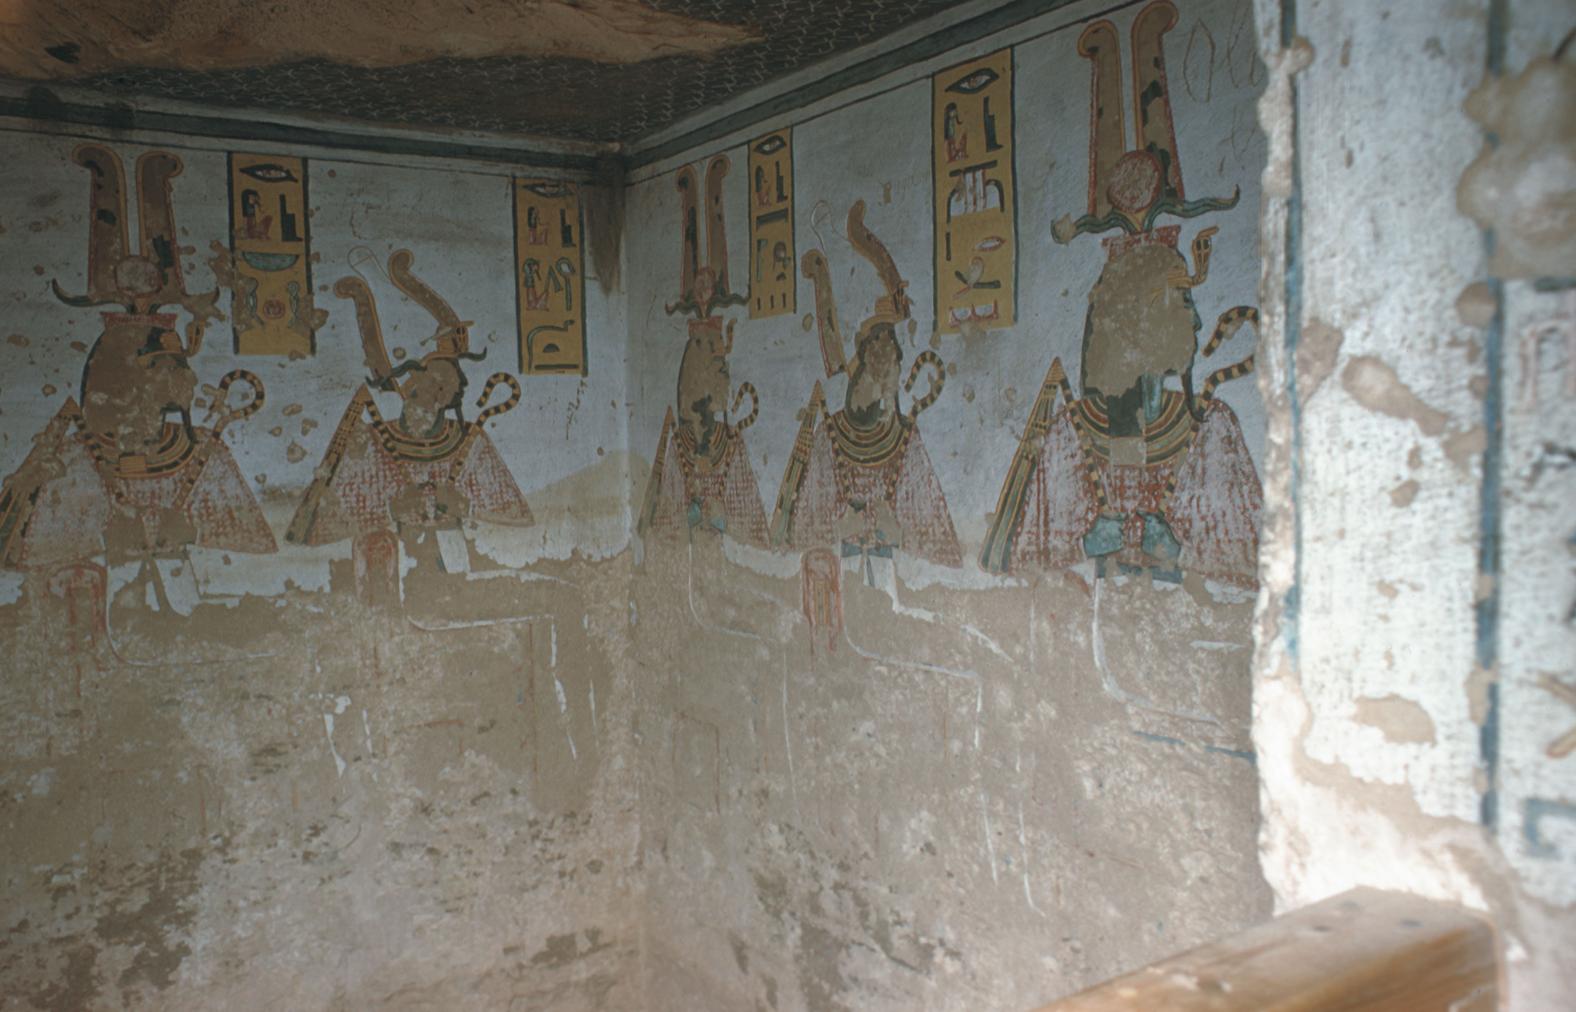
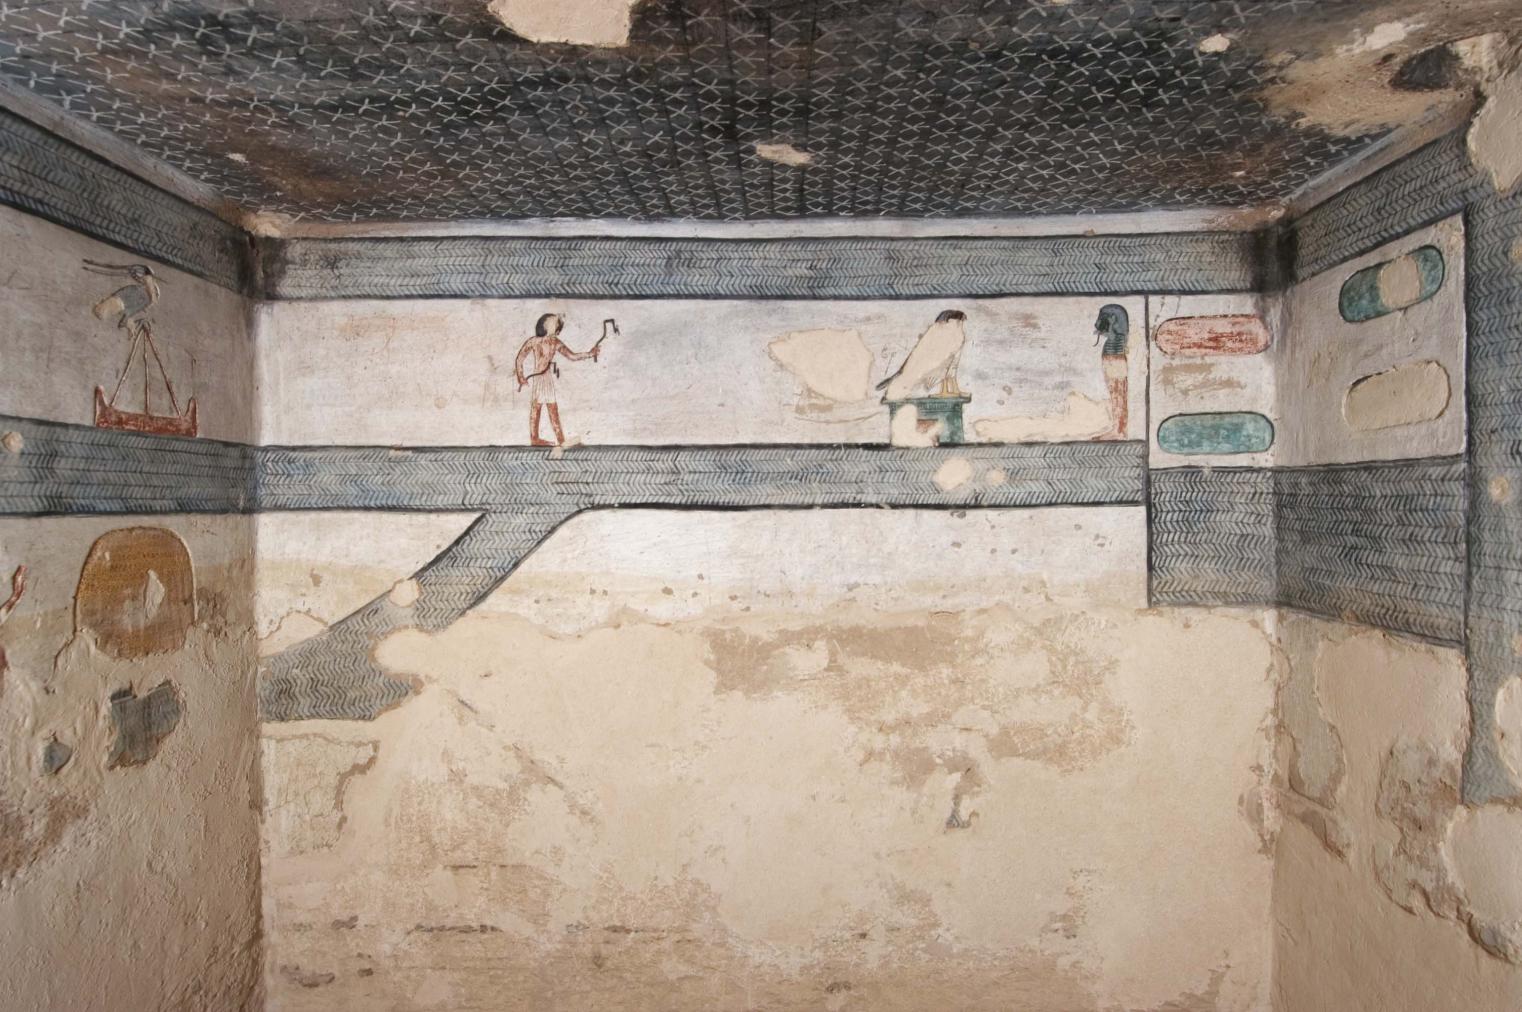
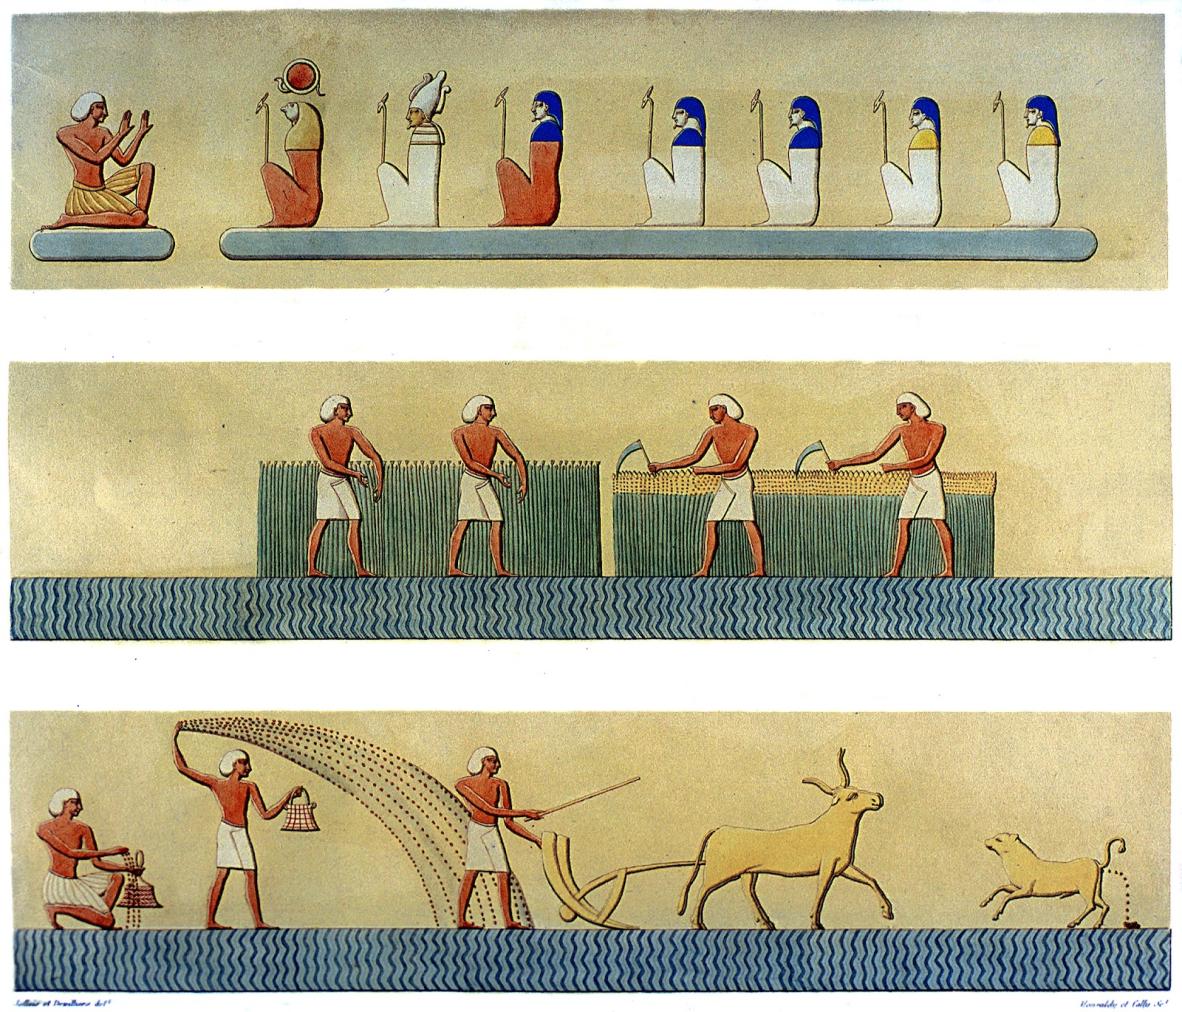
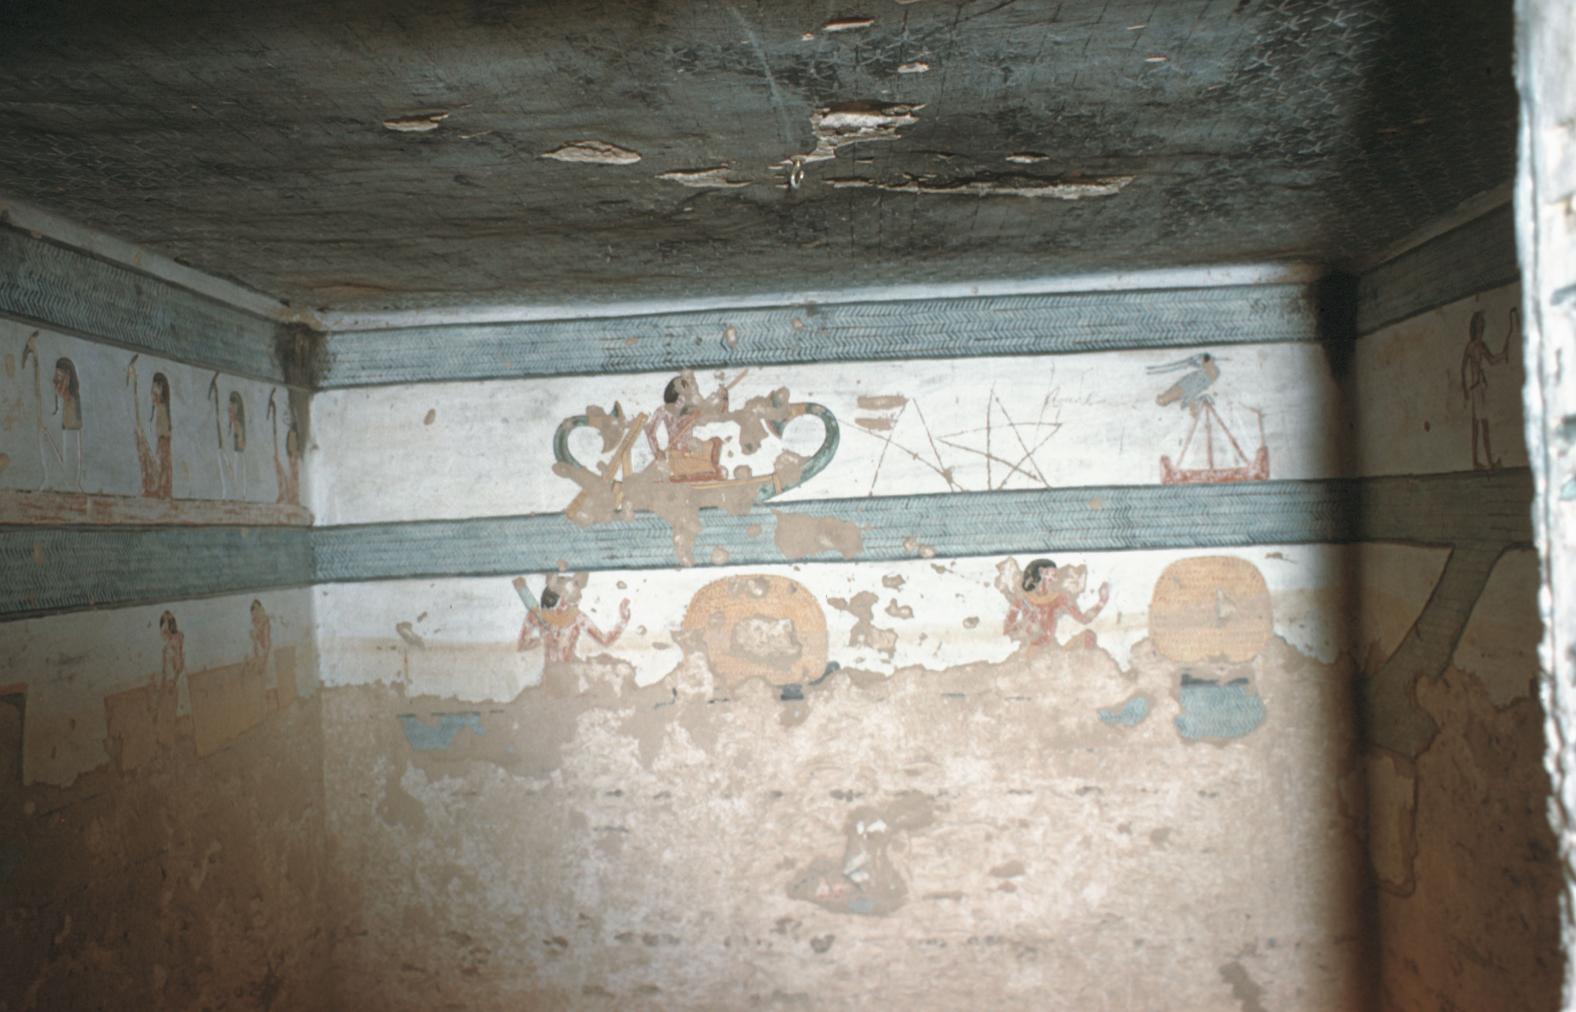
See entire tombThe decoration in this side chamber consists of the Fields of Iaru depicted in three registers derived from Book of the Dead spell 110. The south wall shows Rameses III kneeling before seven squatting divinities in the first register, reapers in the second register, and sowers and plowers with cows in the third register. The north wall shows a man with two adzes and a hawk on a shrine. The west wall shows a man in a canoe and a Benu-bird in the first register. Much of the decoration has been lost. A door pivot at the edge of the ceiling north of the gate indicates that the entry was to be closed by a single door leaf.
Porter and Moss designation:
Gate Cg
See entire tombThis is the second gate from the entrance in the western wall of corridor C. A door bolt hole in the south thickness indicates that the gate was to be closed by a single door leaf.
Porter and Moss designation:
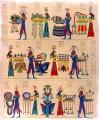
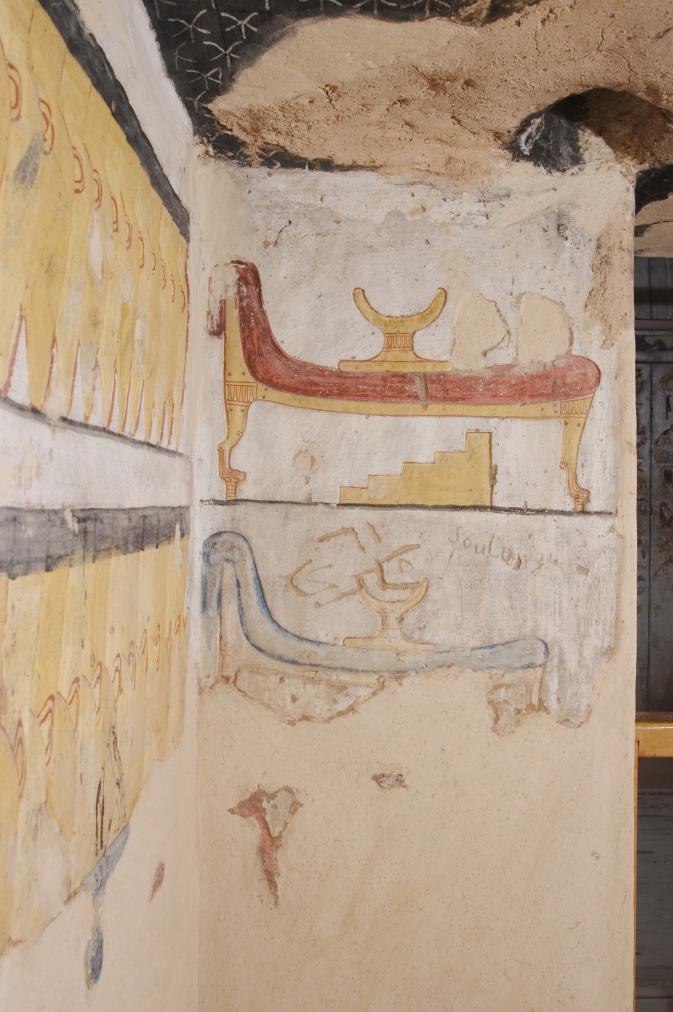
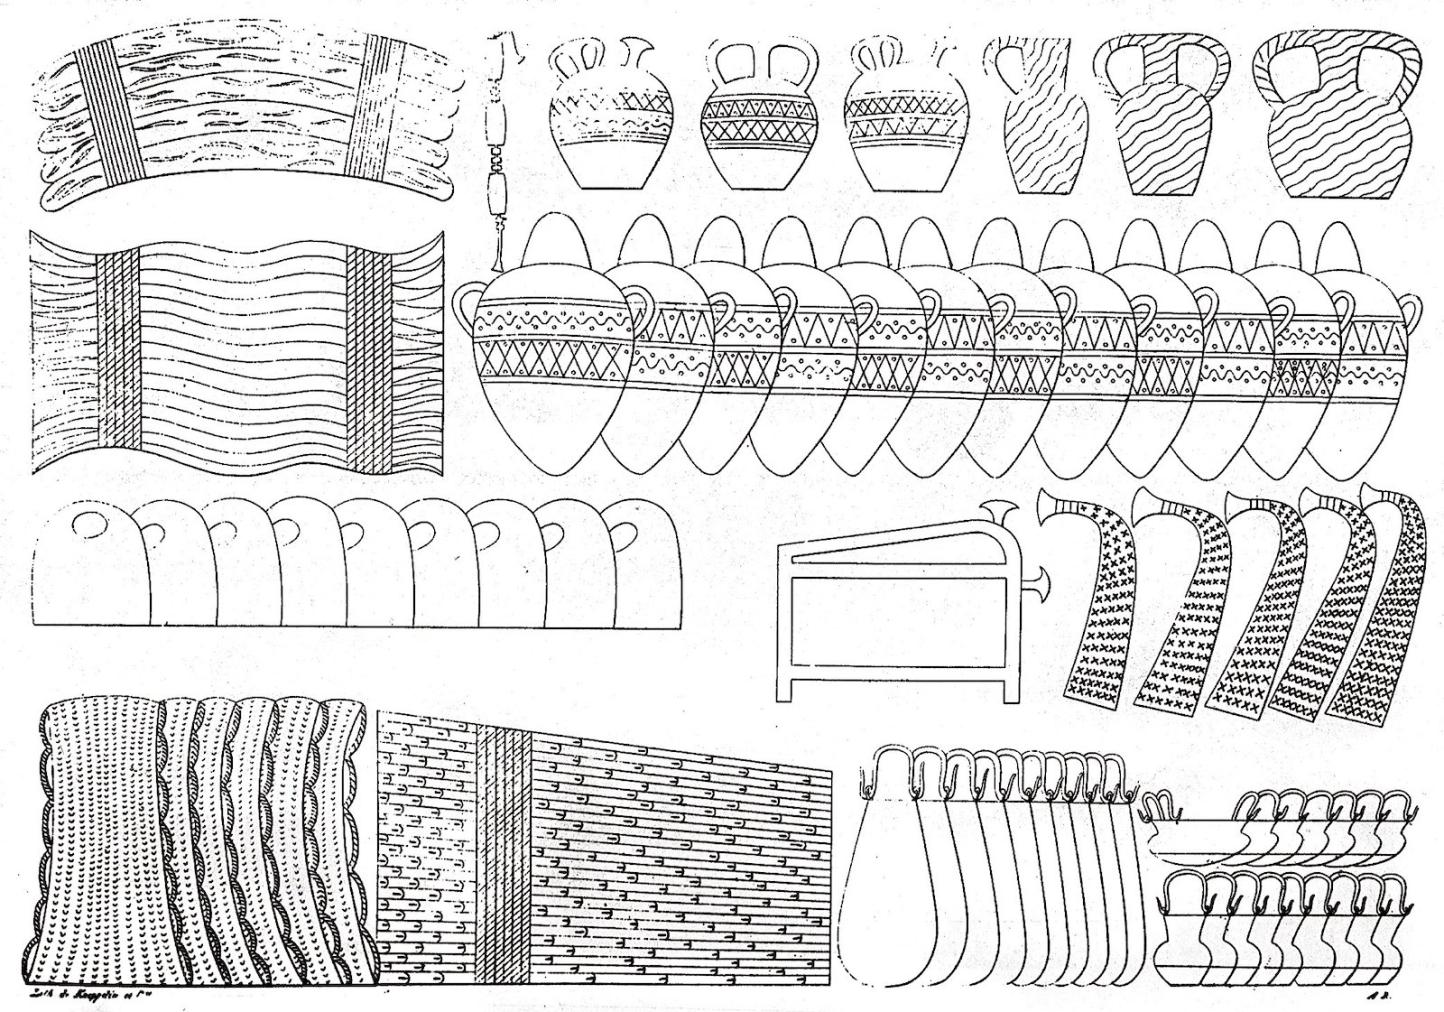
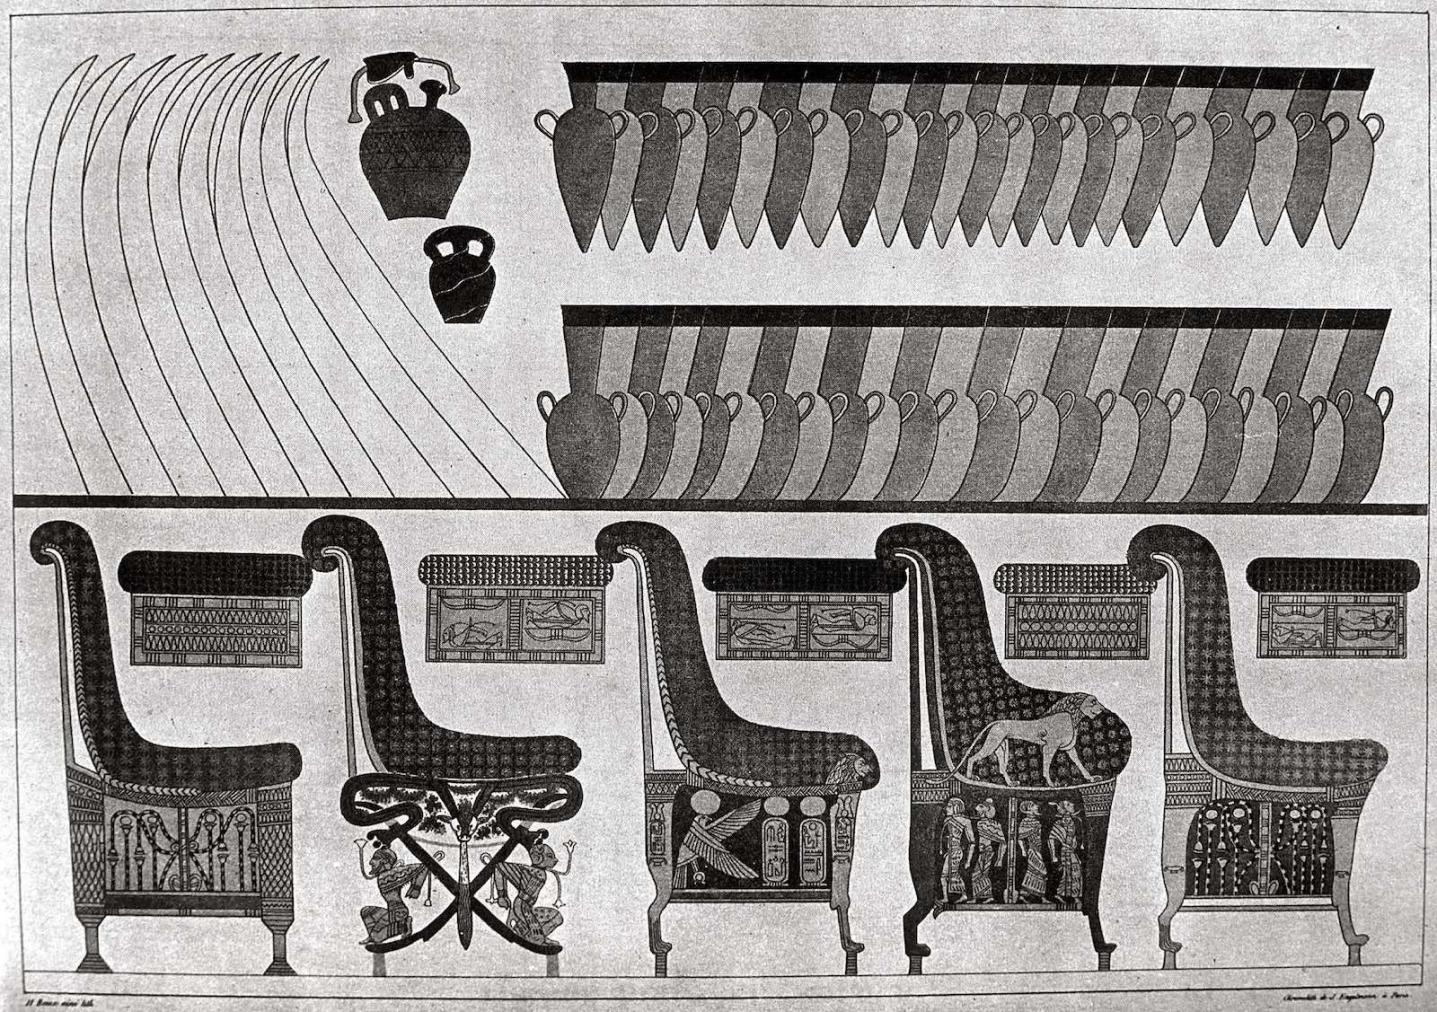
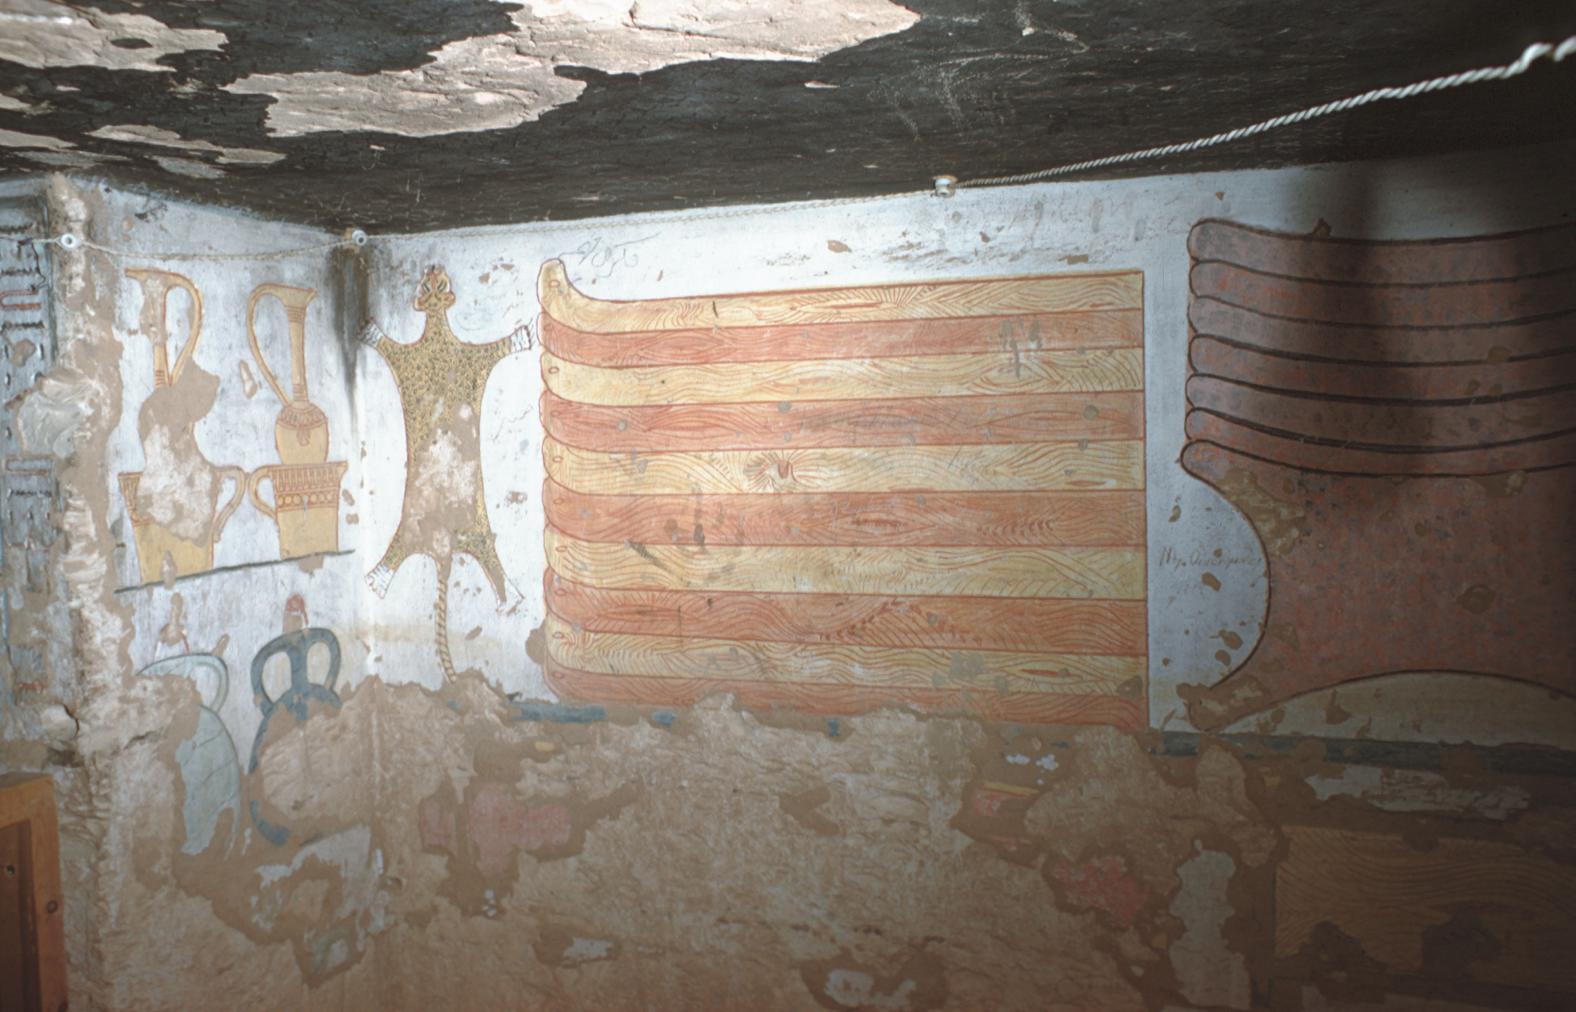
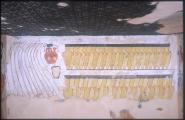
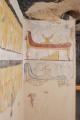
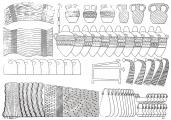
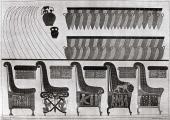
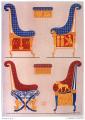
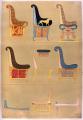
Side chamber Cg
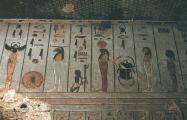
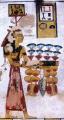
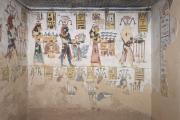
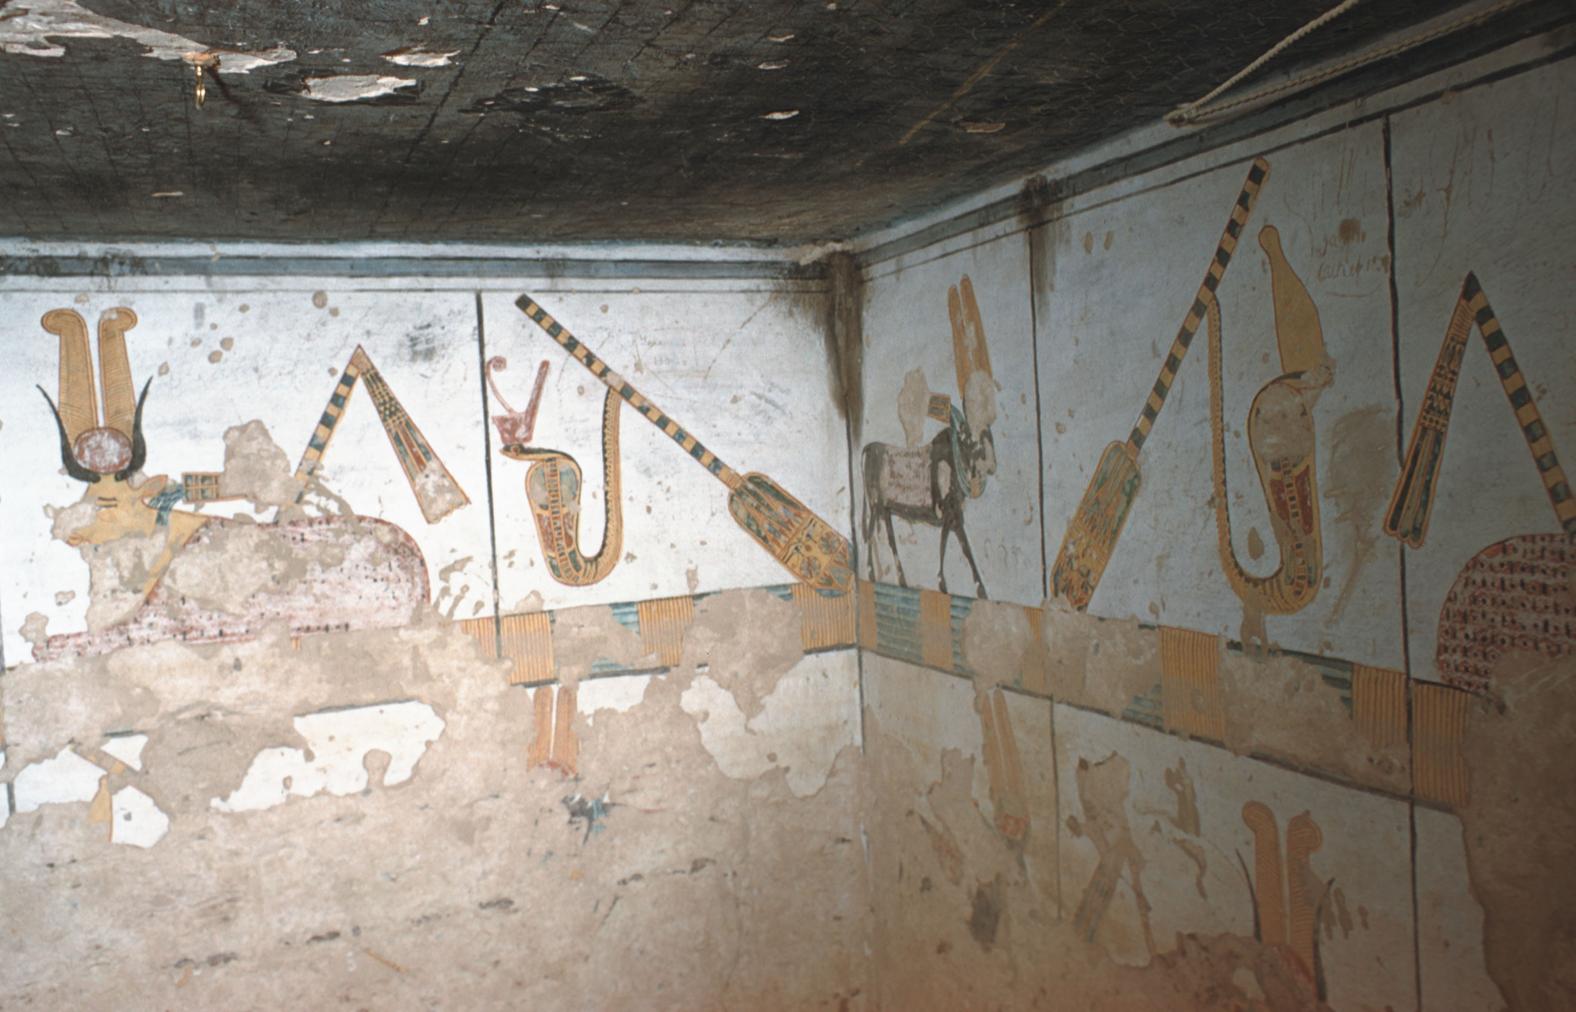
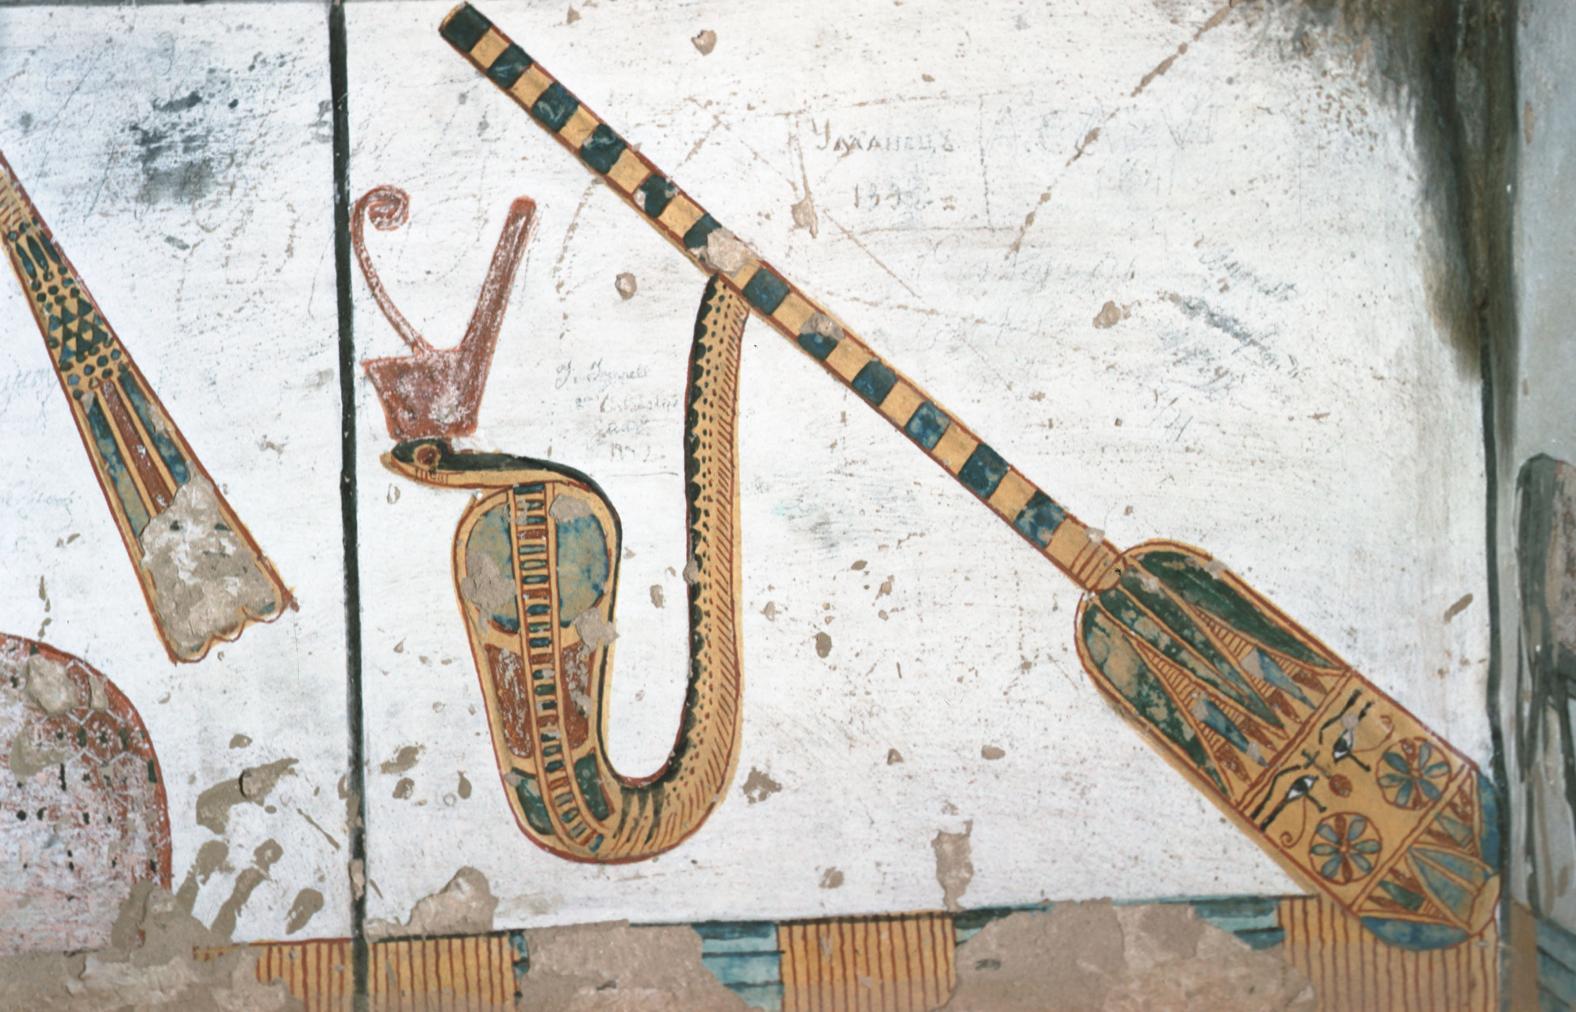
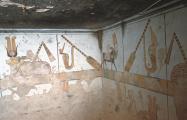
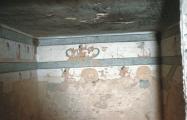
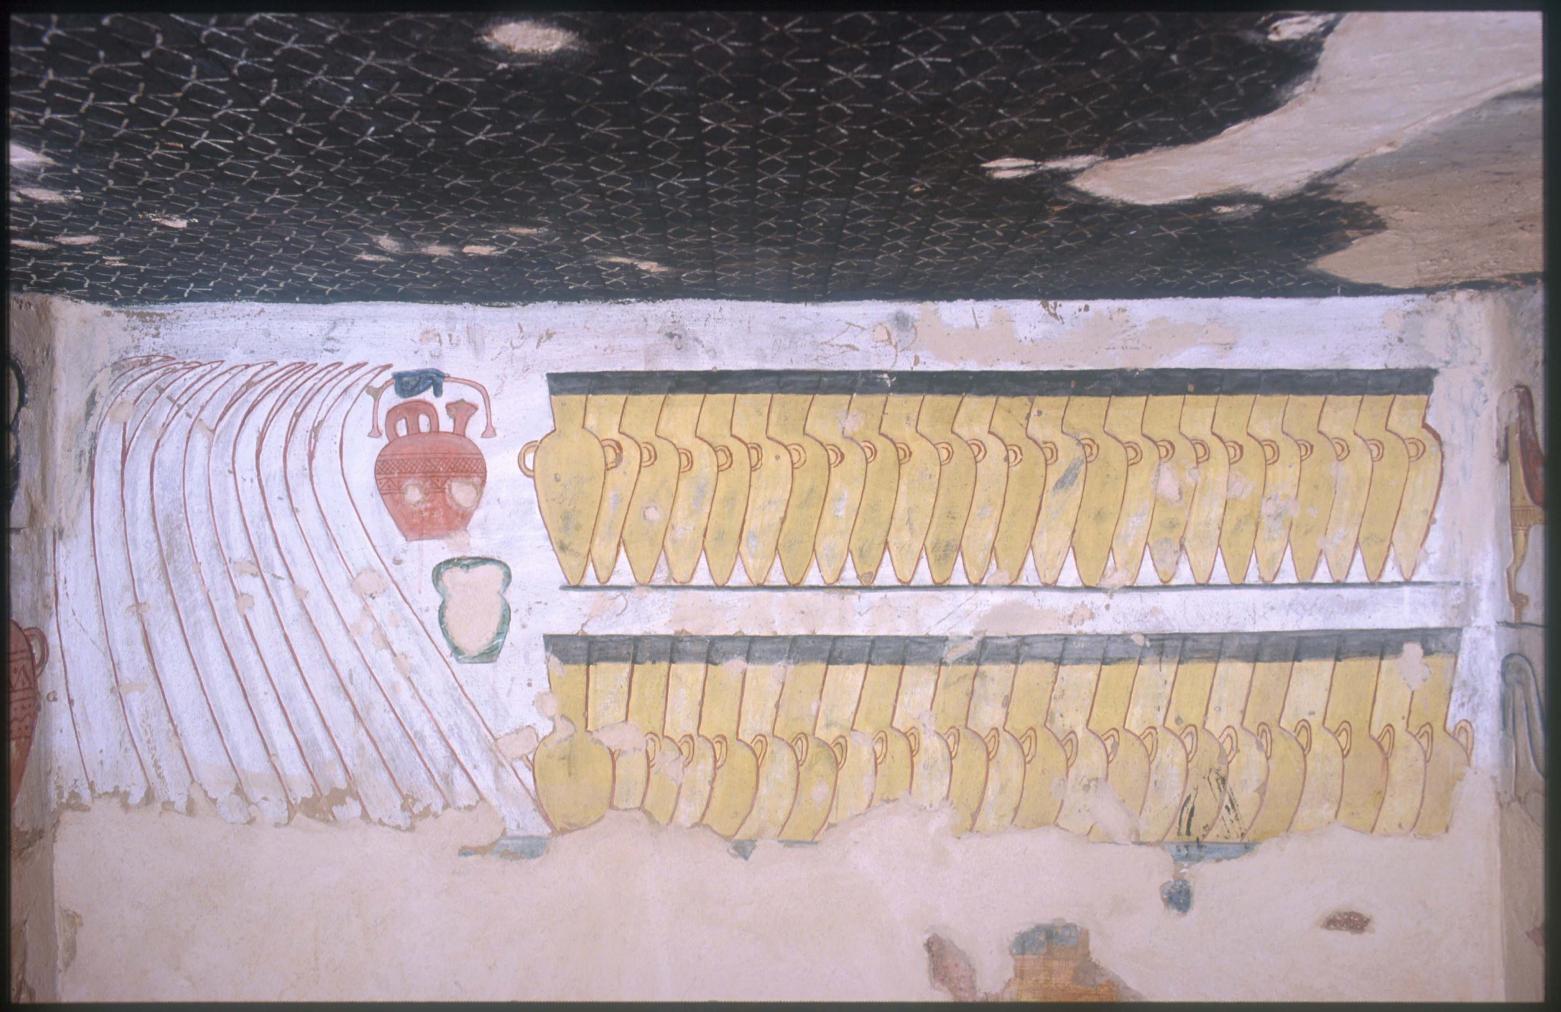
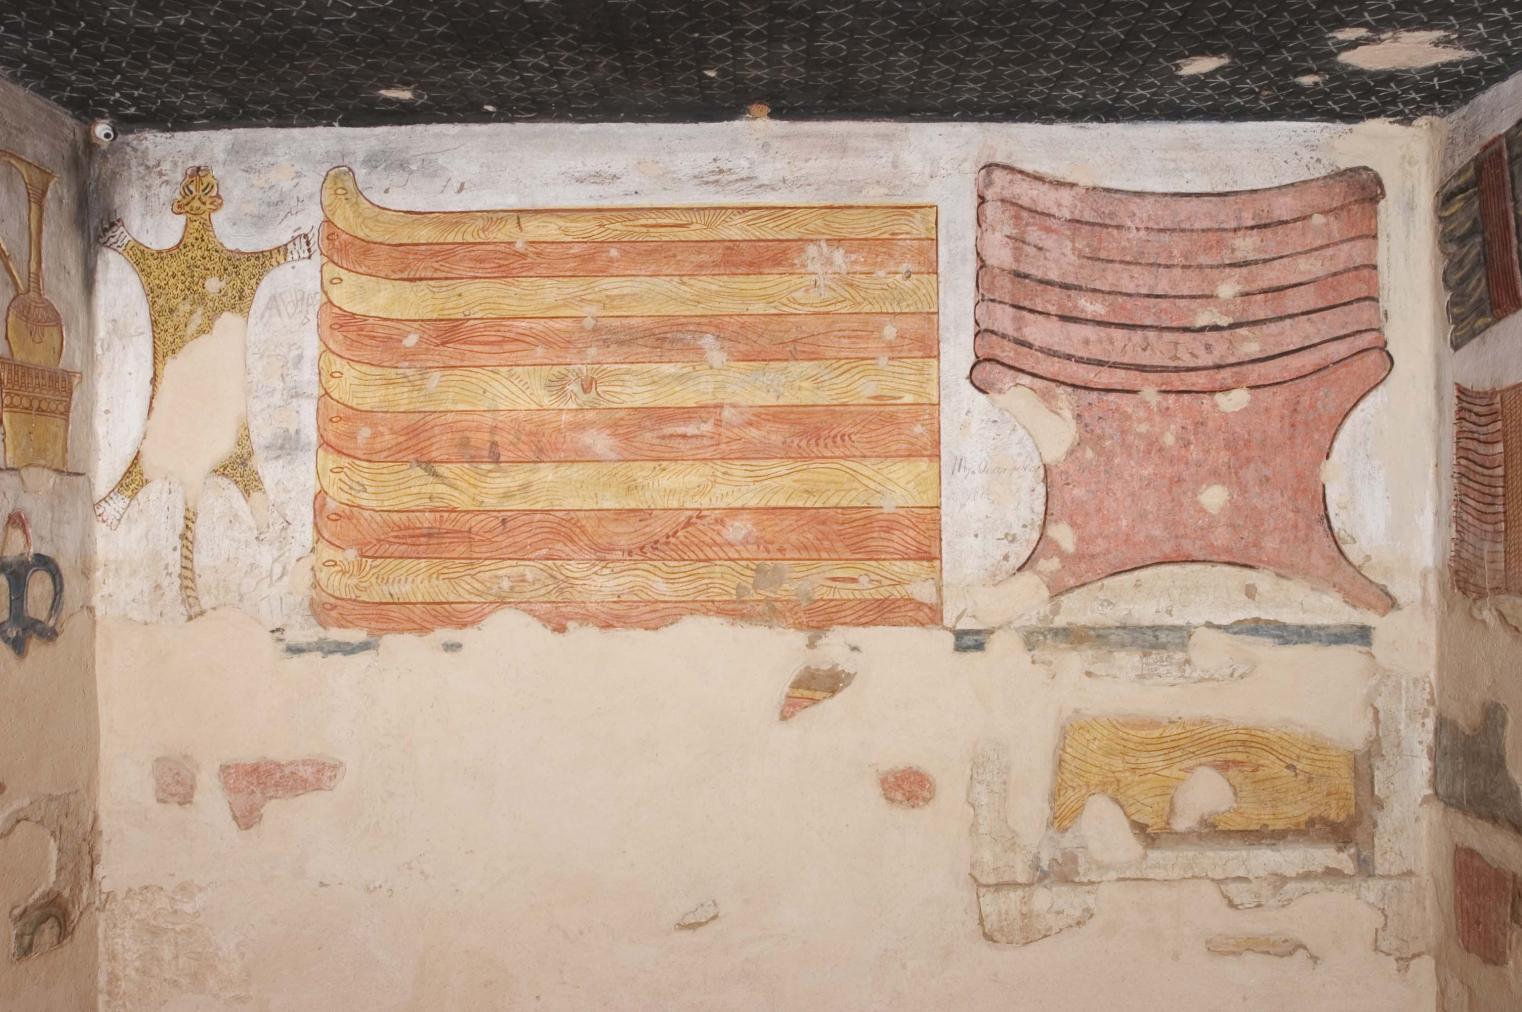
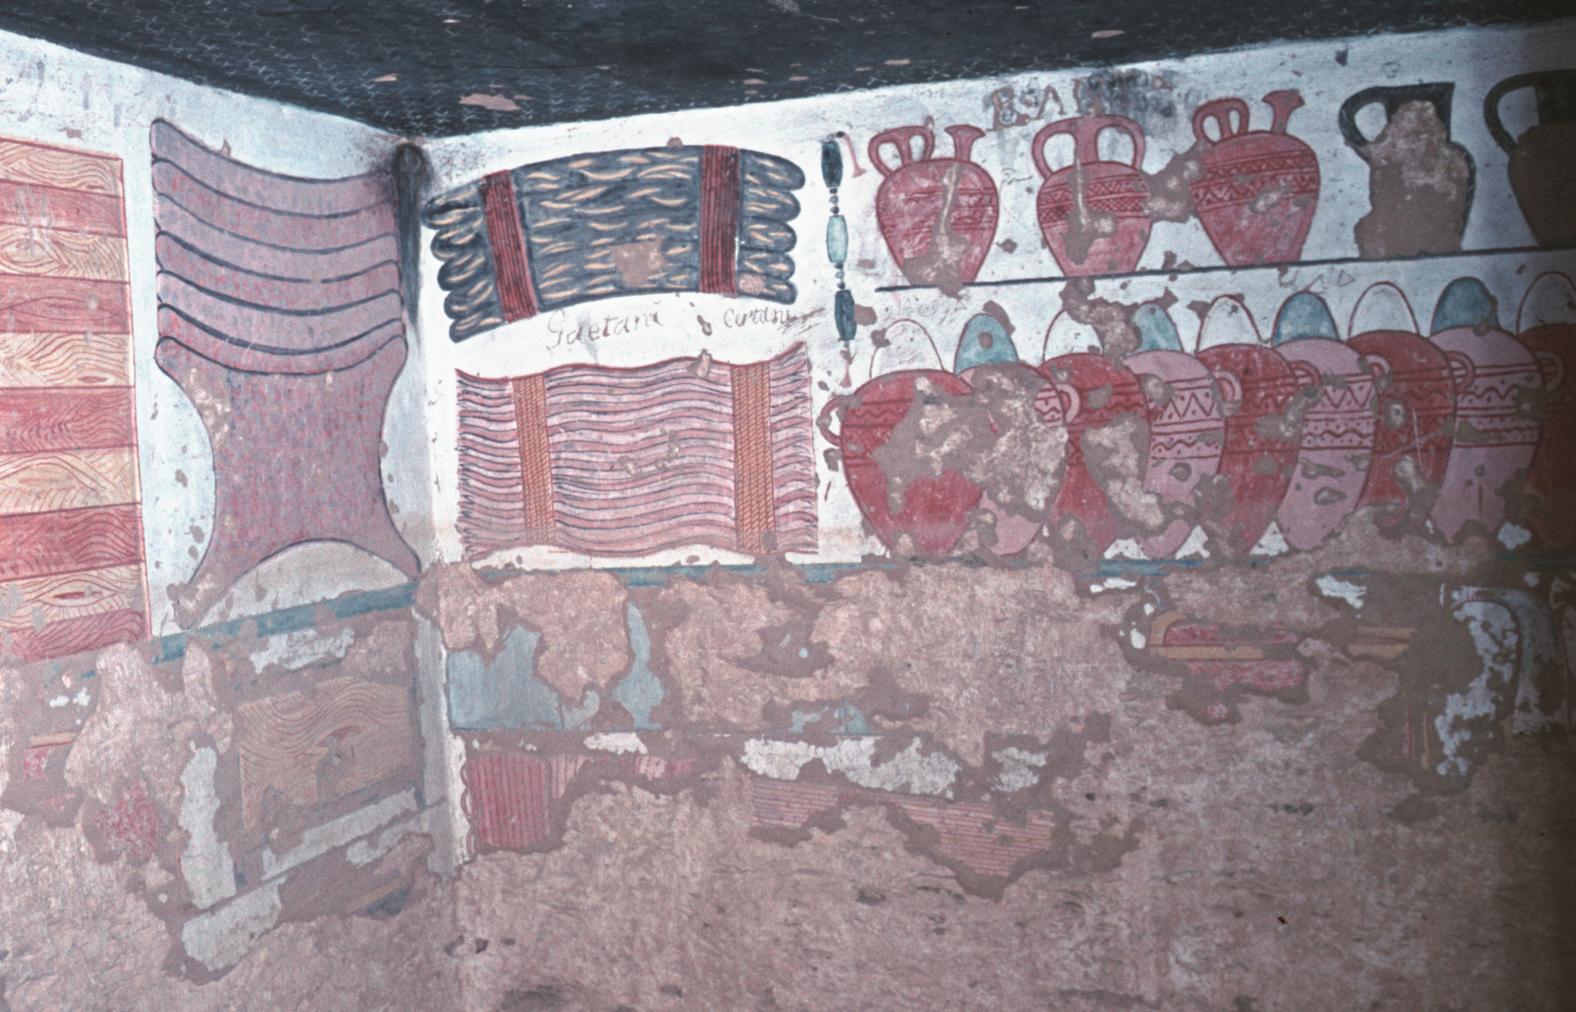
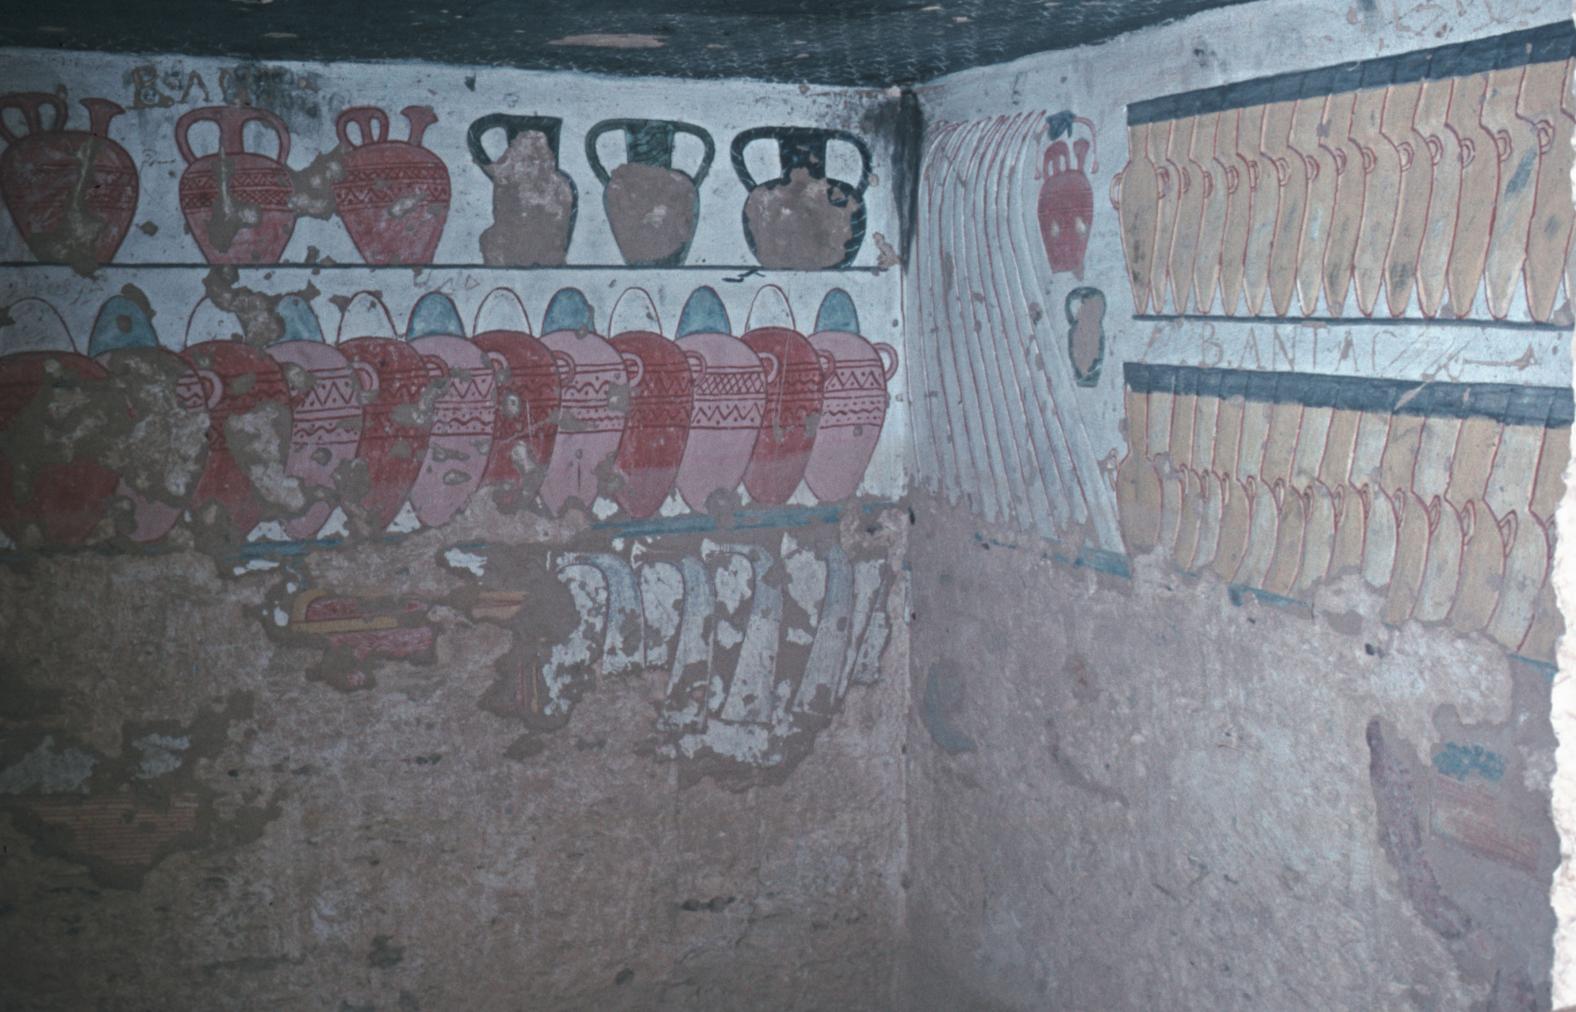
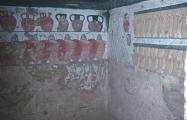
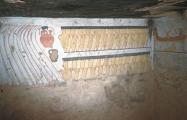
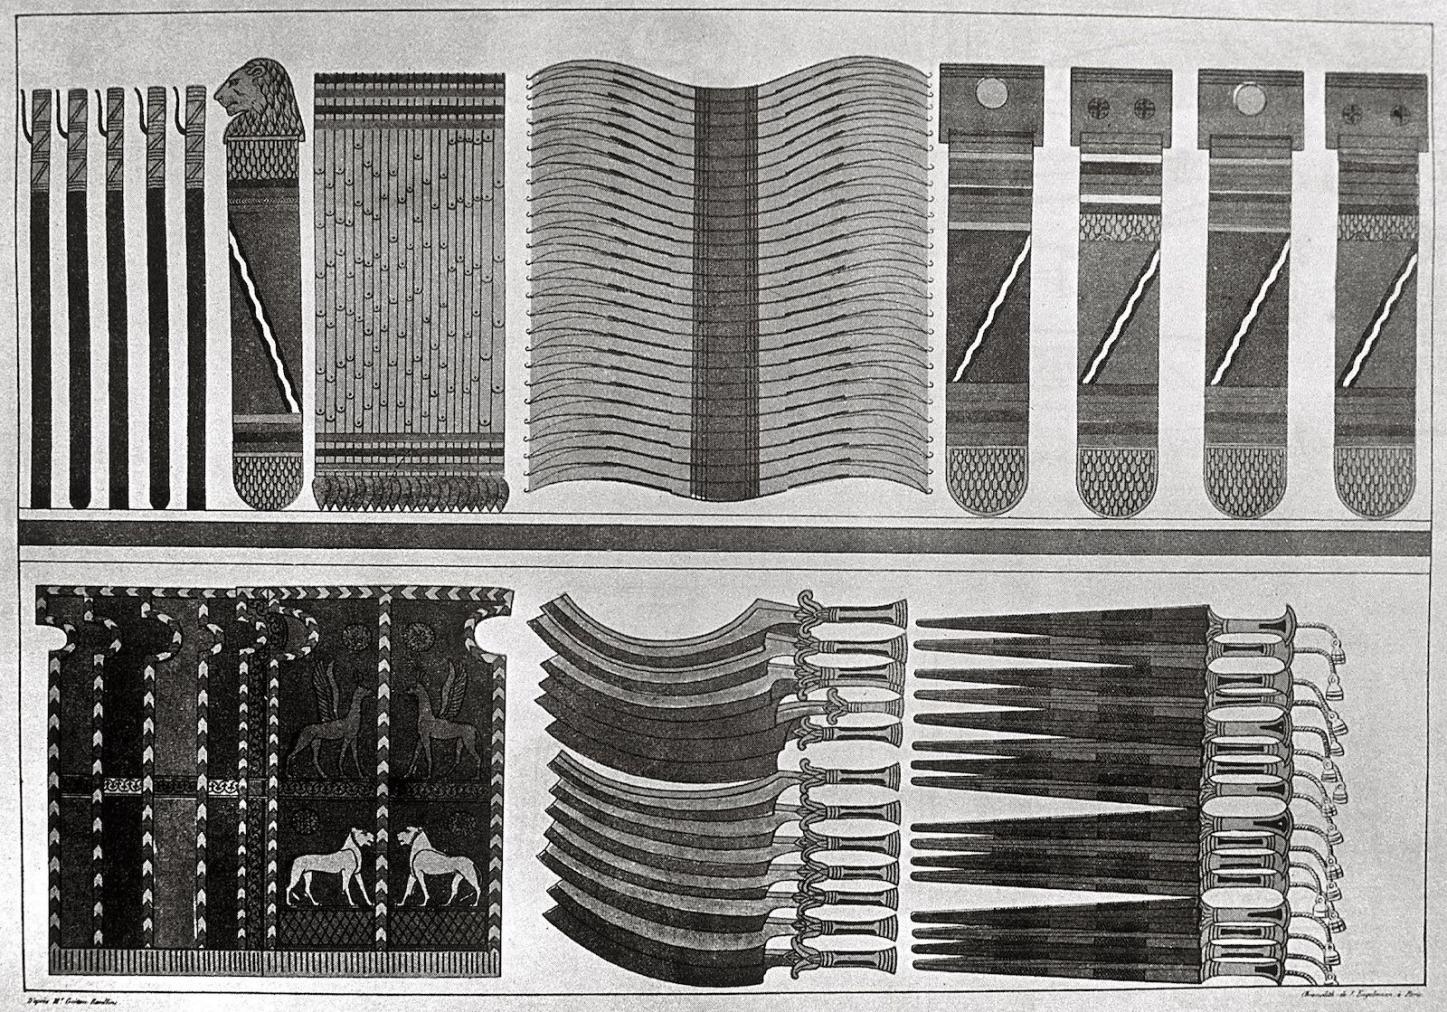
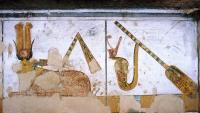
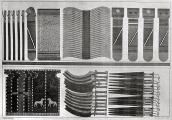
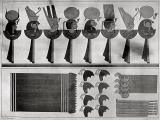
See entire tombThe front (east) wall is decorated with beds on the right (south) half, and with ewers, basins and vases on the left (north) half. A leopard skin, other animal skins, sledges, boxes, and baskets are shown on the left (south) wall, and vases and chairs on the right (north) wall. The rear (west) wall is decorated with throwsticks, bows, vases and shields. Much of the decoration in the chamber has been lost, but what remains has retained its vivid colors. A door pivot hole at the edge of the ceiling north of the gate indicates a single door leaf was to close the entry.
Porter and Moss designation:


Gate Ch
See entire tombThis is the first gate from the entrance in the right (west) wall of corridor C. A door bolt hole in the left (south) thickness is evidence of a single door leaf.
Porter and Moss designation:
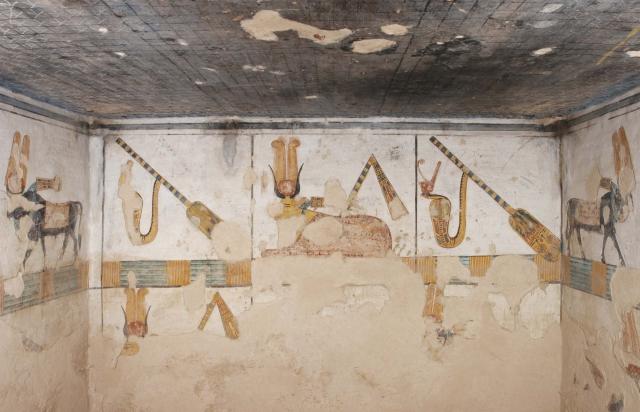
Side chamber Ch
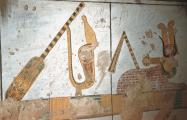
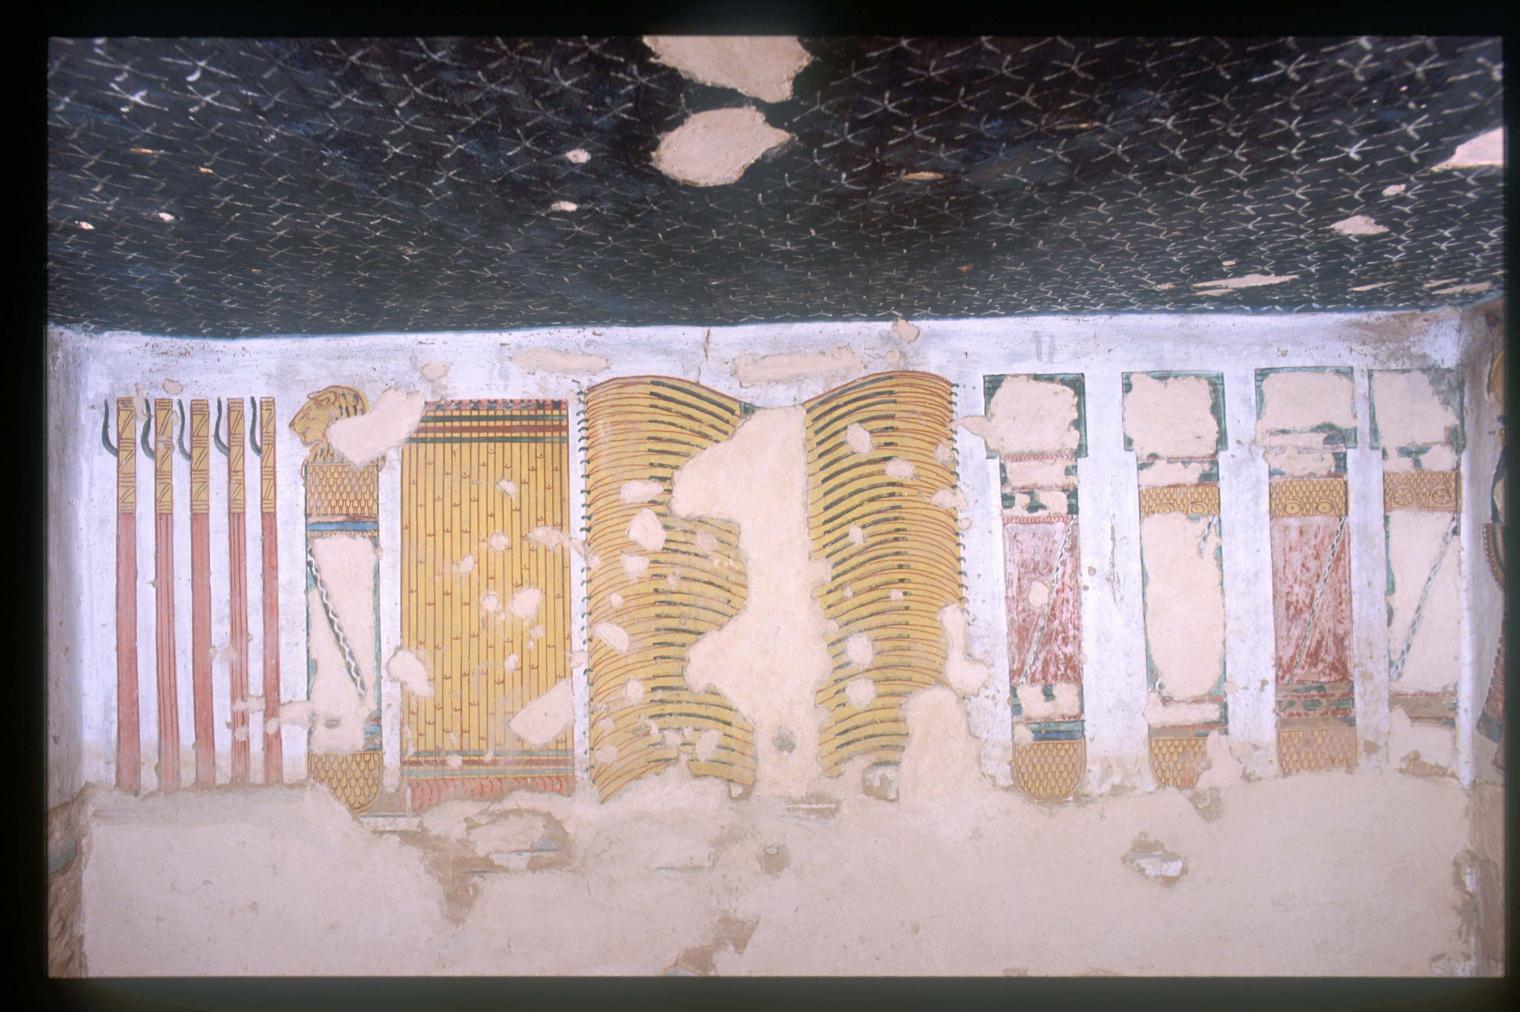
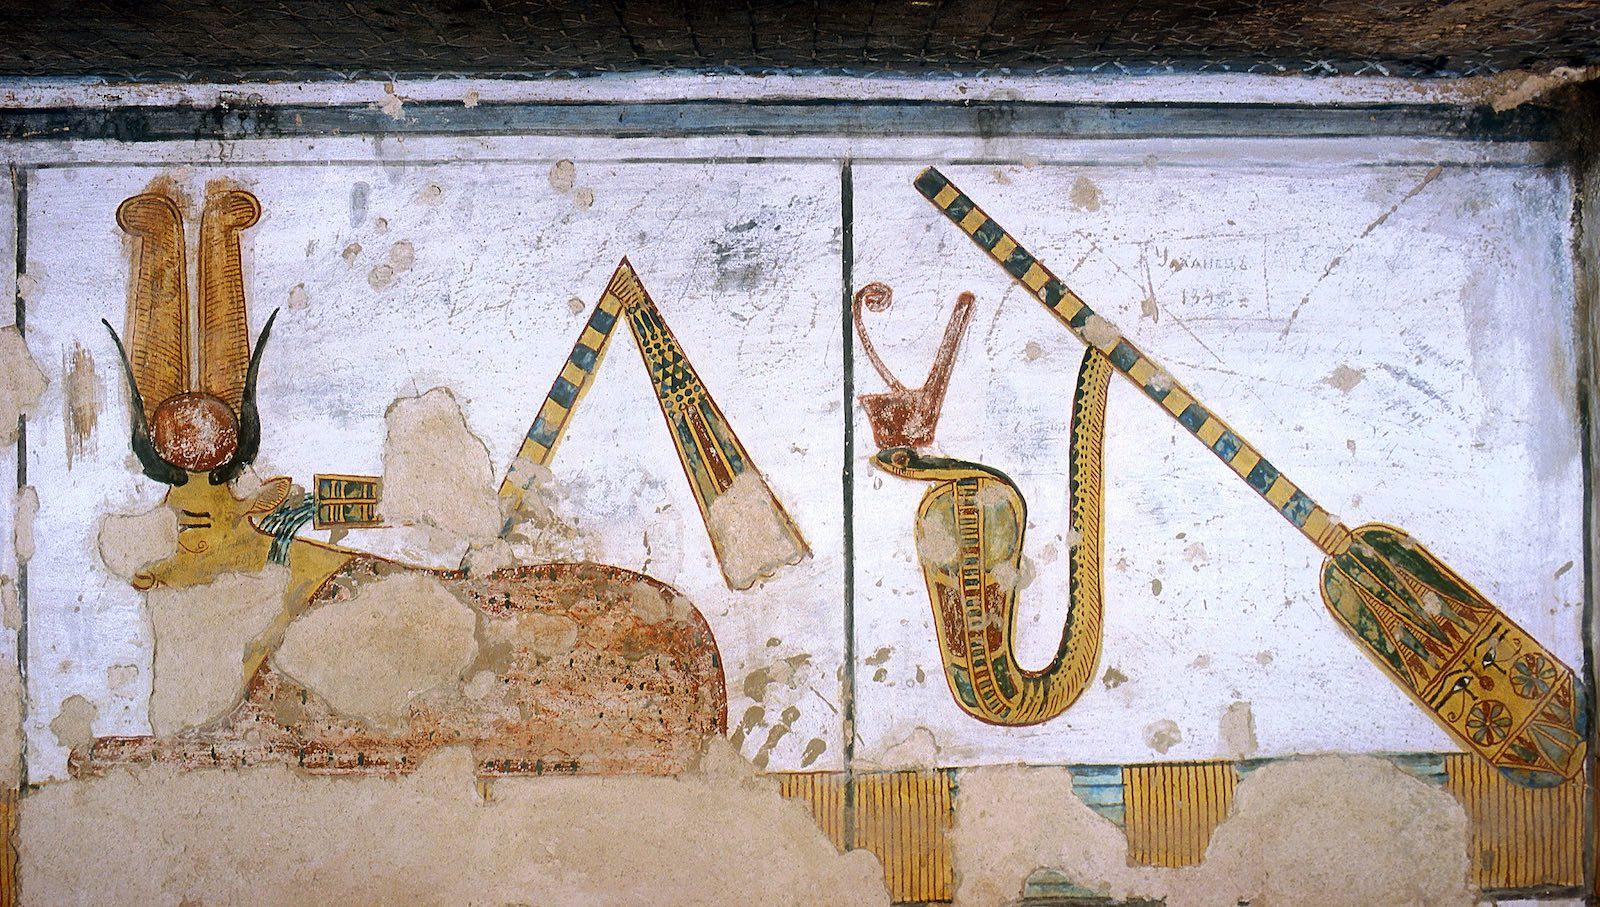
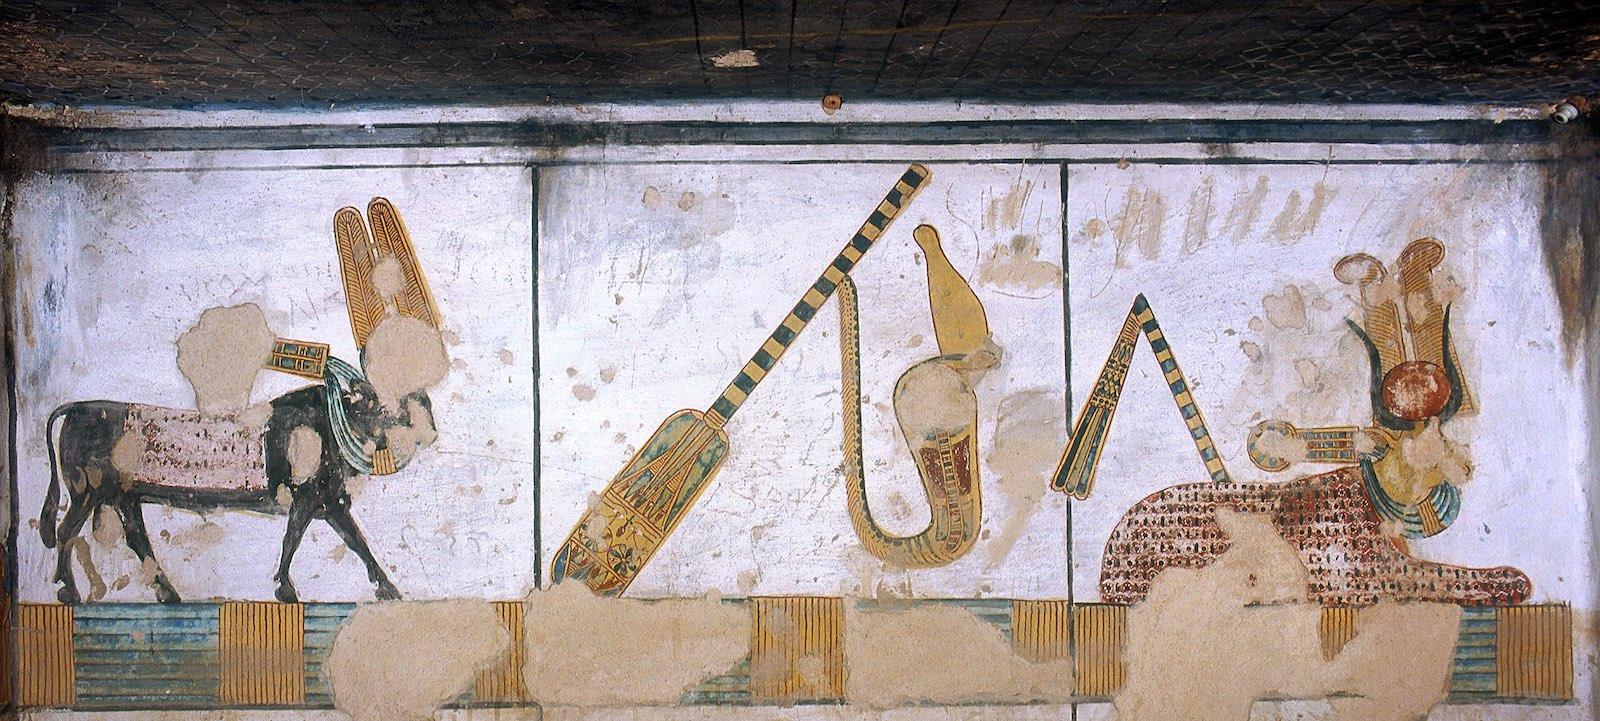
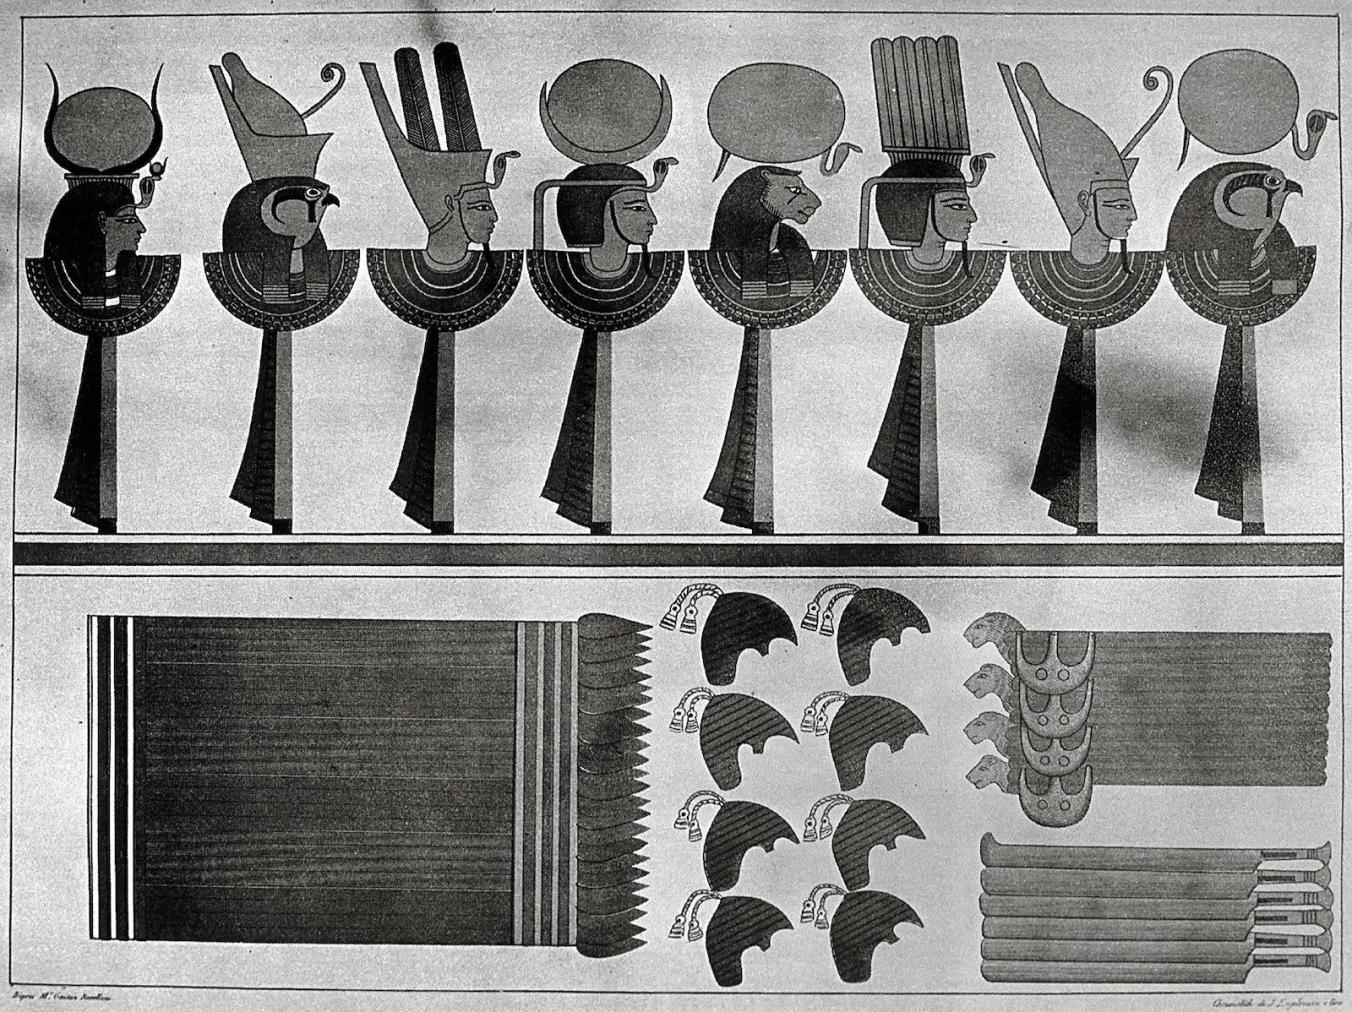
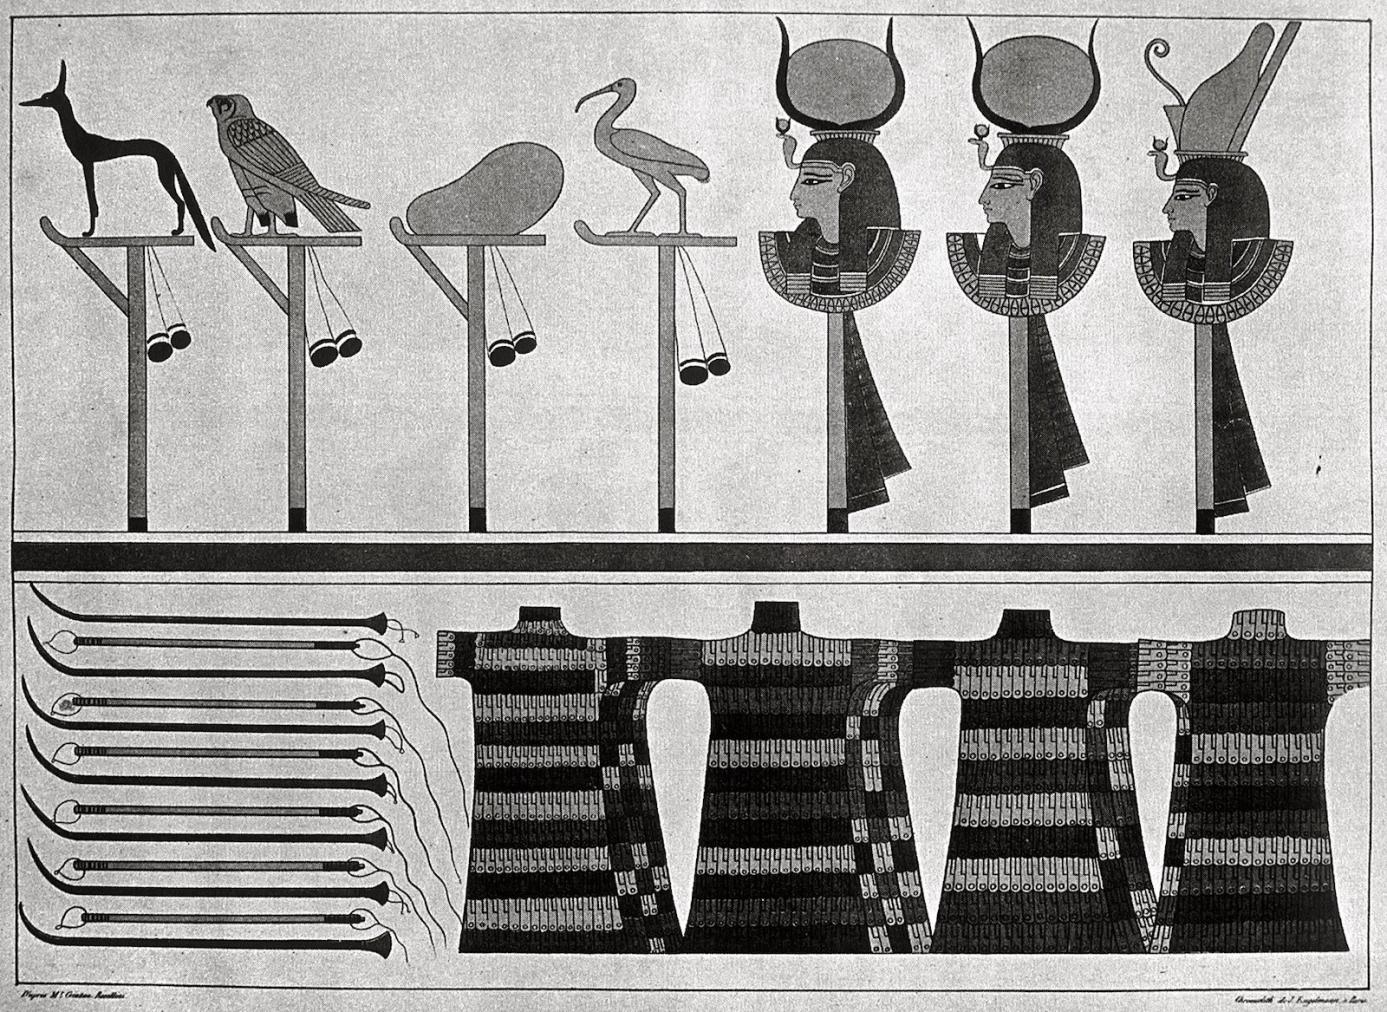
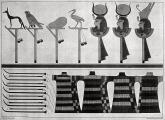
See entire tombThe front (east) wall of this side chamber is decorated with a bull and pool on each side of the doorway. Divine standards and weapons decorate the right (north) wall, and divine standards decorate the left (south) wall. The rear (west) wall shows weapons and corsets. Much of the decoration in the chamber has been lost. A door pivot hole at the ceiling edge north of the gate indicates that a single door leaf was to close the entry.
Porter and Moss designation:


Gate D1
See entire tombOn the lintel of gate D1 is a winged sun disk, and on the reveals are the names of Rameses III. There is a step down between the outer and inner thicknesses. A door pivot hole beyond the left (east) outer thickness and a door bolt hole in the right (west) inner thickness show the intention to close the gate with a single door leaf.
Porter and Moss designation:
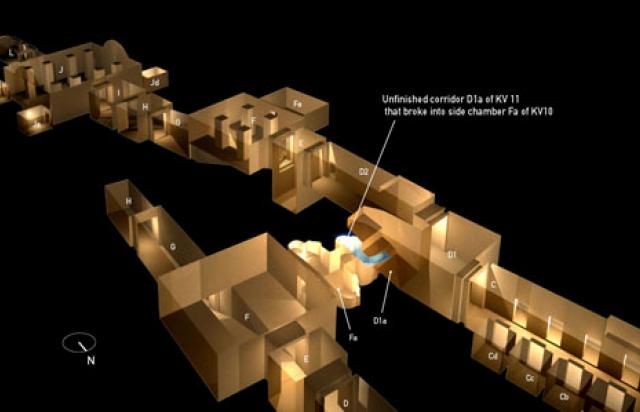
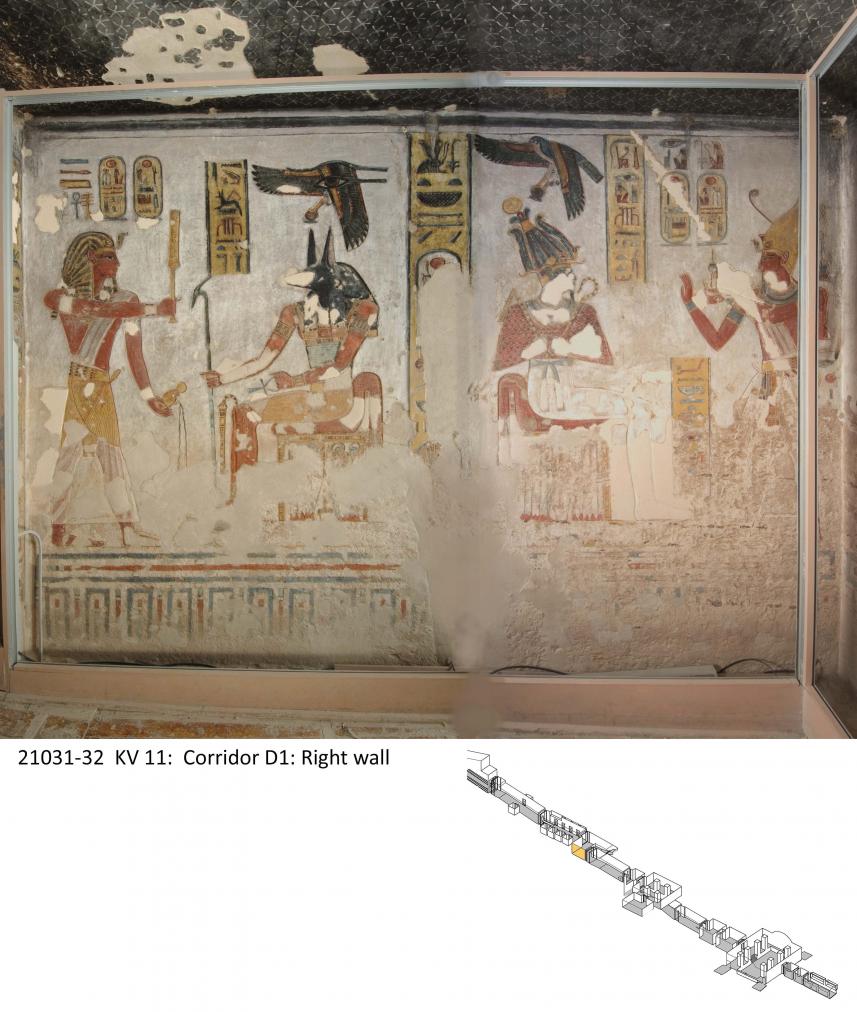
Chamber D1
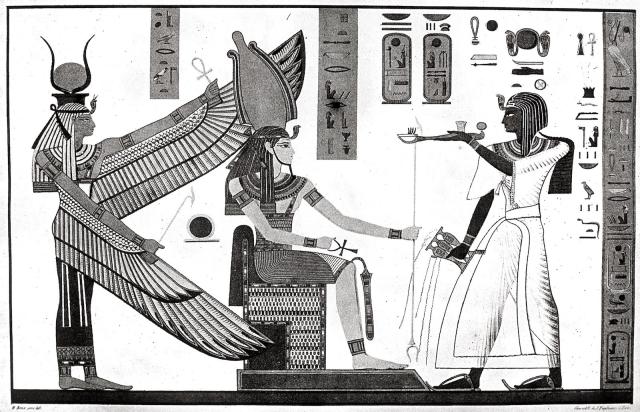
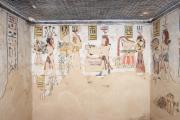
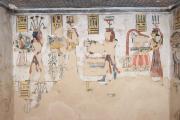
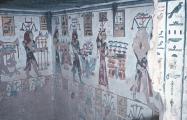
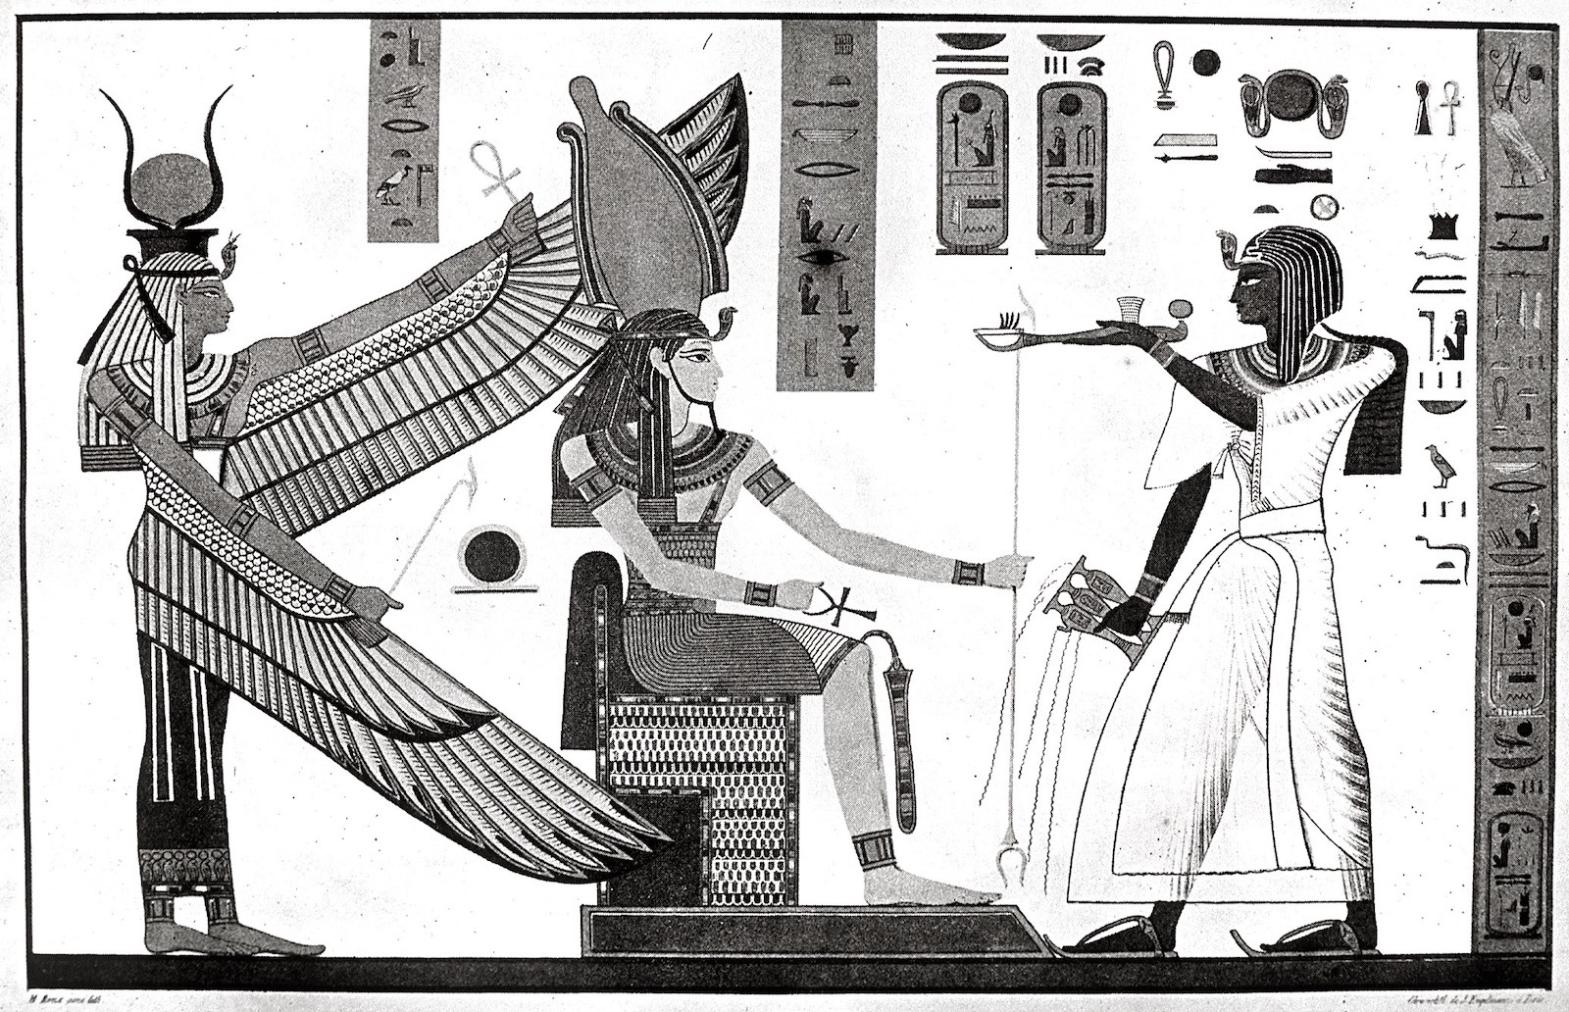
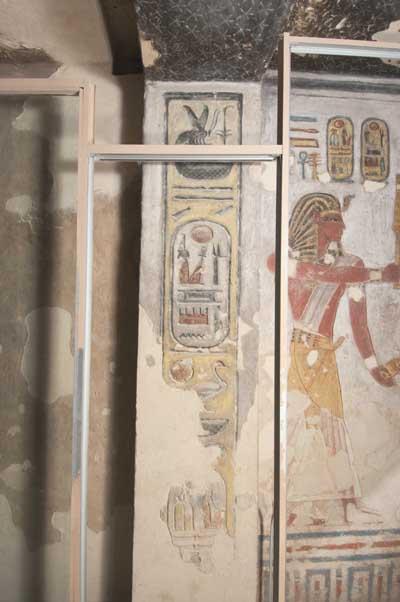
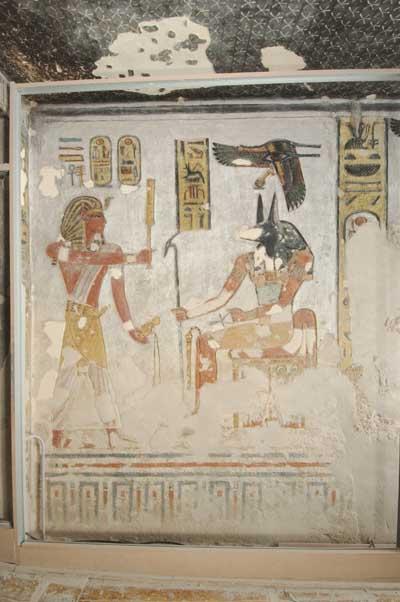
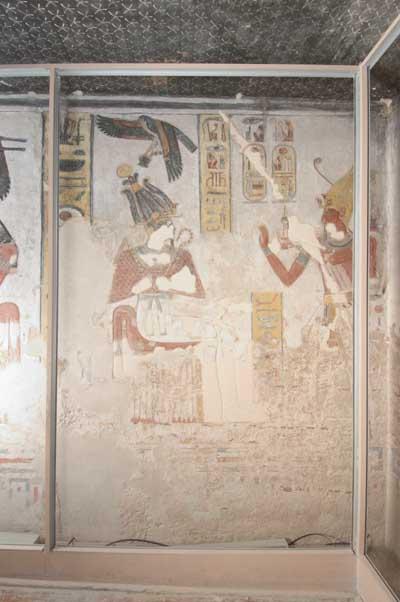
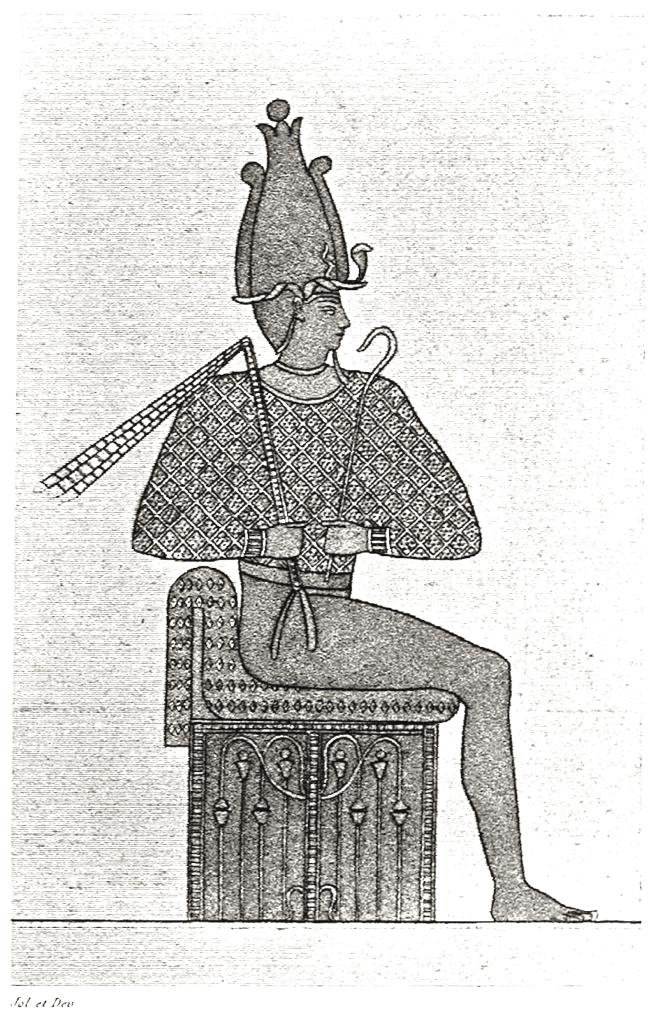
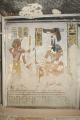
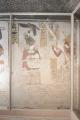
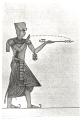
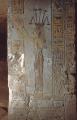
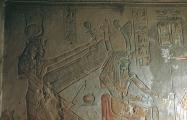
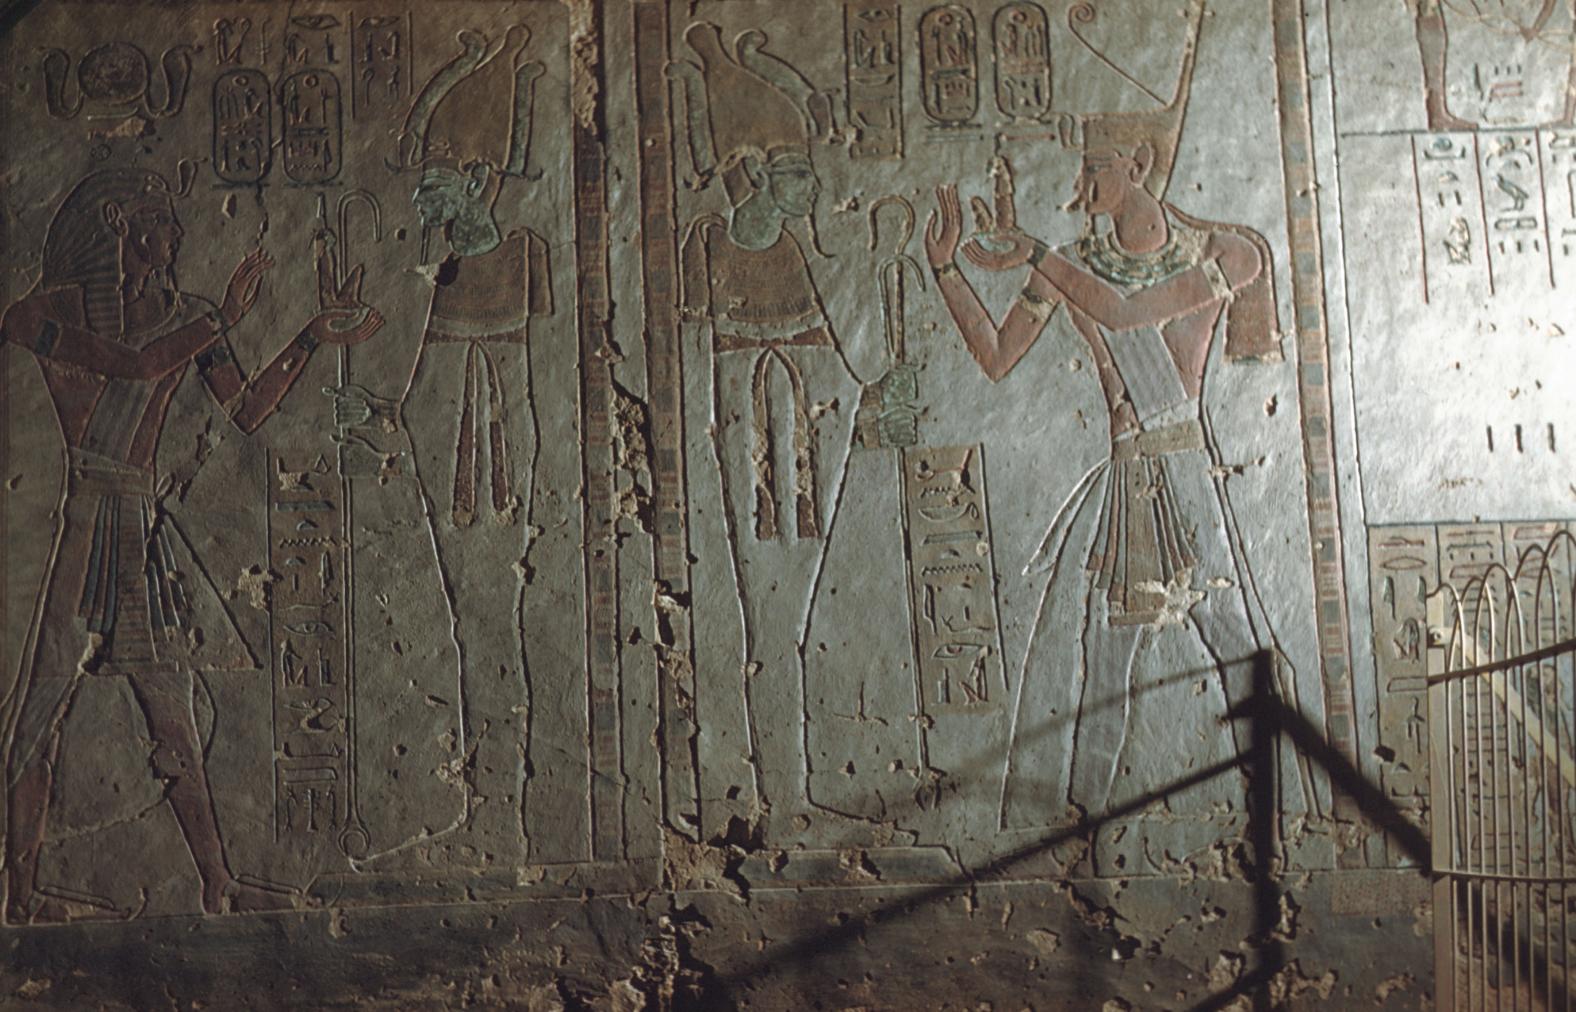
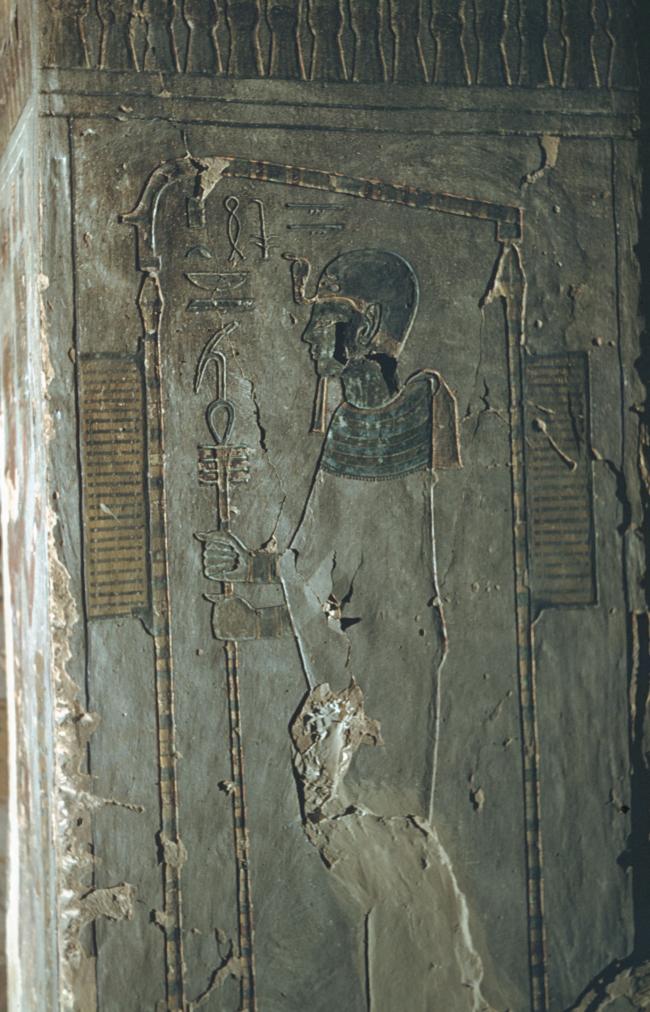
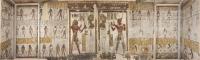
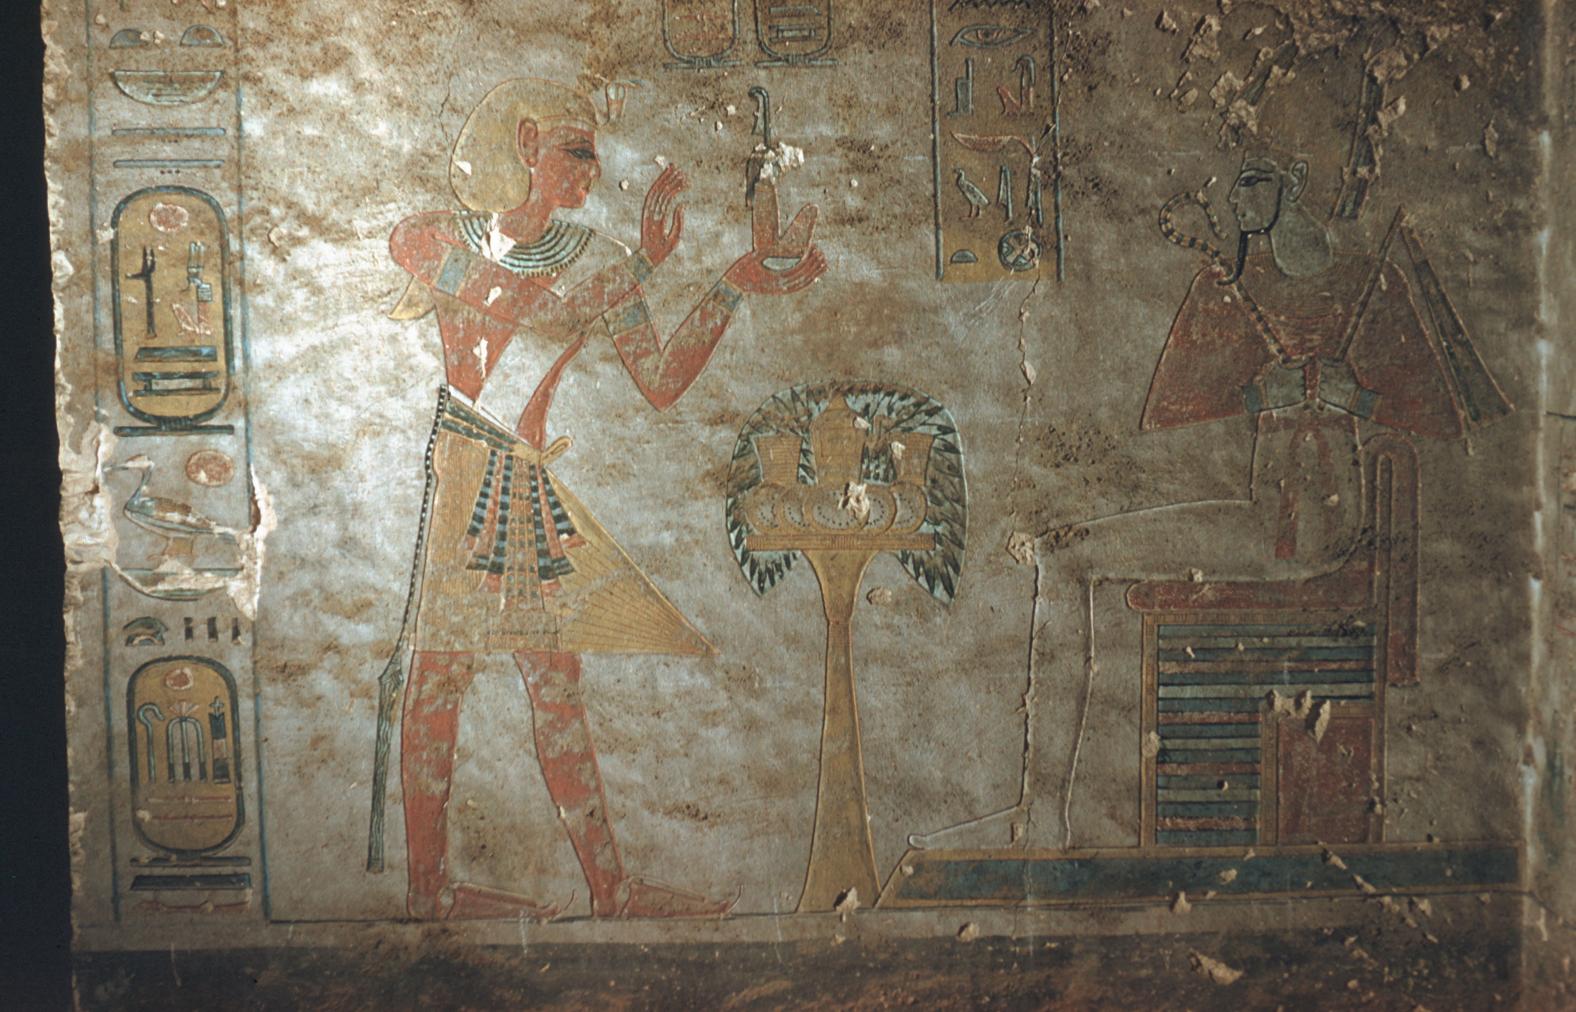
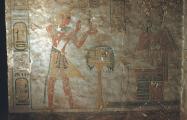
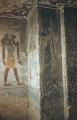
See entire tombChamber D1 is a combination of the front (north) part of the intended corridor D, which was abandoned when it broke into side chamber Fa of KV 10, and the cutting to the left (west), made to shift the axis westwards away from KV 10. The left (west) wall shows two scenes: Rameses III offering incense to Atum, and Rameses III receiving the Heb-Sed Festival symbol from Ptah. The Upper Egyptian goddess Meret is shown with a libation-vase on the rear (south) wall. Although heavily damaged, the inscription in front of the goddess Meret attests to the strong connection of the tomb with the sanctuary at Heliopolis. Rameses III offers incense and libation to Ptah-Sokar and a winged Isis on the front wall. The right wall shows two scenes: Rameses III offering Ma'at to Osiris, and offering libation to Anubis.
Porter and Moss designation:
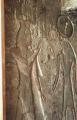
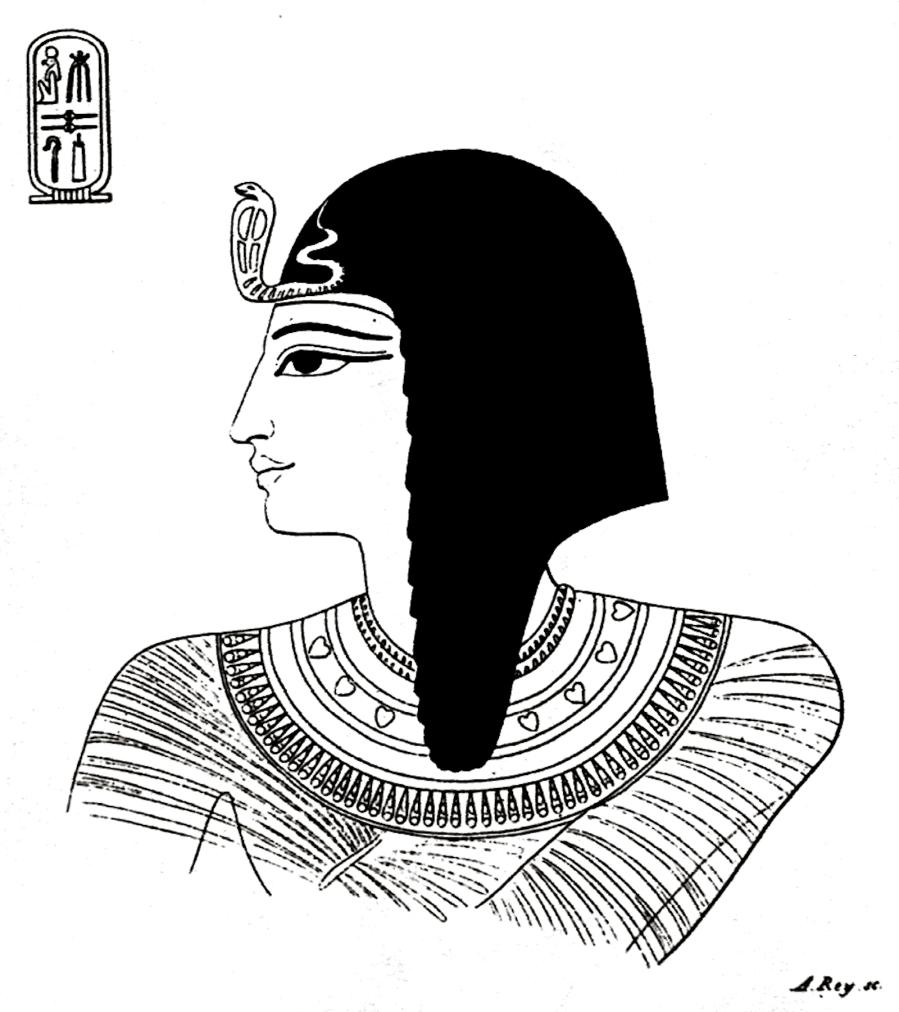
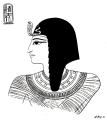
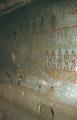
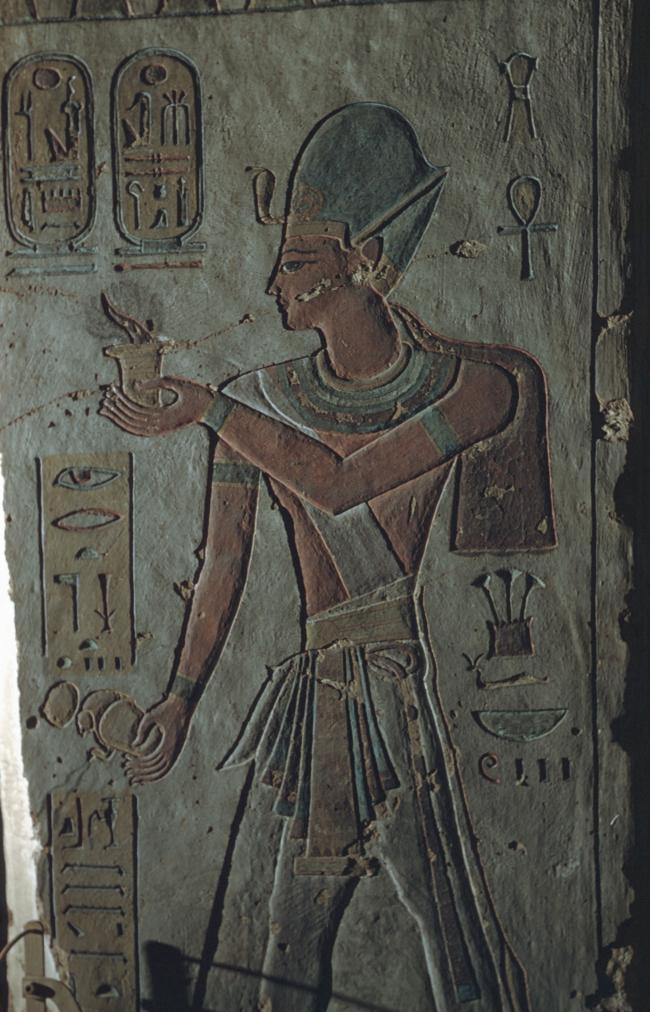
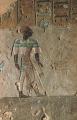
![Portrait (reversed) of Rameses III offering to [Ptah-Sokar].](/sites/default/files/styles/gallery/public/images/16536.jpg?itok=ll3JlwRY "Portrait (reversed) of Rameses III offering to [Ptah-Sokar].")
Portrait (reversed) of Rameses III offering to [Ptah-Sokar].
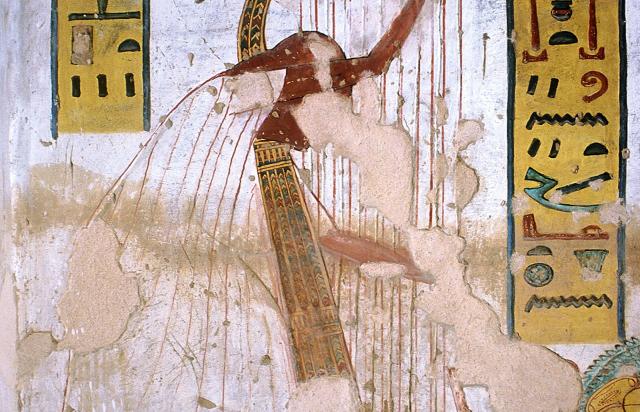
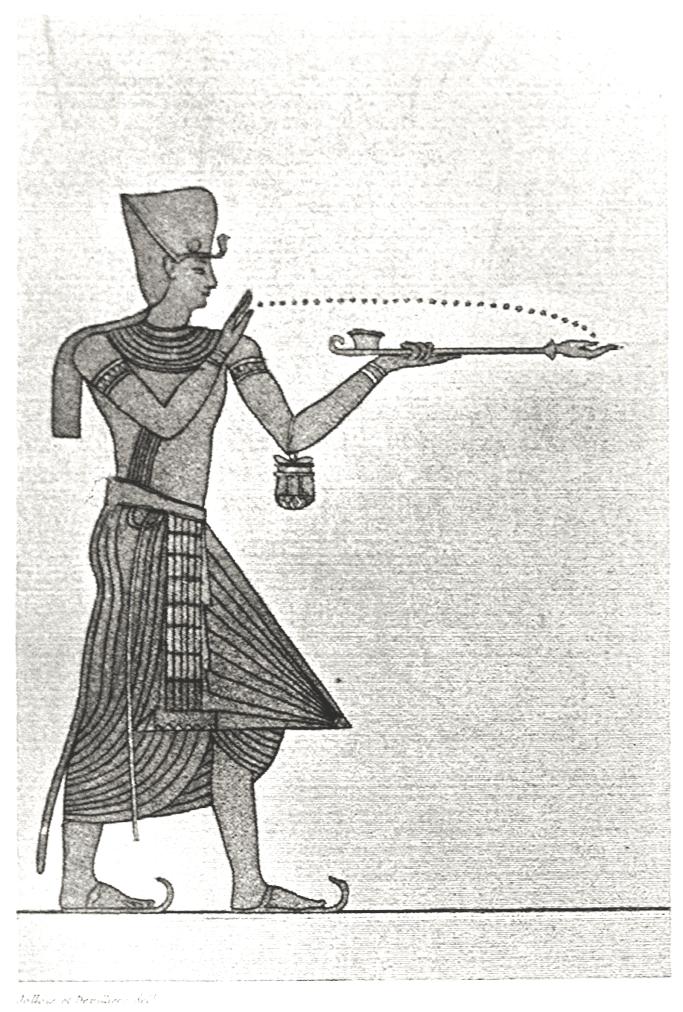
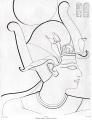
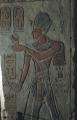
![Rameses III offering incense [to Ptah].](/sites/default/files/styles/gallery/public/images/16575.jpg?itok=QvwACKUn "Rameses III offering incense [to Ptah].")
Rameses III offering incense [to Ptah].
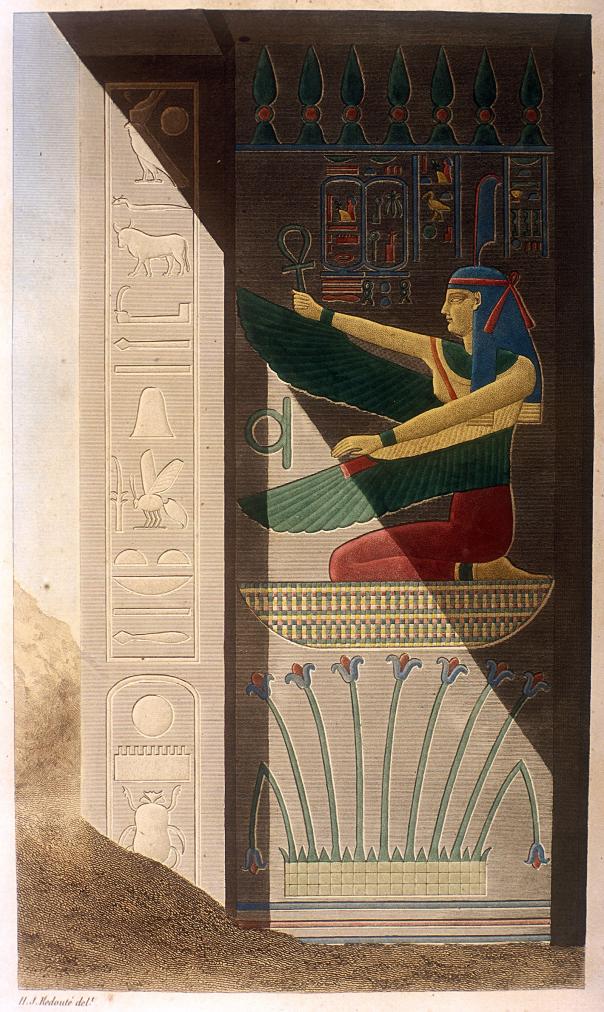
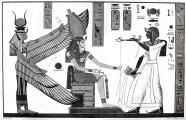
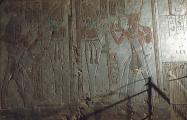
![Winged figure of Isis [protecting Ptah-Sokar Osiris, before Rameses III].](/sites/default/files/styles/gallery/public/images/16589.jpg?itok=ZLSV2SSO "Winged figure of Isis [protecting Ptah-Sokar Osiris, before Rameses III].")
Winged figure of Isis [protecting Ptah-Sokar Osiris, before Rameses III].

![Portrait (reversed) of Rameses III offering to [Ptah-Sokar].](/sites/default/files/styles/thumbnail/public/images/16536.jpg?itok=pBDYv9qy "Portrait (reversed) of Rameses III offering to [Ptah-Sokar].")
![Rameses III offering incense [to Ptah].](/sites/default/files/styles/thumbnail/public/images/16575.jpg?itok=JOLWaENx "Rameses III offering incense [to Ptah].")
![Winged figure of Isis [protecting Ptah-Sokar Osiris, before Rameses III].](/sites/default/files/styles/thumbnail/public/images/16589.jpg?itok=vENCI2FW "Winged figure of Isis [protecting Ptah-Sokar Osiris, before Rameses III].")

Corridor D1a
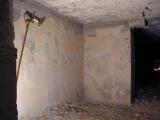
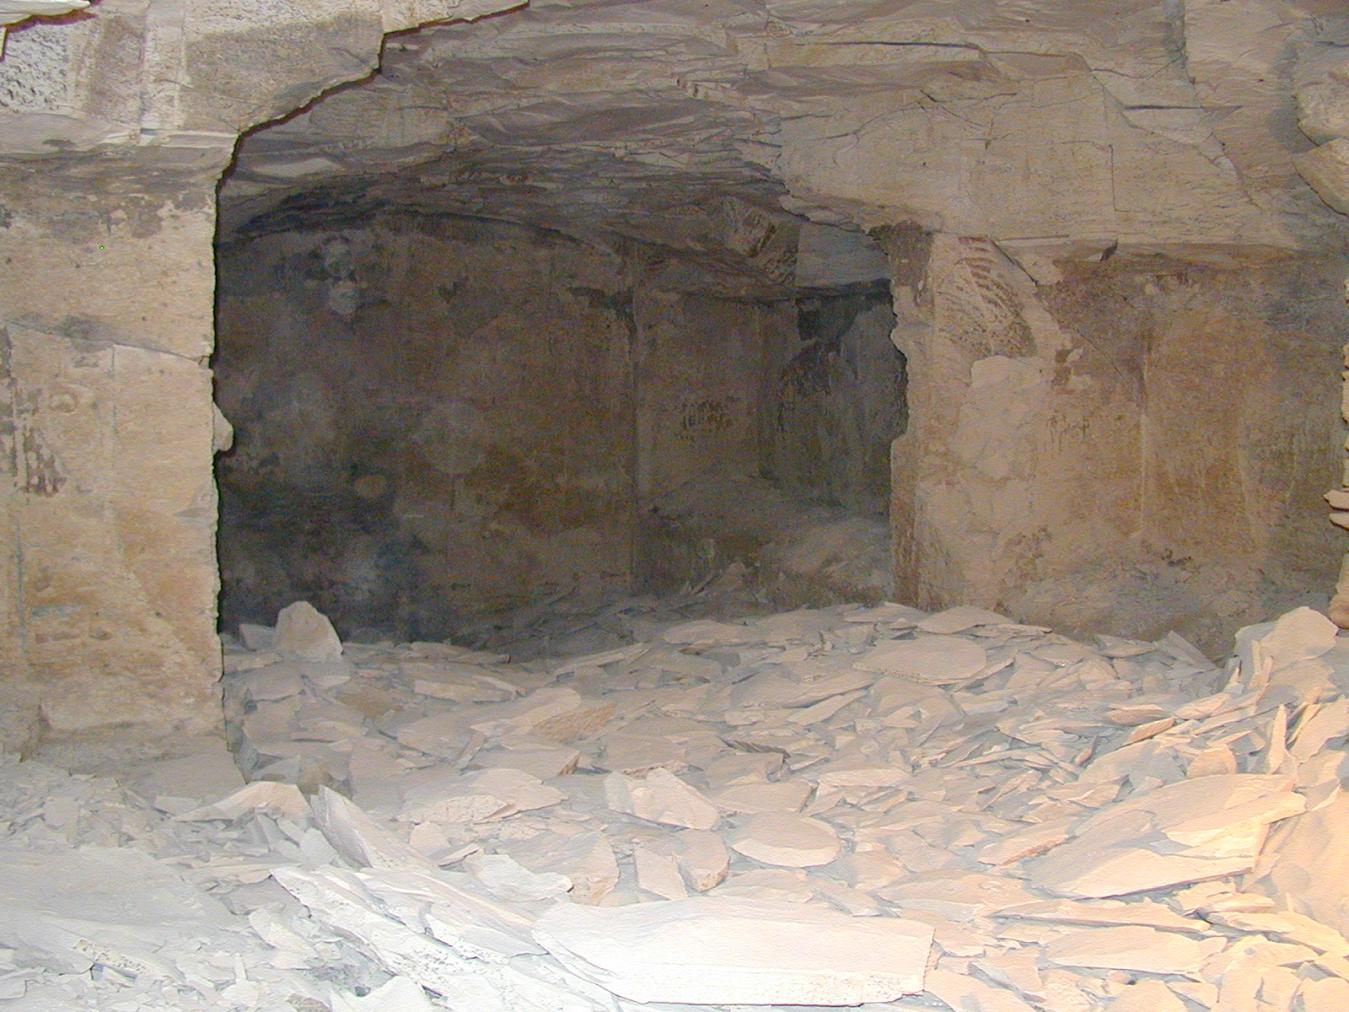
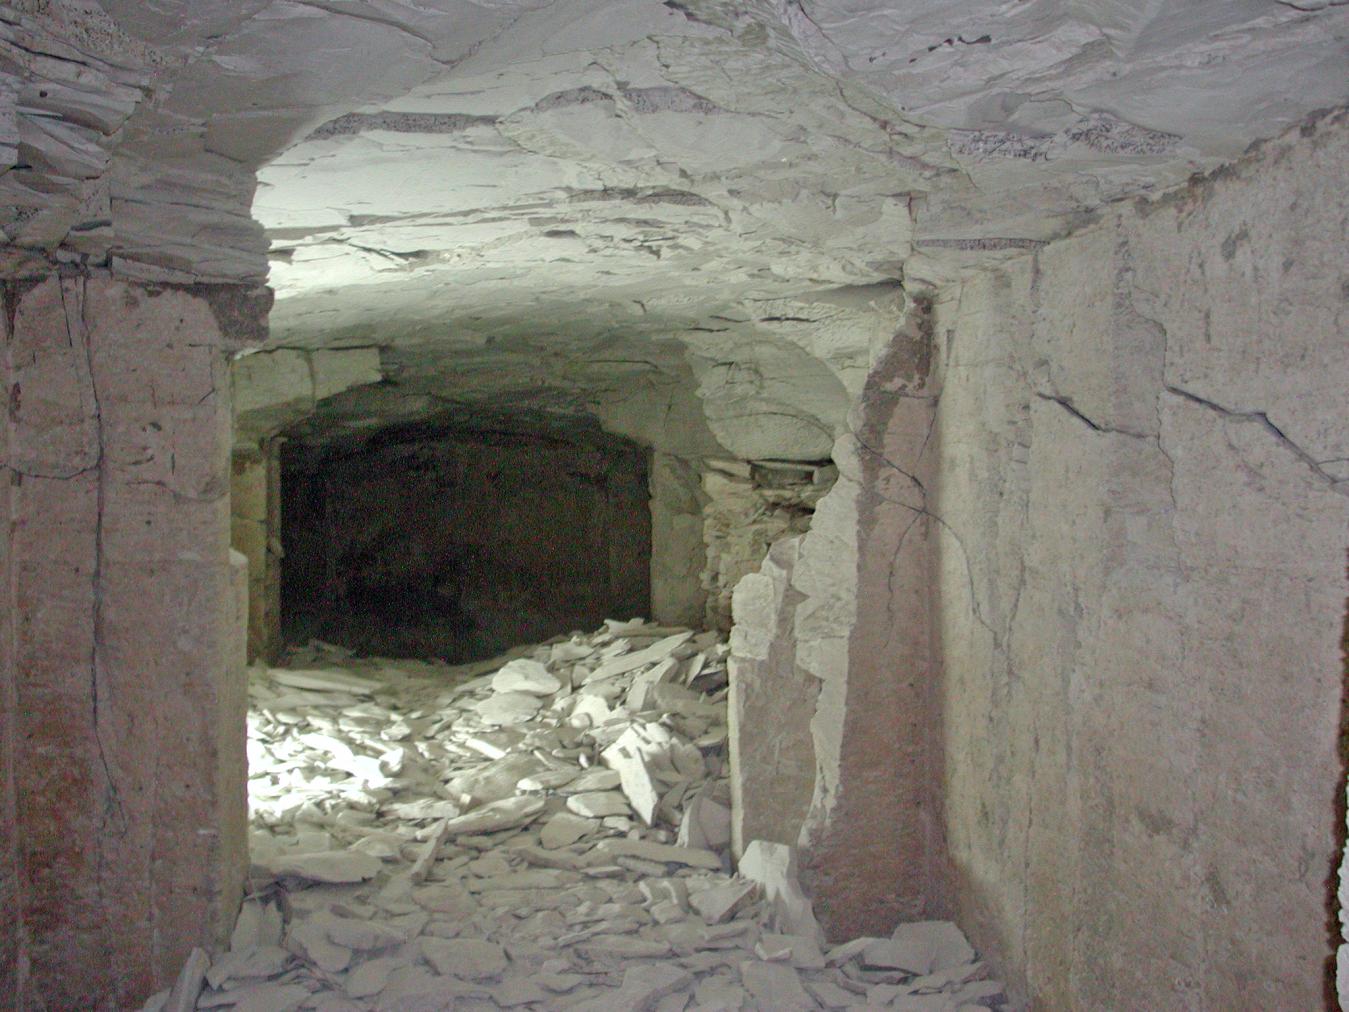
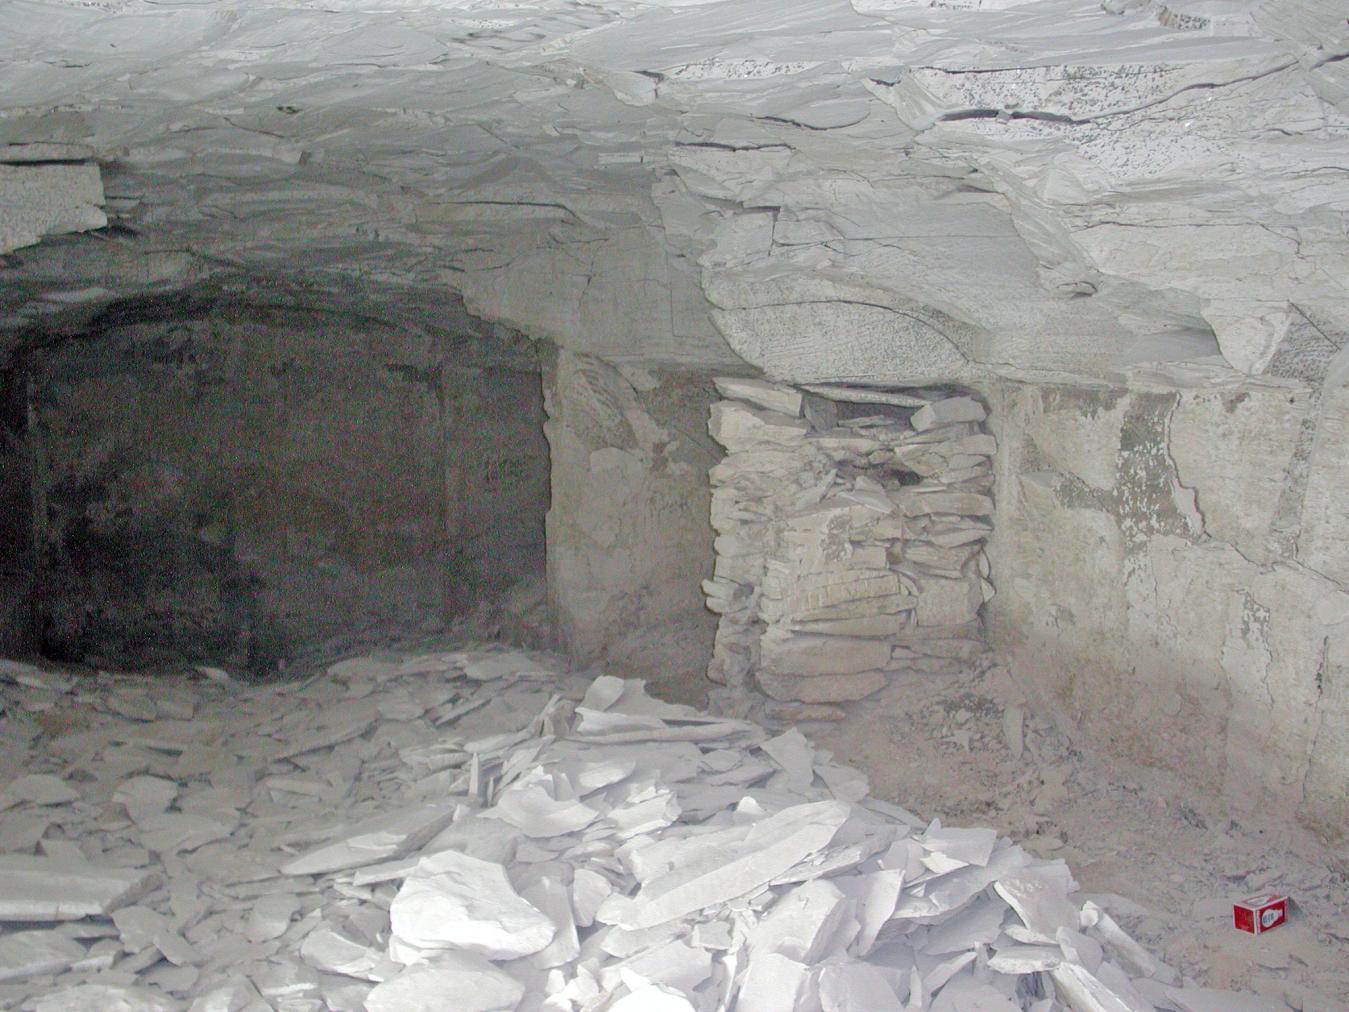
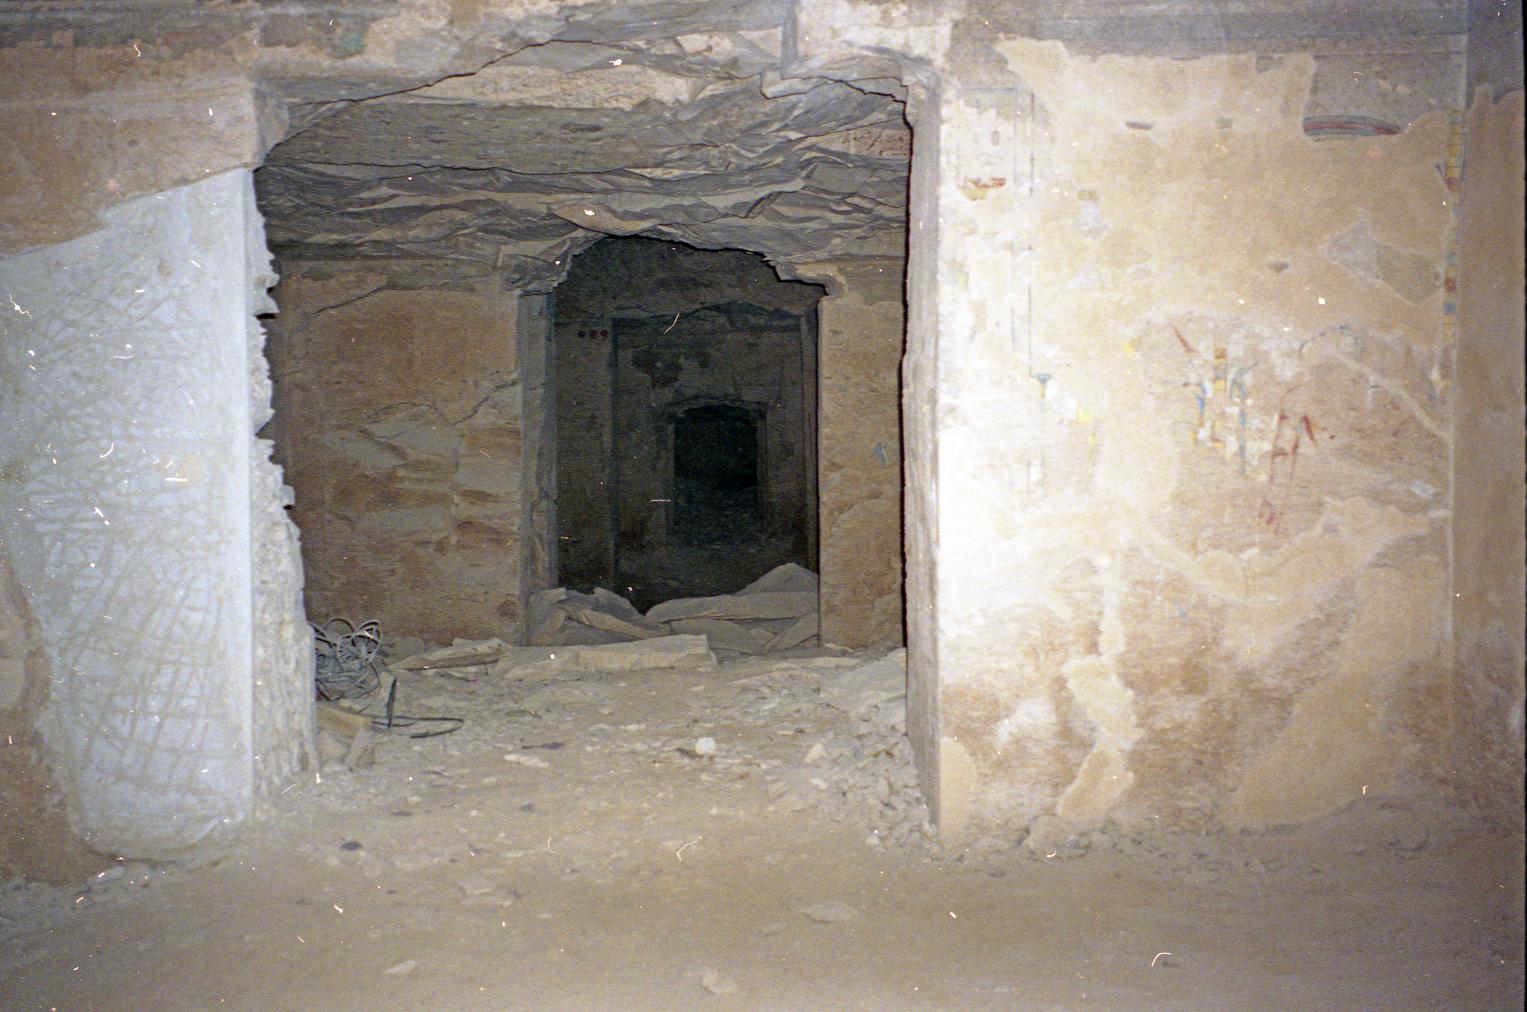
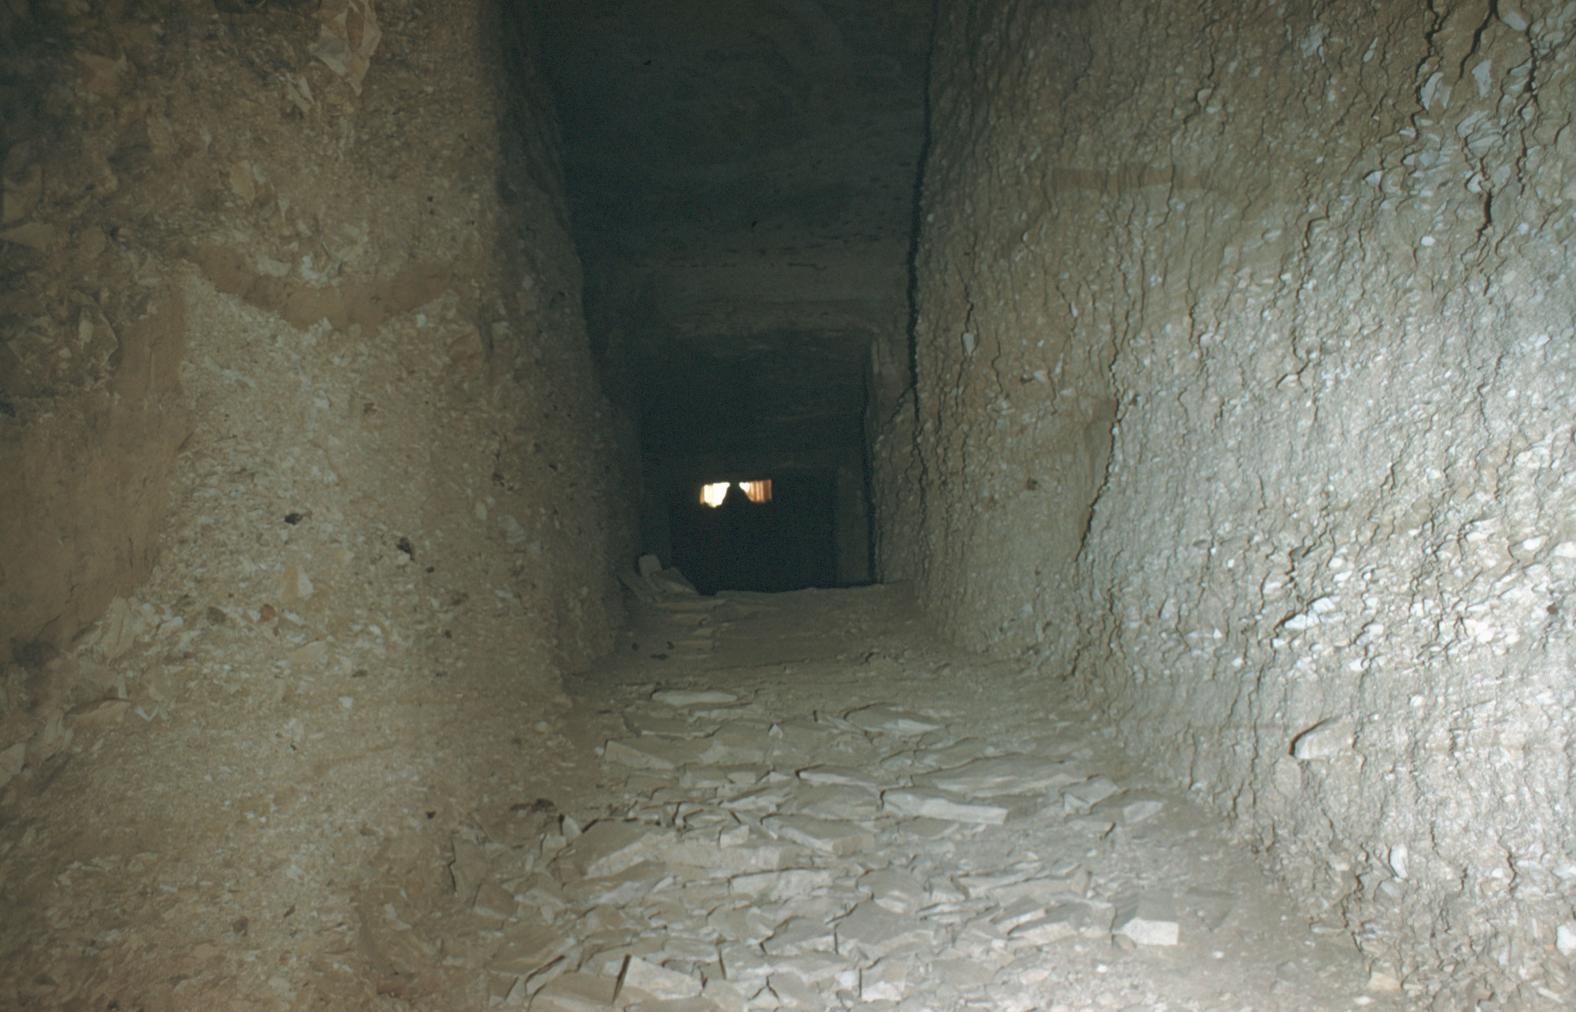
See entire tombWhen cutting corridor D1a, the tomb cutters broke through the ceiling of the side chamber Fa in KV 10. The walls of this abandoned cutting are undecorated. The floor ascends in three stepped levels.
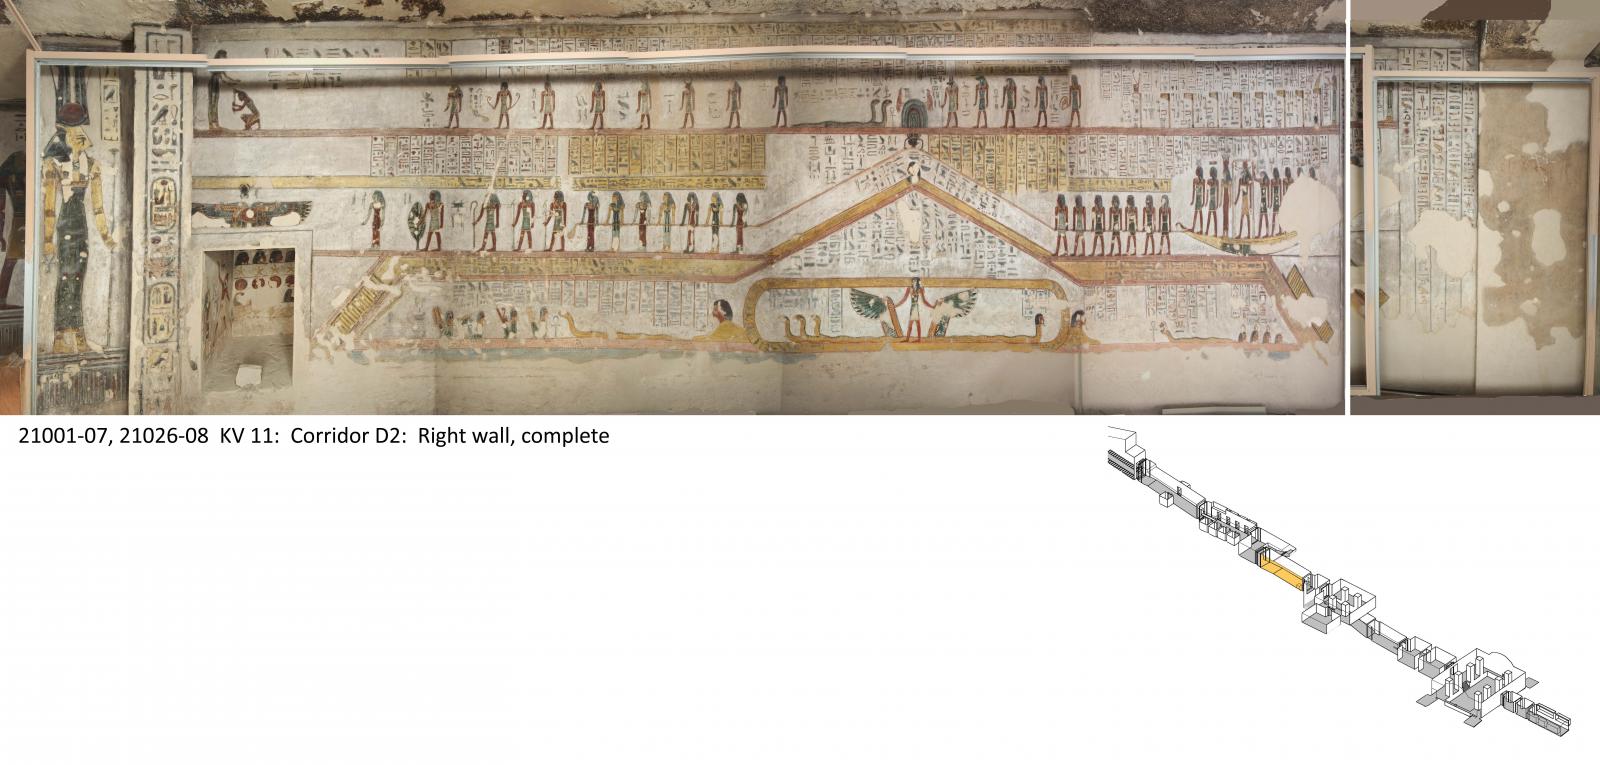
Corridor D2
See entire tombThis represents the completed extension of corridor D after its axis was shifted to the west. The floor slopes up slightly from front to back and the axis is not parallel to that of the preceding corridors, but bends to the west. The ceiling height is increases one-third of the way into the corridor, perhaps due to the rising floor level. The left (east) and right (west) walls are decorated with the fourth and fifth hours of the Imydwat.
Porter and Moss designation:

Gate D2
See entire tombThis gate in the rear (south) wall of D1 lies near the southwest corner of the chamber. A slot for a wooden beam to hold door pivots in the soffit and two grooves in the floor beyond the threshold indicate provision for a pair of wooden door leaves. On the lintel of the gate is a winged sun disk, and on the reveals are the names of Rameses III.
Porter and Moss designation:
Gate E
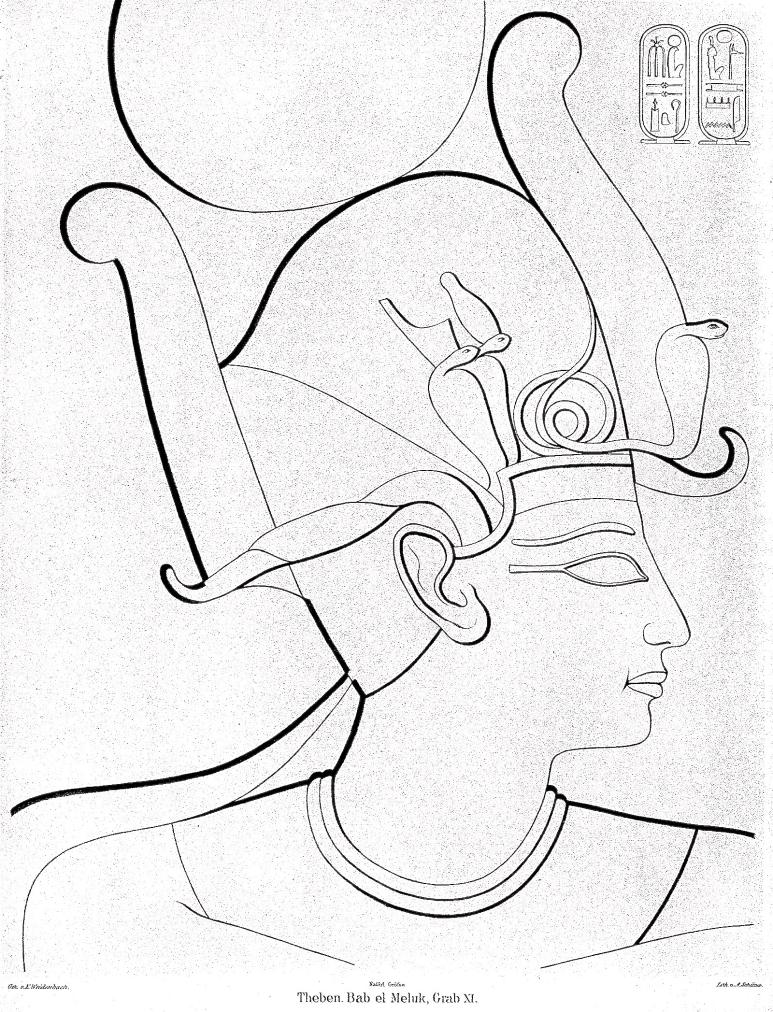
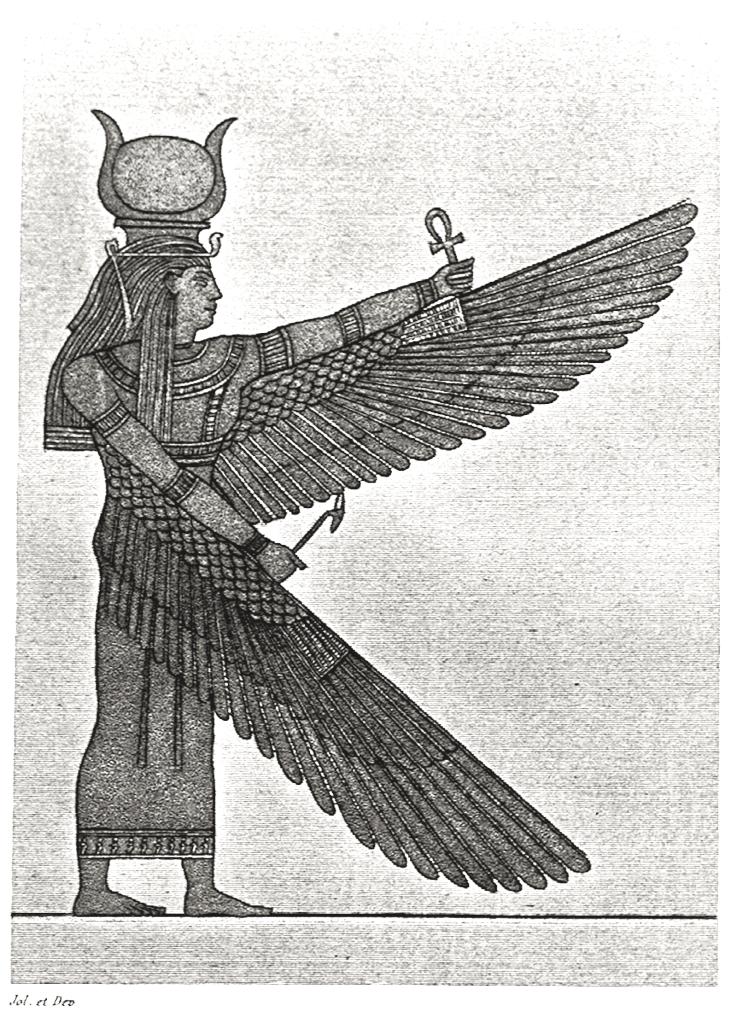
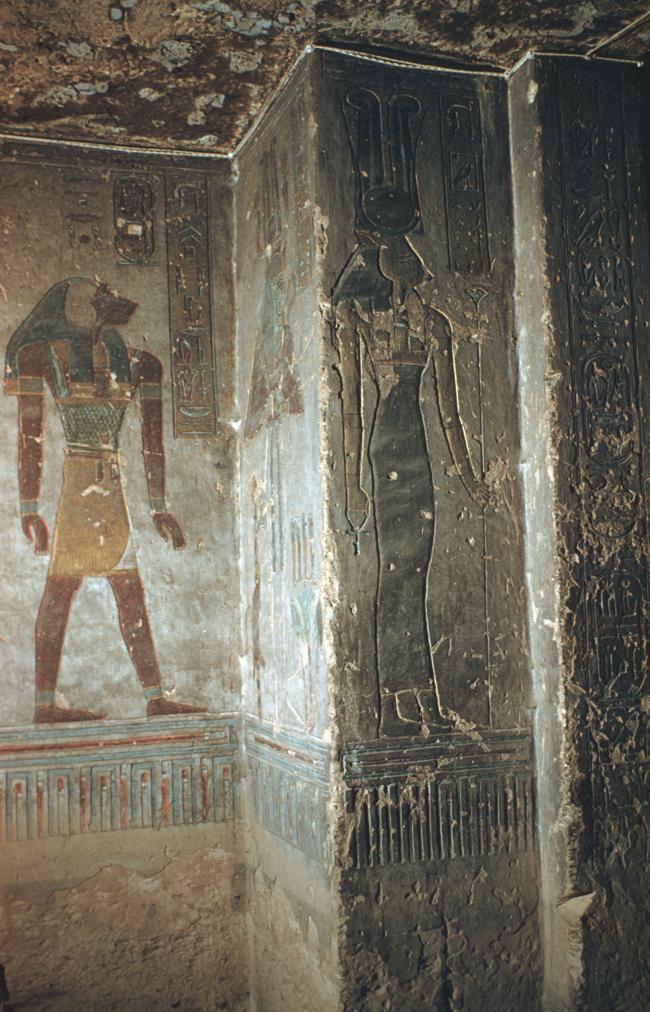
See entire tombOn the lintel of gate E is a winged sun disk, and on the reveals and outer thicknesses are the names of Rameses III. The inner thickness of the compound jamb show a human-headed Hathor on the left (east) and a unique cow-headed Hathor on the right (west). A step creates a descent from corridor D2 to well chamber E.
Porter and Moss designation:
Well chamber E
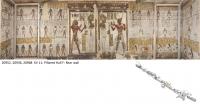
See entire tombThe chamber contains a well shaft which has been only partially cleared. The left (east) half of the chamber is decorated with Osiris, Imsety, Anubis, Duamutef, Isis, and Iwnmutef. The right (west) half shows Osiris, Hapy, Qebehsenuef, Nephthys, Serqet, and Iwnmutef.
Porter and Moss designation:

Gate F
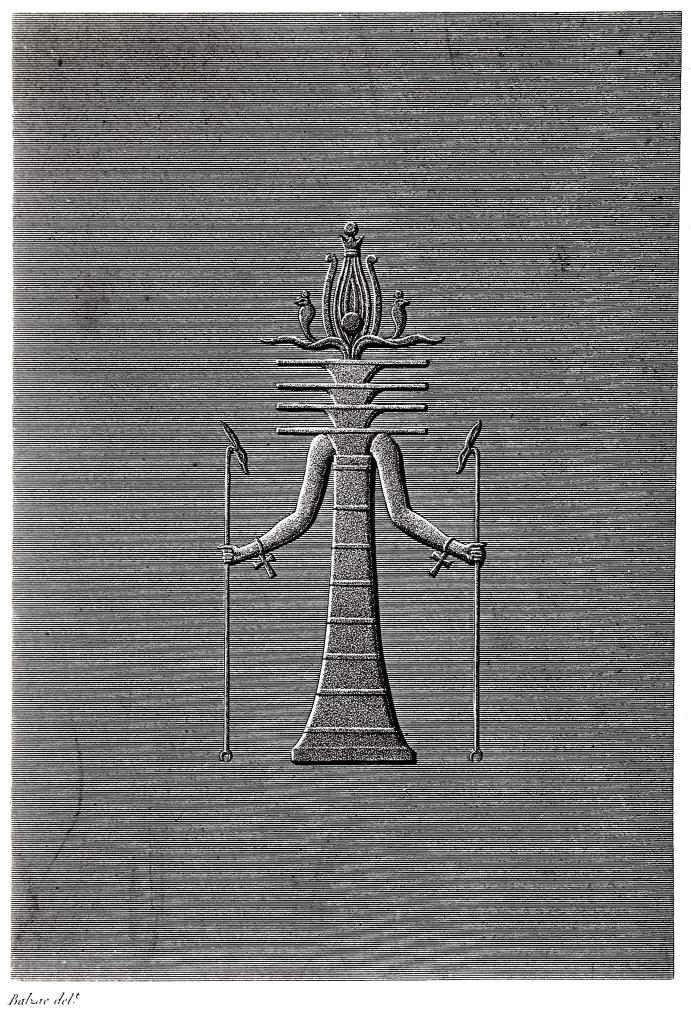
See entire tombThe inner thicknesses of this gate show a djed-pillar on the left (east) and Osiris on the right (west). The gate contains a compound jamb, a step and two door pivot holes which show that double wooden doors were to close the gate.
Porter and Moss designation:
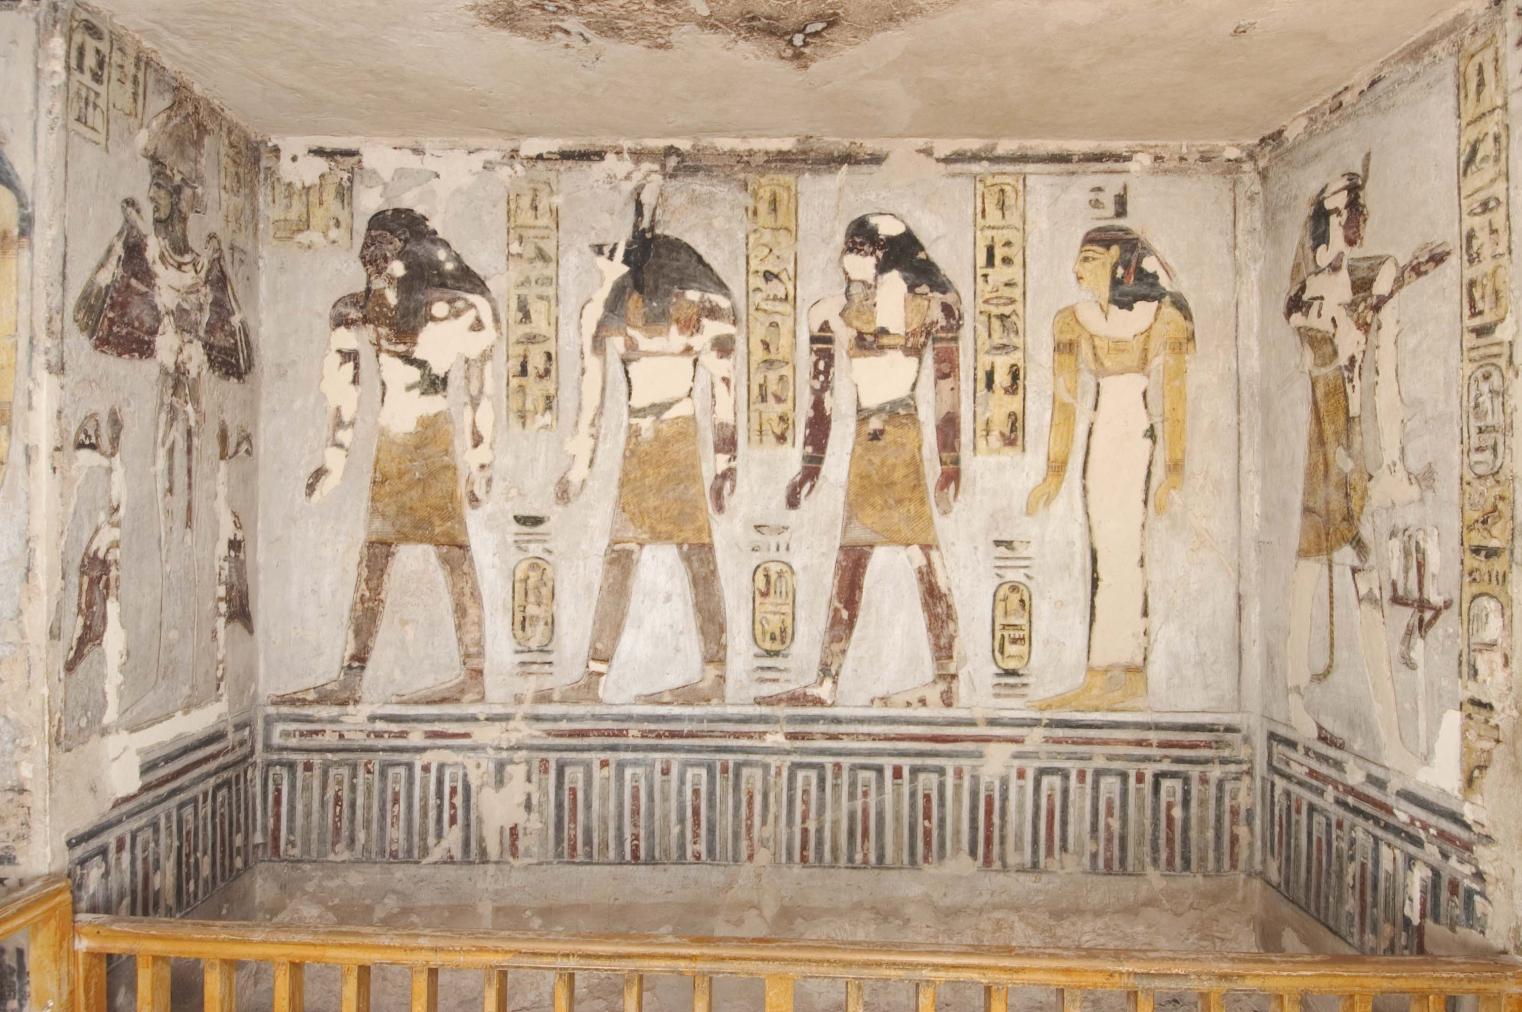
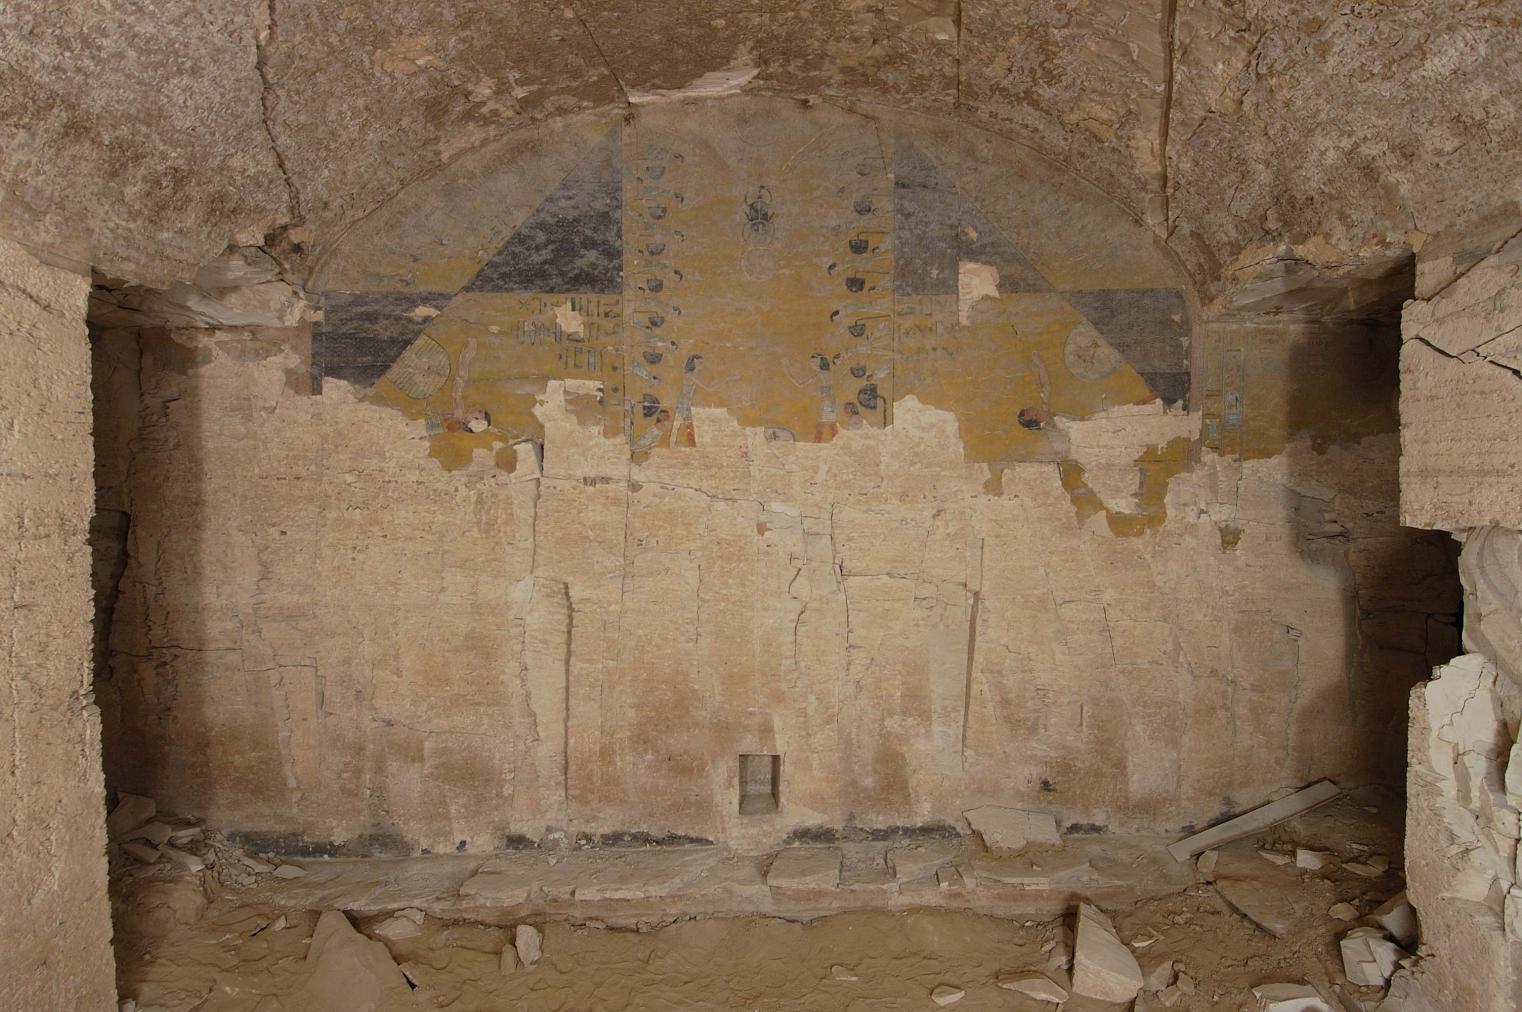
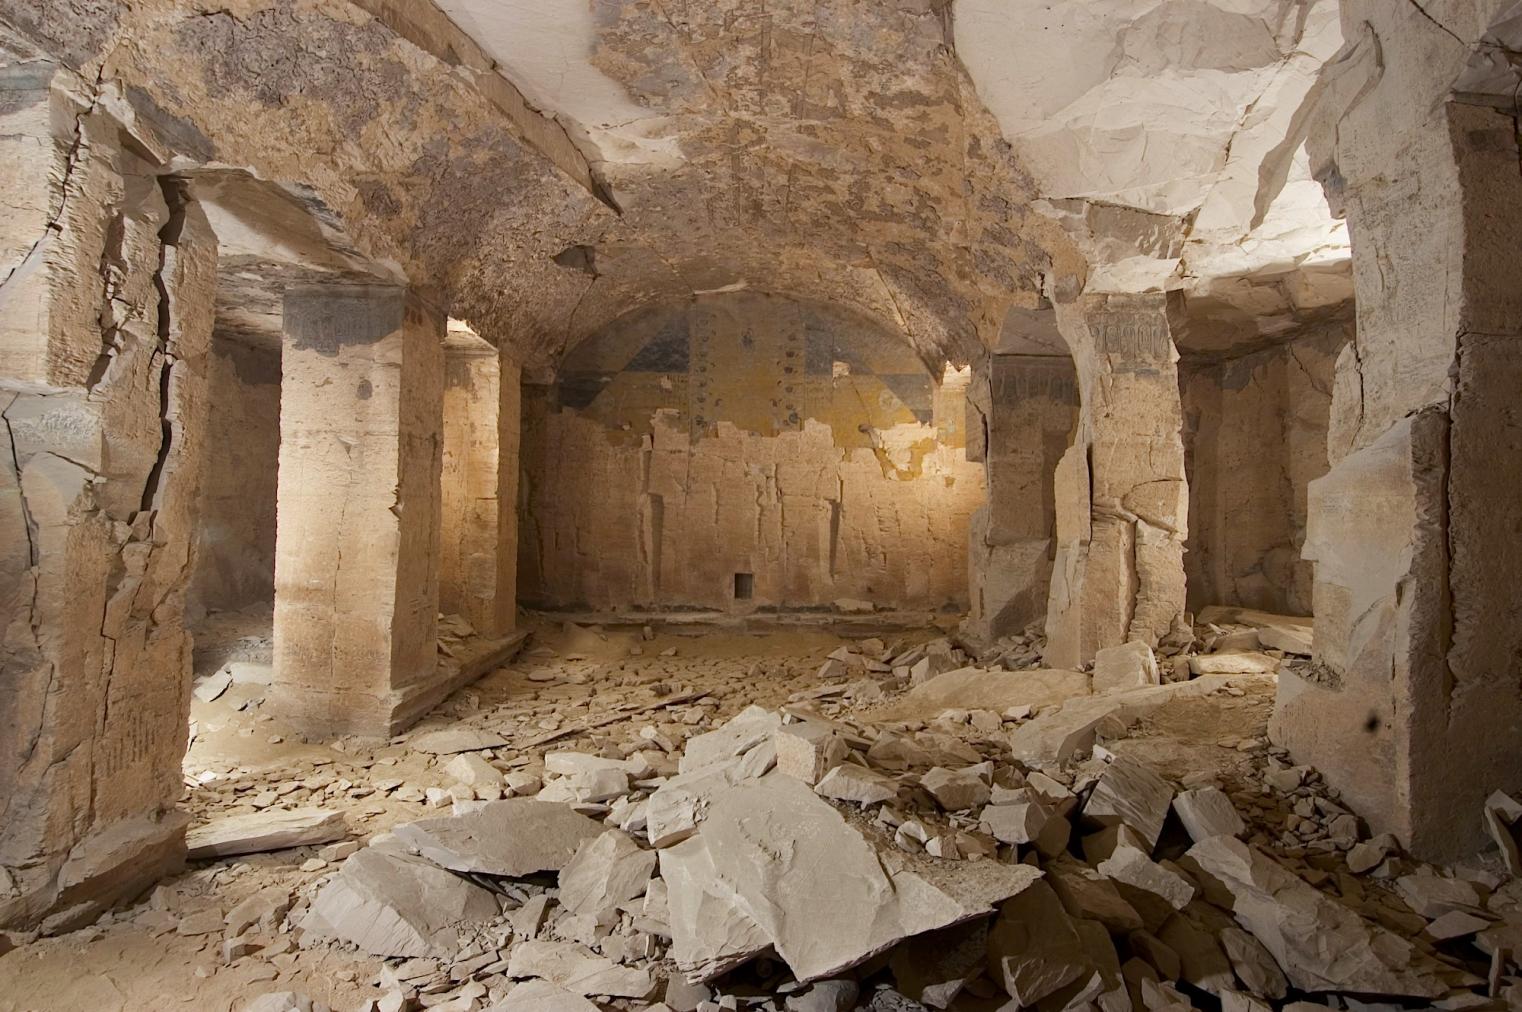
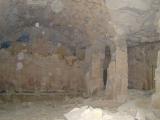
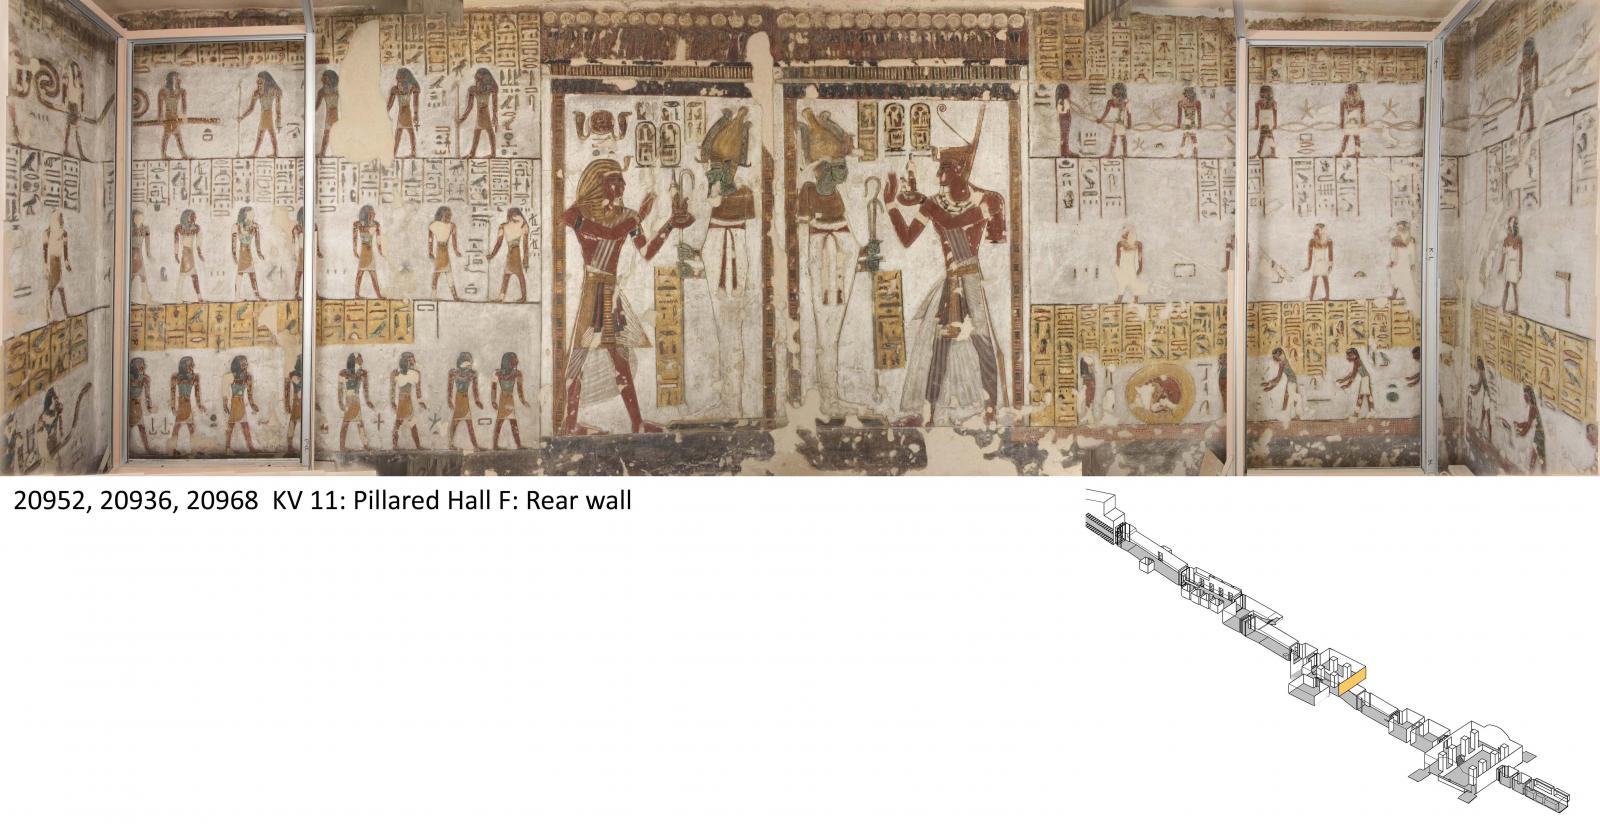
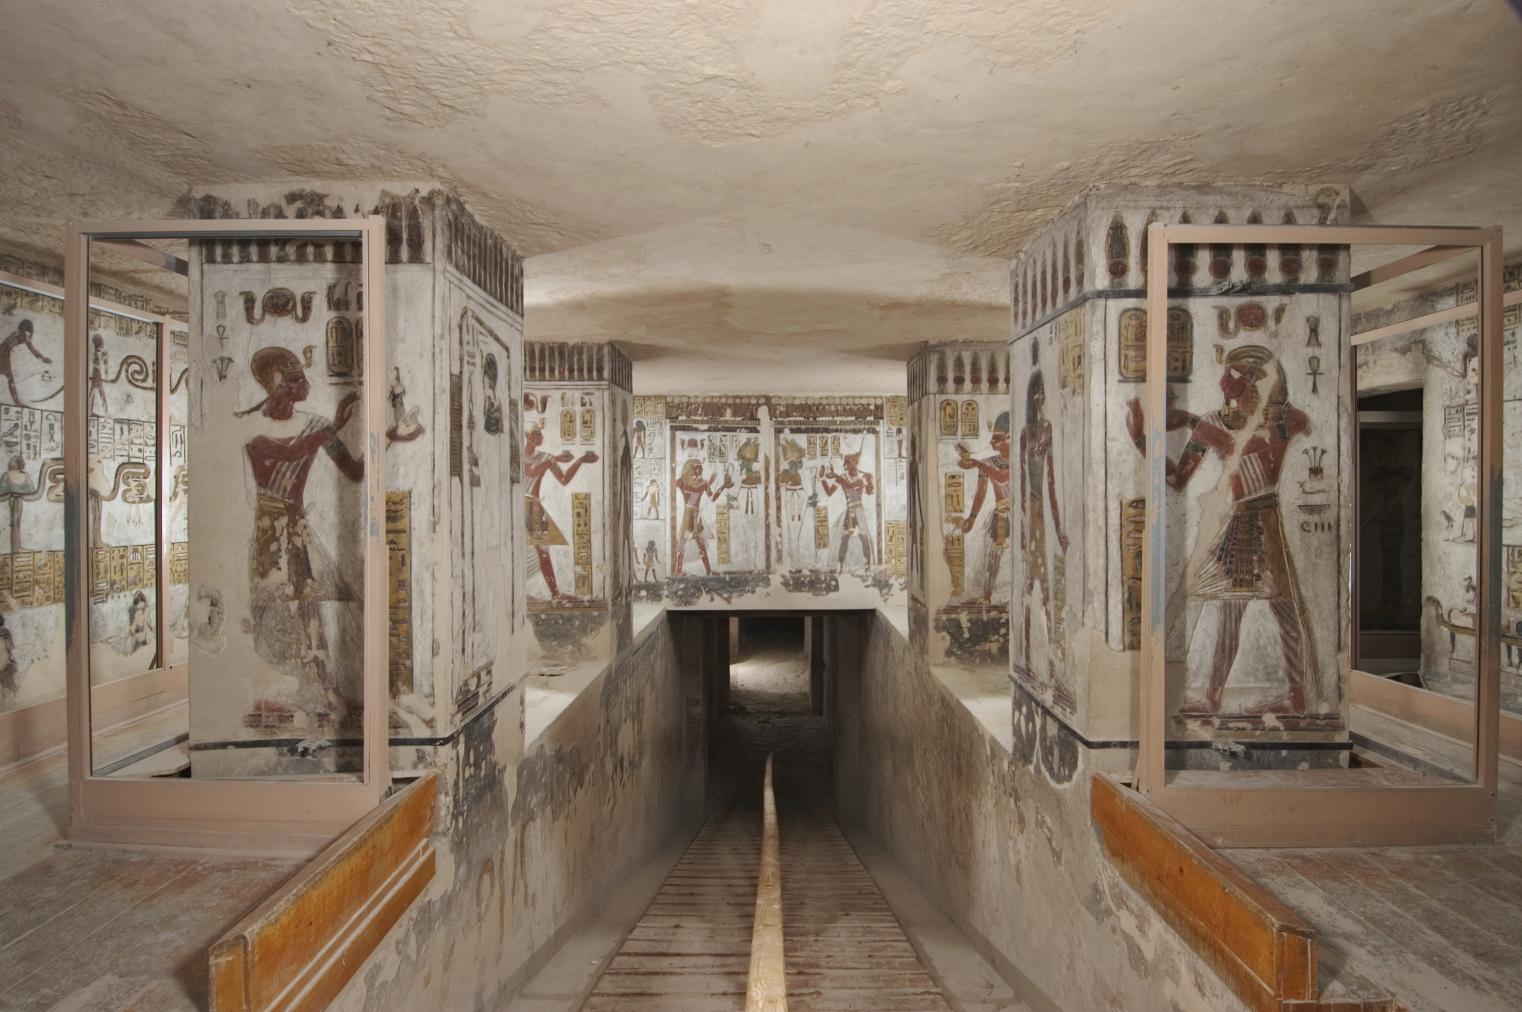
Pillared chamber F
See entire tombTwo pillars stand on each side of a center descent. The center of the right (west) wall contains a gate opening into a large side chamber. The left (east) half of the chamber is decorated in three registers, showing the fourth division (P)/fifth hour (H) of the Book of Gates.
The fifth division(P)/sixth hour (H) is on the right half. There is a double scene in the center of the rear (south) wall showing the king offering to Osiris. Scenes on the pillars show Rameses III offering to Ma'at, Ptah, Ra-Horakhty, Thoth, Geb, Kheperi, Atum, and Nefertem. There are two Hieratic graffiti on pillar 4 recording Dynasty 21 activity involved in the reburial of the king. Another on the right wall names the God's Father, Hori.
Porter and Moss designation:
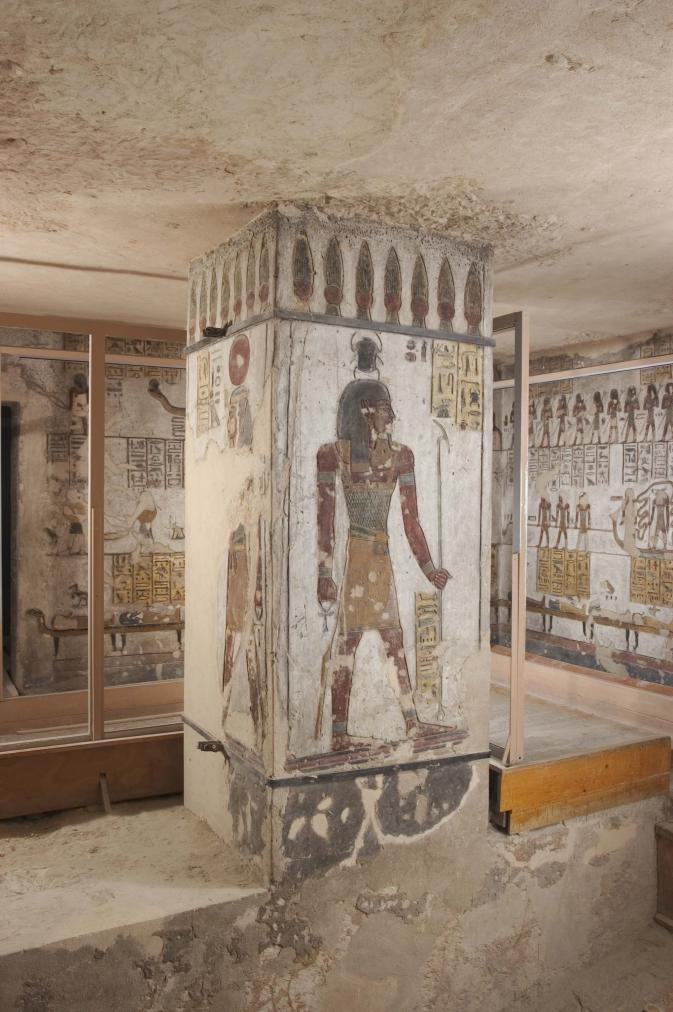
KV 11: Pillared Hall F: Pillar 3: left and rear faces Image #20976


Descent F
See entire tombThe walls of the sloped descent show two winged cobras representing Nekhbet on the left (east) and Wadjet on the right (west), together with Anubis jackals and text of Rameses III.
Porter and Moss designation:
Gate Fa
See entire tombThis gate lies in the right (west) wall of chamber F and leads to a side chamber. The single door pivot hole and compound jamb show that a wooden door was to close the gate. The inner thicknesses of this gate show Neit on the left (south) and Serqet on the right (north).
Porter and Moss designation:
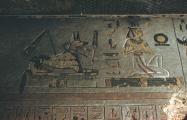
Side chamber Fa
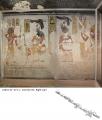
See entire tombThe front (east) wall of this side chamber shows Rameses III led by Thoth and Horus on the right (south) half, and Rameses III offering an image of Ma'at to Osiris on the left (north) half. The side and rear walls are decorated with the sixth division (P)/seventh hour (H) of the Book of Gates.
Porter and Moss designation:

Rameses III offering Ma'at to Osiris.

Gate G
See entire tombThe names of Rameses III appear on the reveals. The left (east) thickness depicts Horus performing the Opening of the Mouth ritual and the right (west) thickness shows a goddess with two vases.
Porter and Moss designation:
Corridor G
See entire tombThe side walls of this corridor are decorated with the Opening of the Mouth ritual. Beam holes in the side walls in front of gate H once held the beam used for maneuvering the sarcophagus into the burial chamber.
Porter and Moss designation:
Gate H
See entire tombOn the reveals of gate H are the names of Rameses III, and on the thicknesses are Neit and Serqet.
Porter and Moss designation:
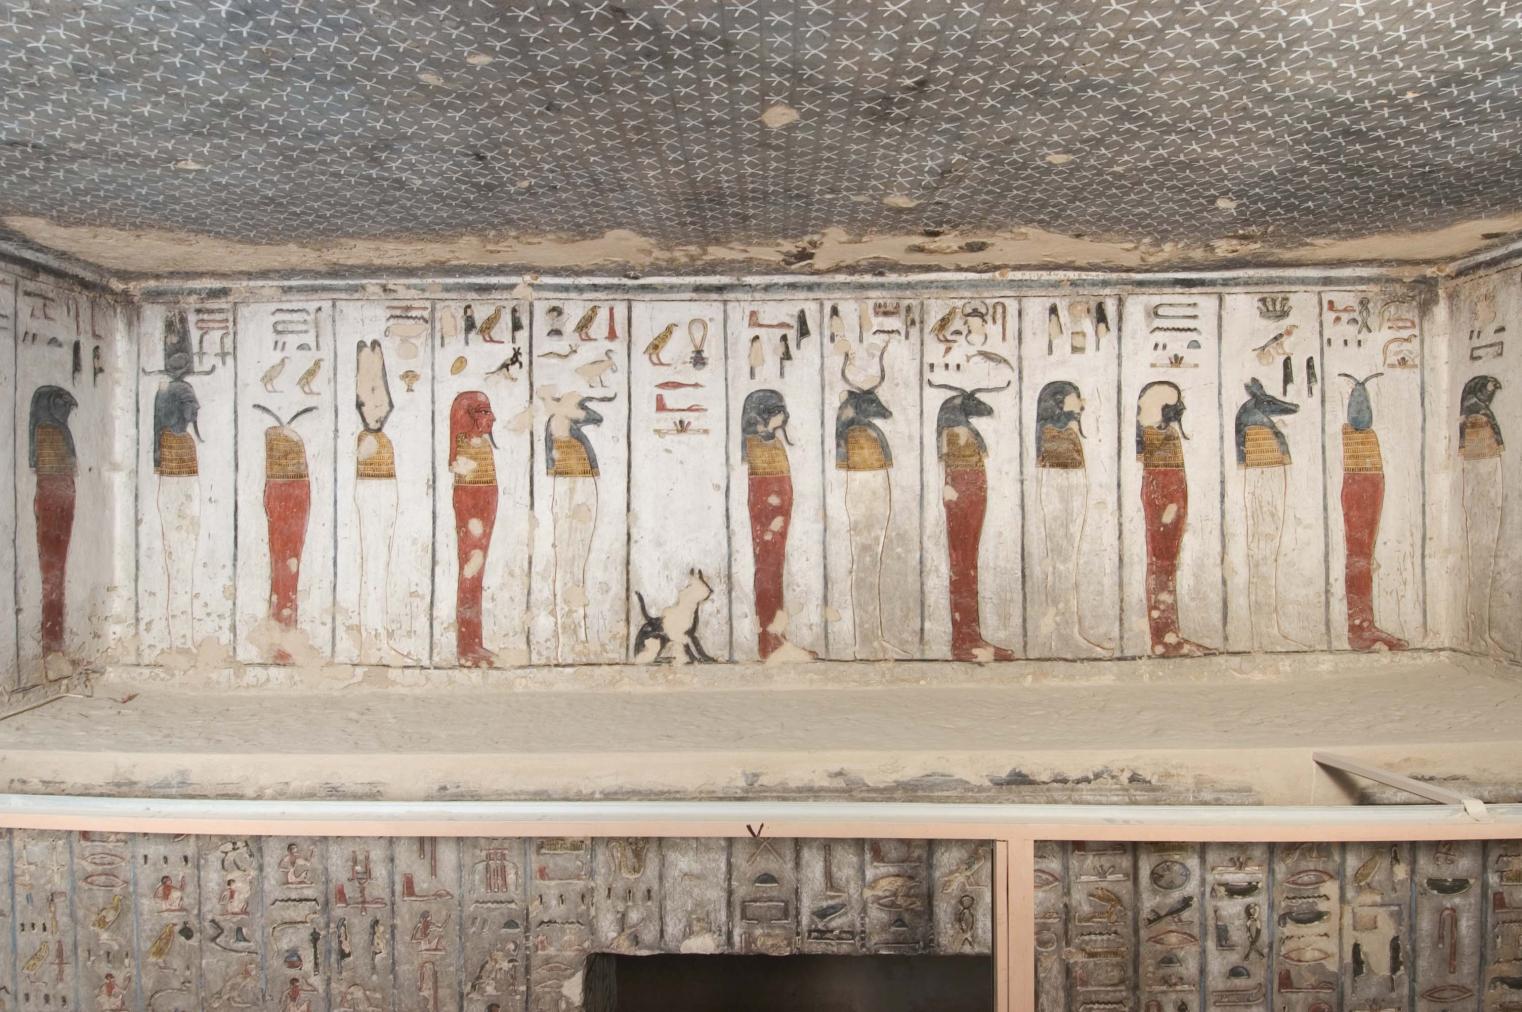
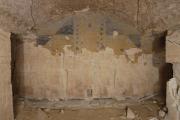
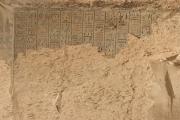
Chamber H
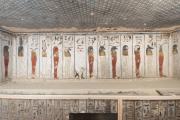
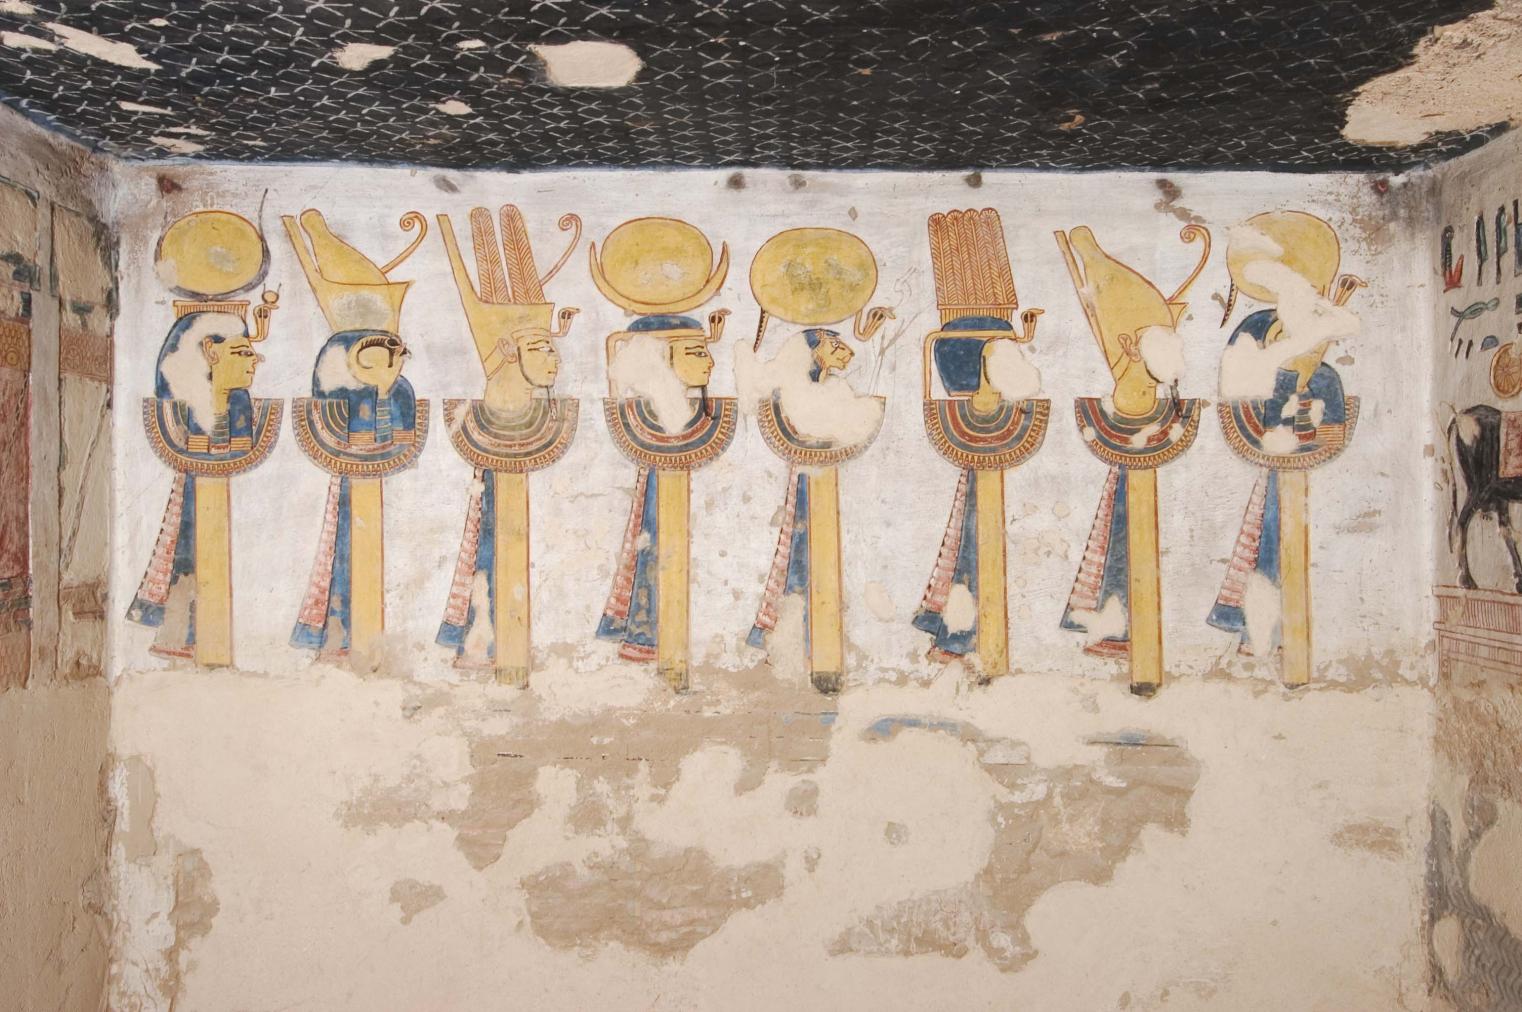
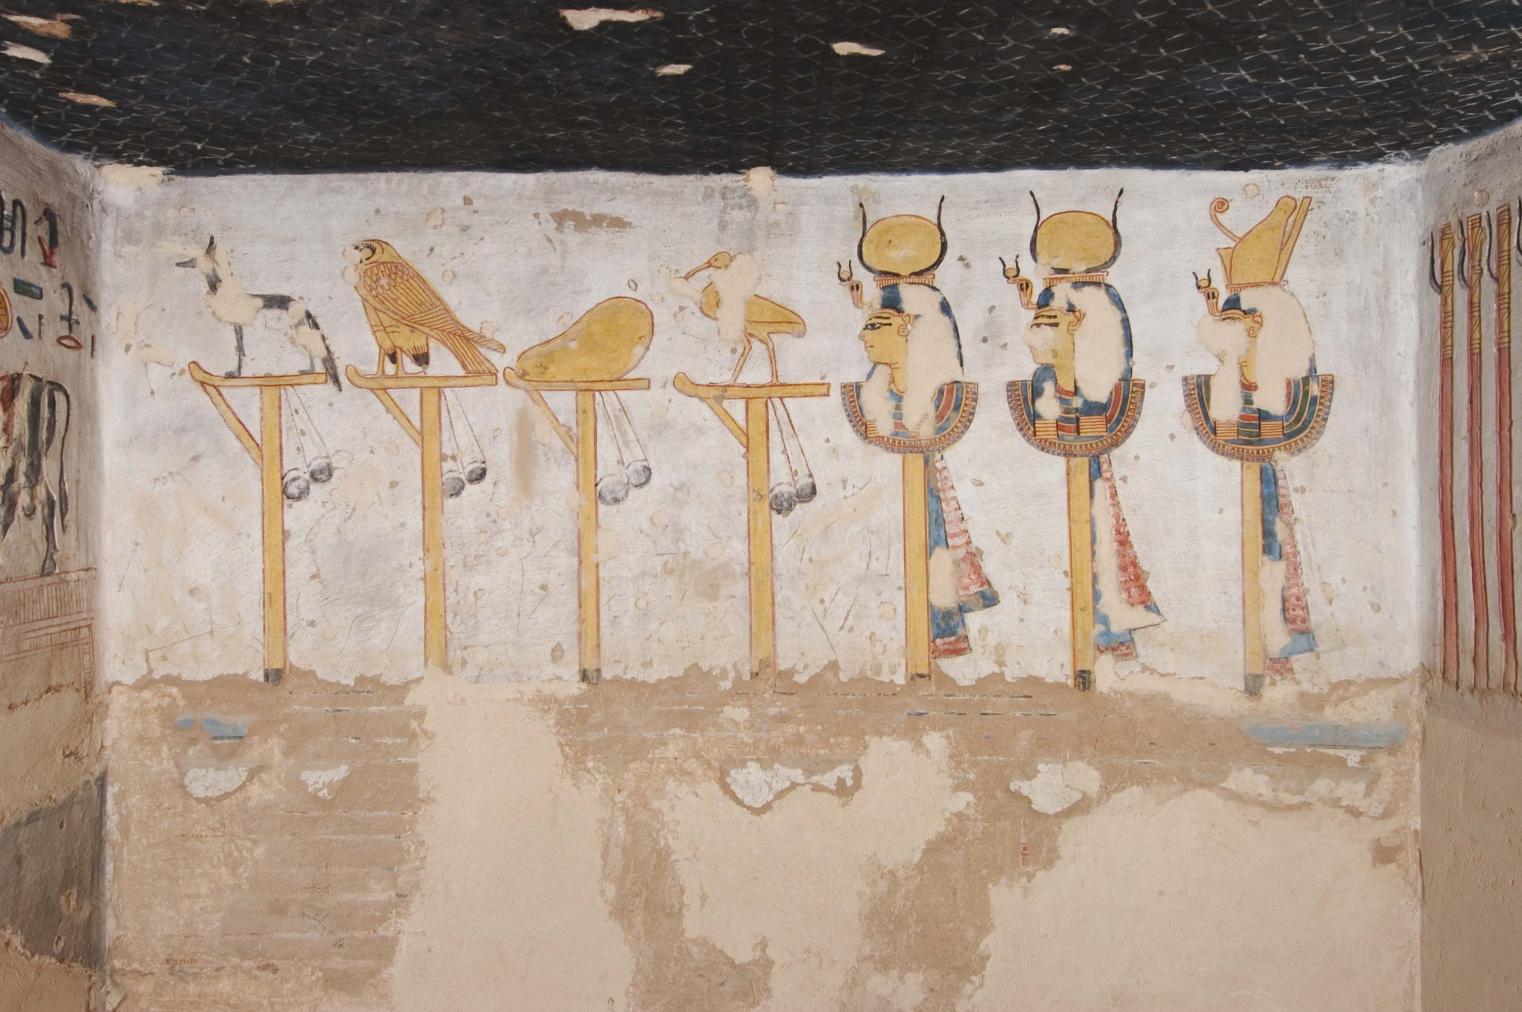
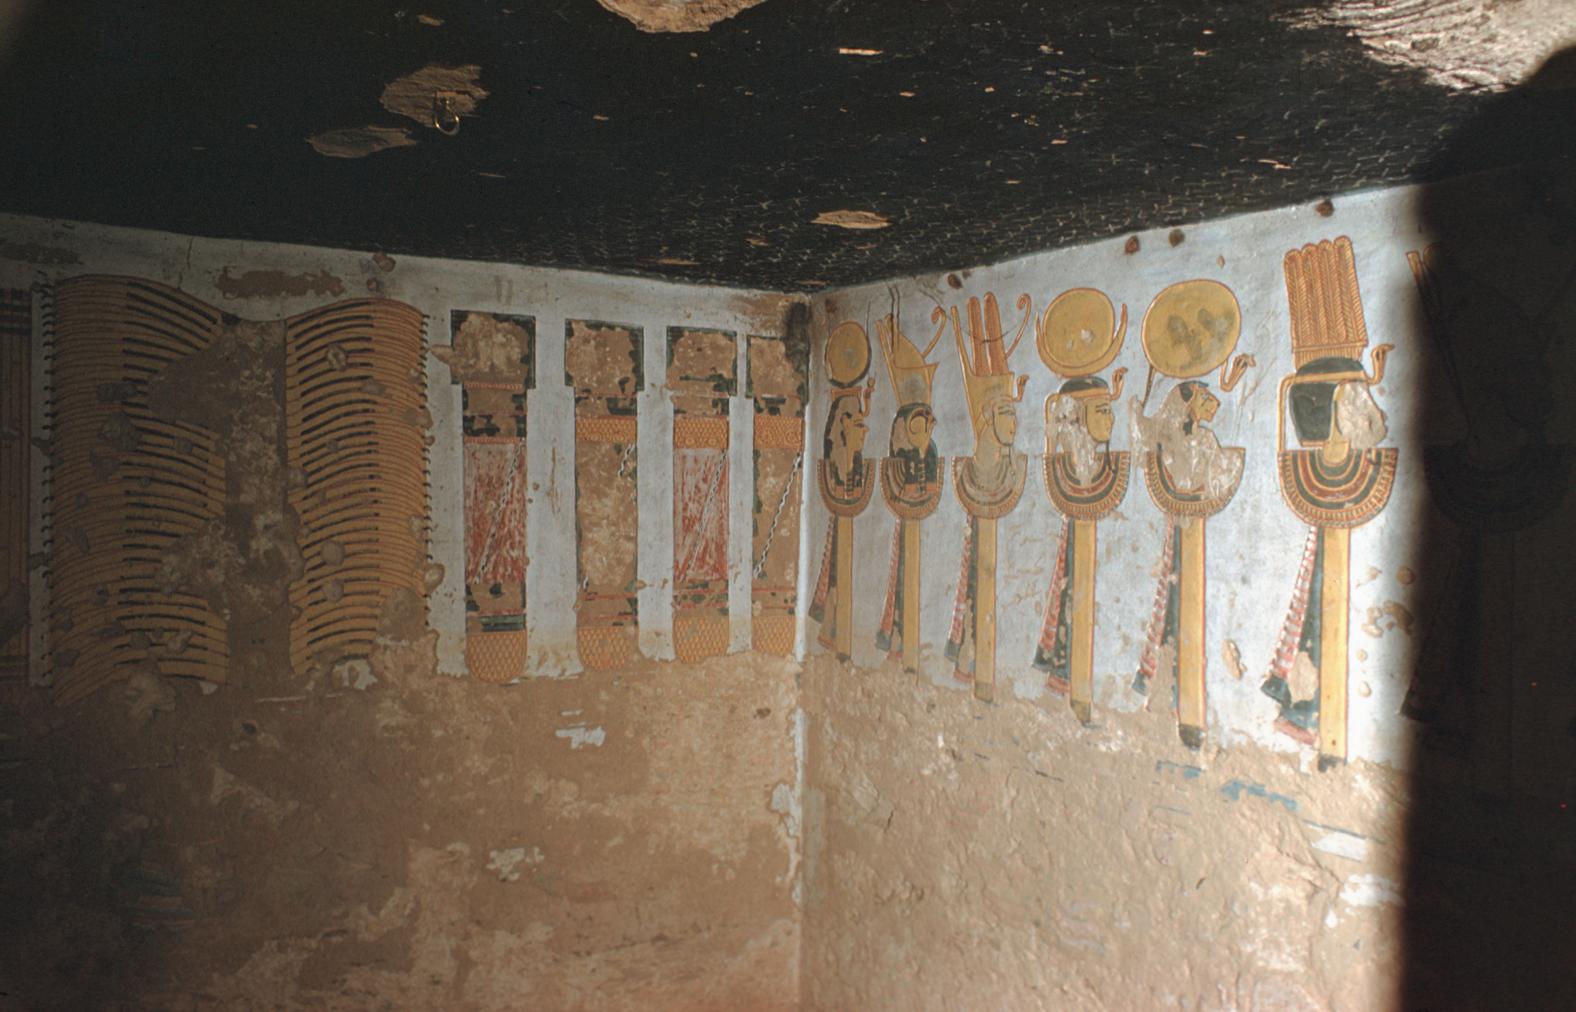
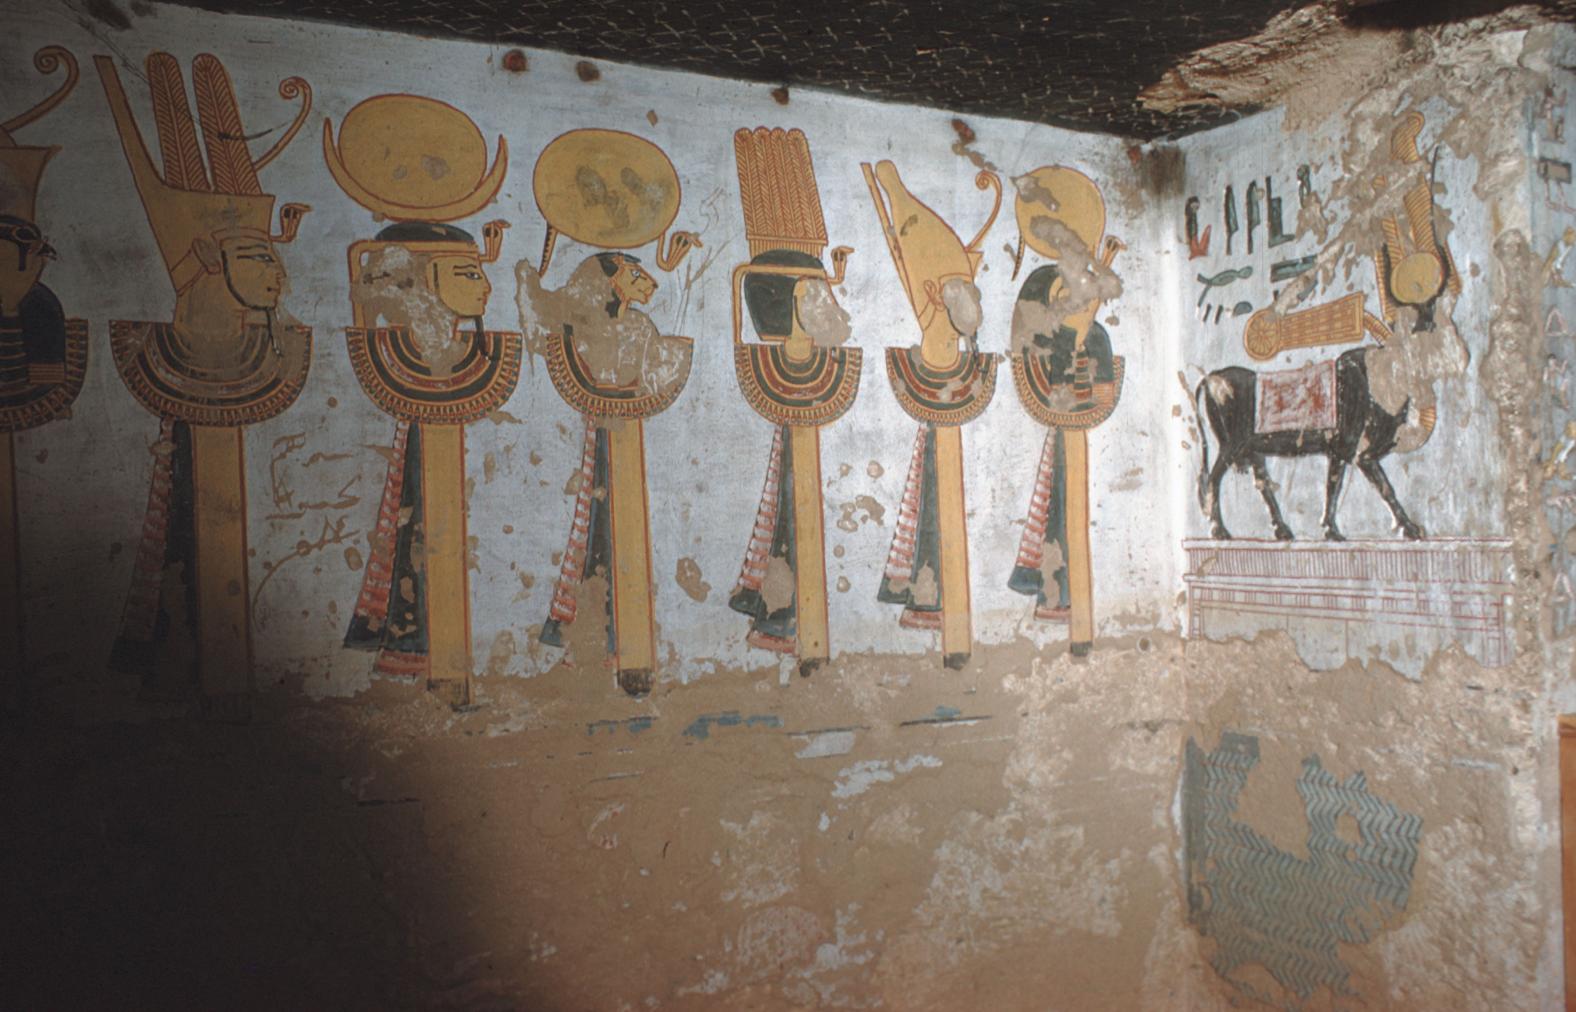
See entire tombThe walls of chamber H are decorated with 20 different male and female deities holding scepters in shrines, with small offering tables placed in front of them. All the figures face in the direction of the sarcophagus chamber. The names of these deities are preserved, mainly thanks to the notes of Champollion, Lefèbure, and Wilkinson. This chamber has been only partially excavated. It has suffered a loss of decoration and structural damage.
Porter and Moss designation:
Gate I
See entire tombOn the right (west) reveal of gate I are dedication texts, and on the right thickness the names of Rameses III, and a representation of Isis. The floor of the gate is only partially excavated.
Porter and Moss designation:
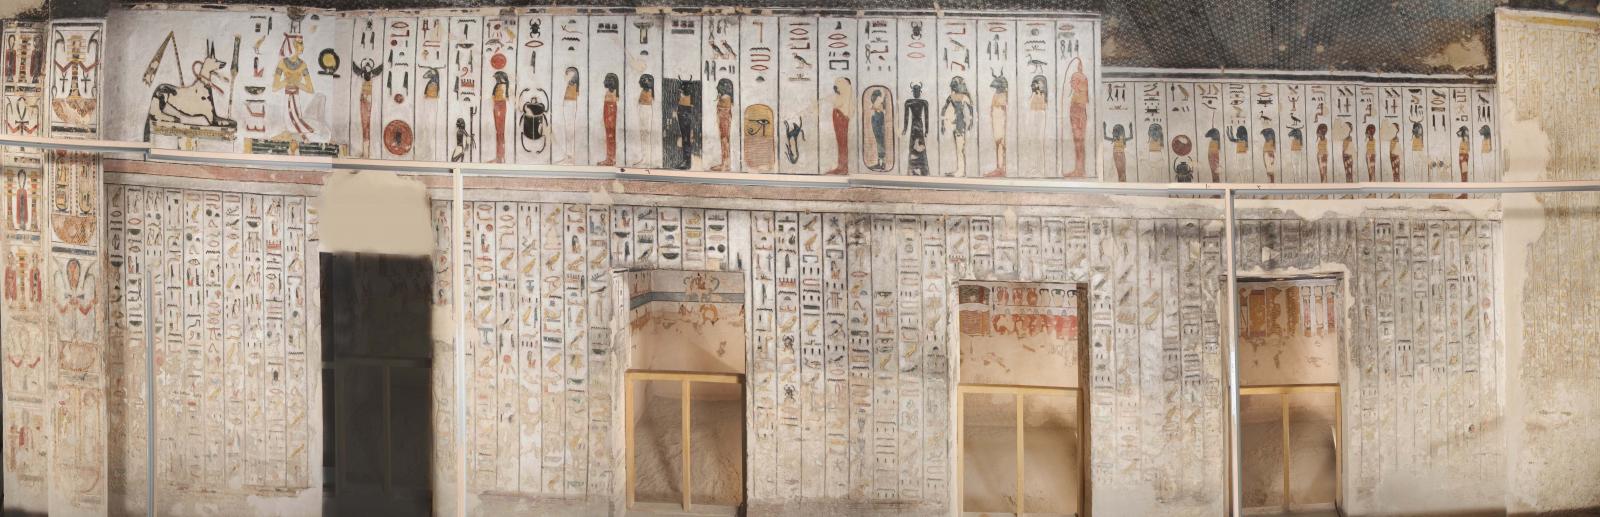
Chamber I
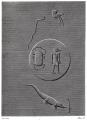
See entire tombThe east wall scene in this partially excavated chamber was decorated with a depiction of the Hall of Double Ma'at. The opposing west wall shows Rameses III being lead by different deities, including Imsety, Ima, Horus, Thoth, Anubis, and Atum. The north and south walls were decorated with four groups of protective deities or 'demons' flanking the doorways. Several of these 'demons' are holding snakes or lizards and are seated upon cube-shaped thrones. The east half of the south wall specifically shows a group of three squatting 'demons' having, respectively, an antelope's head, a tortoise in place of the head, and a crocodile head. Four groups of these same 'demons' are also depicted in the four corners of the sarcophagus chamber. The chamber has suffered from loss of decoration and structural damage.
Porter and Moss designation:

Gate J
See entire tombGate J has a compound jamb, on the reveals of which are the names of Rameses III, and on the thicknesses of which are protective deities including a lion and jackal on the left (east) and Hery-Ma'at and lion-headed god on the right (west). The floor of the gate is only partially excavated.
Porter and Moss designation:
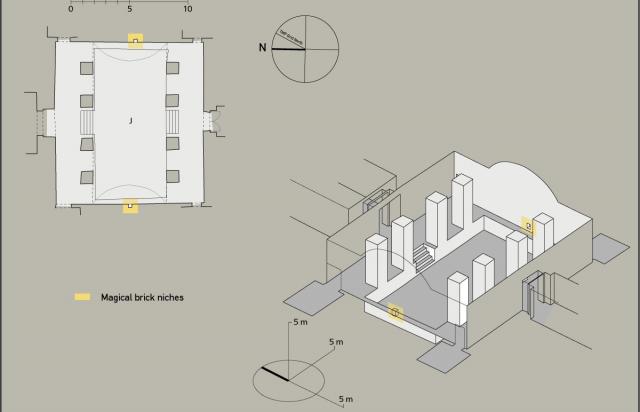
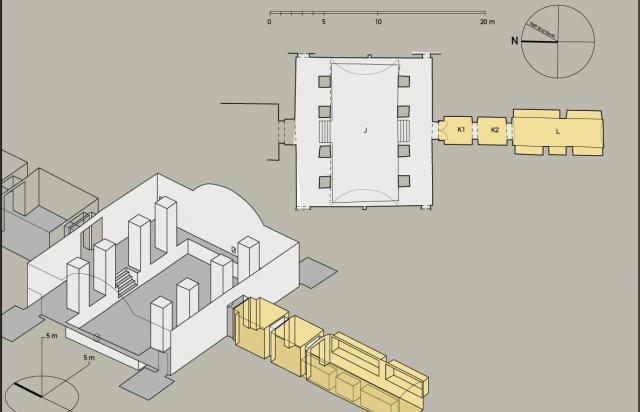
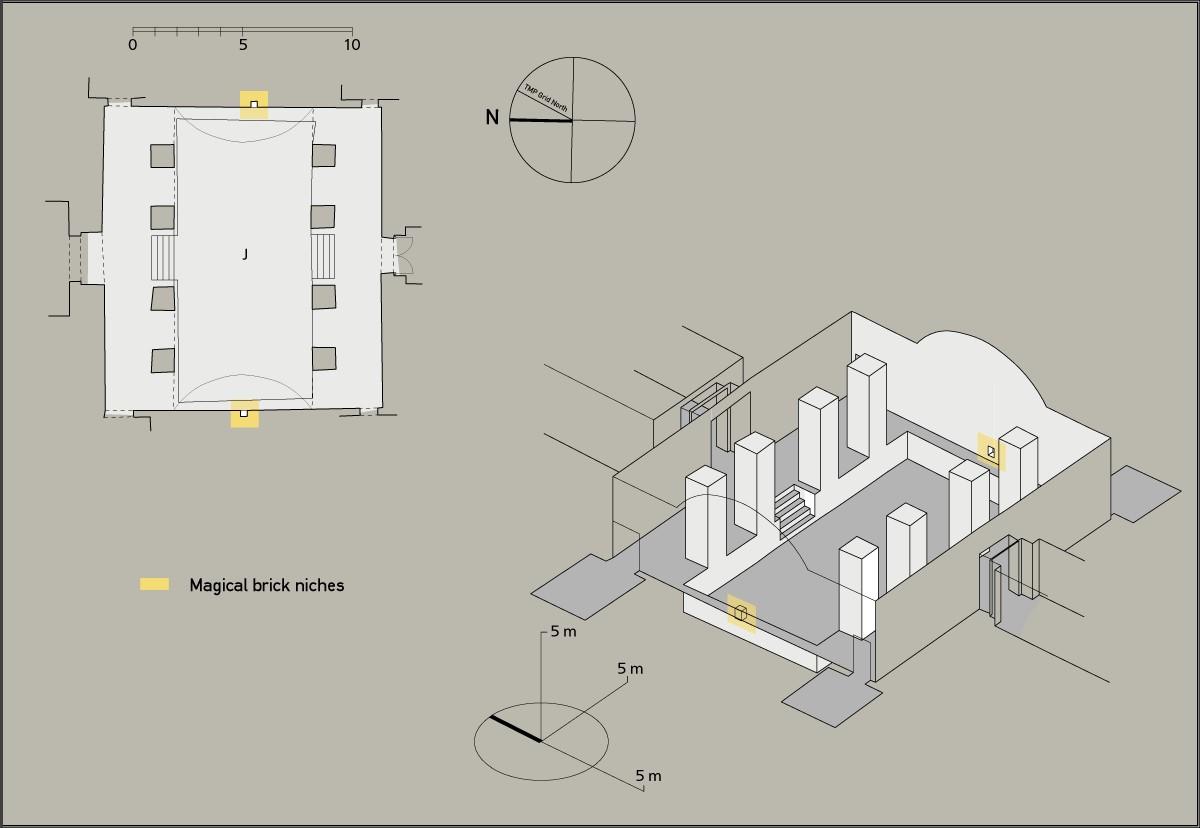
Burial chamber J
See entire tombThe vaulted section of this unexcavated burial chamber lies at a right angle to the axis of the tomb. Four pillars stand on platforms to the front (north) and rear (south) of the sunken central section. There are narrow benches topped with a cavetto cornice against the walls at the left (east) and right (west) ends of the central section, and a recess in the center of the wall just above each shelf. A stepped ramp descends from each platform to the sunken floor between each central pair of pillars and a cavetto cornice runs along the upper edge of each platform. At each corner of the chamber, a gate opens into a small side chamber. The walls are decorated with the Book of the Dead, Book of Gates, and Book of the Earth. The pillars show Rameses III making offerings to Atum, Thoth, Ra-Horakhty, Horus, Osiris-Wennefer, Soped, Anubis, Ptah-Tatjenen, Geb, Ra, Ptah-Sokar-Osiris, Shu, and Onuris. The chamber has suffered a loss of decoration and structural damage, particularly breakage of the pillars and collapse of the flat sections of the ceiling.
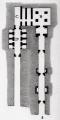
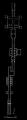
Chamber plan:
RectangularRelationship to main tomb axis:
PerpendicularChamber layout:
Pillared front and rear upper level, sunken central lower levelFloor:
Two levelsCeiling:
Vaulted center, flat sides
Porter and Moss designation:
.")
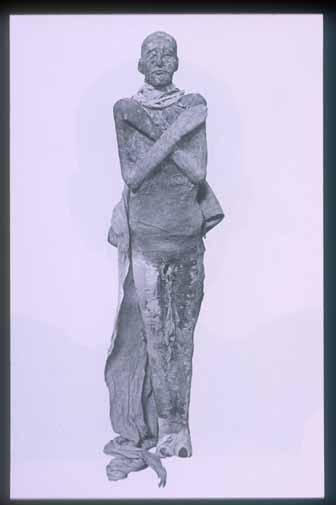
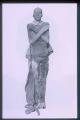
Mummy of Rameses III: head (side view).

Lateral head x-ray of Rameses III.

.")


Gate Ja
See entire tombThe lintel has collapsed.
Porter and Moss designation:
Side chamber Ja
See entire tombThis chamber is located to the northeast of the burial chamber. It is partly excavated, and the floor is covered with stone debris from wall and ceiling collapse. The walls are decorated with a bull, seven cows, and sacred oars from Book of the Dead spell 148.
Porter and Moss designation:
Gate Jb
See entire tombThe lintel has collapsed.
Porter and Moss designation:
Side chamber Jb
See entire tombThe chamber is located to the southeast of the burial chamber. It is partly excavated and the floor is covered with stone debris from ceiling and wall collapse. Two jackals on standards and ten images of Osiris are depicted on the walls, similar to the decoration in side chamber Ce.
Porter and Moss designation:
Gate Jc
See entire tombThe gate lies in the southwest corner of the burial chamber.
Porter and Moss designation:
Side chamber Jc
See entire tombThis chamber to the southwest of the burial chamber is only partly excavated. The floor is covered with stone debris from the ceiling's collapse. The decoration is the Book of the Heavenly Cow, with deities on the right (east) wall, texts on the side walls and a large-scale figure of the cow on the left (west) wall.
Porter and Moss designation:
Gate Jd
See entire tombThe gate lies in the northwest corner of the burial chamber.
Porter and Moss designation:
Side chamber Jd
See entire tombThis chamber is located to the northwest of the burial chamber. The chamber is only partly excavated and the floor is covered with limestone fragments in part as a result of ceiling collapse. The Fields of Iaru are shown on all the walls of this chamber.
Porter and Moss designation:
Gate K1
See entire tombThis partly excavated gate has a compound jamb. One door pivot hole remains intact. There are cartouches on the reveals of gate K1, and on the right (west) thickness is a baboon with a bow.
Porter and Moss designation:
Chamber K1
See entire tombThis square chamber is only partly excavated, and the floor is covered with stone fragments. The poorly preserved wall decoration shows protective deities or 'demons' in shrines, holding snakes and seated before offering tables.
Porter and Moss designation:
Gate K2
See entire tombThe reveals show Horus on the left (east) and a man holding a gazelle's head before a table of offerings on the right (west). The thicknesses are decorated with cartouches.
Porter and Moss designation:
Chamber K2
See entire tombThis square chamber is only partly excavated. Remains of decoration show protective deities in shrines.
Porter and Moss designation:
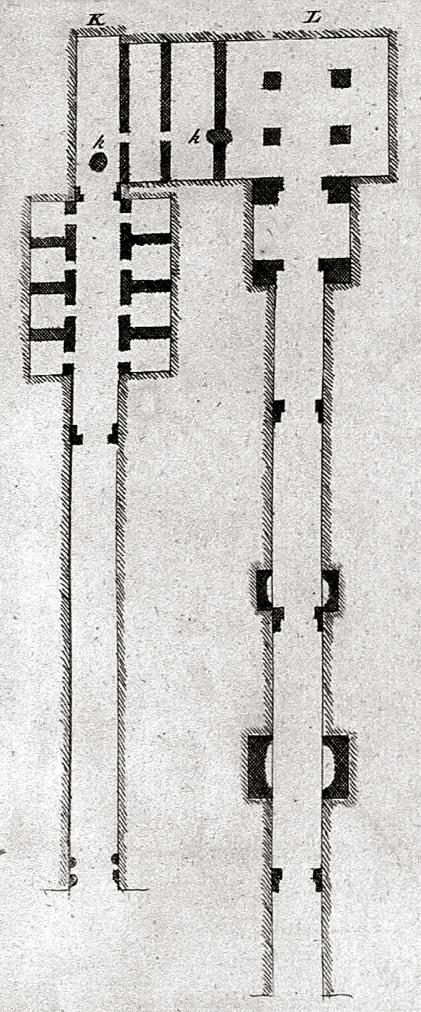
Gate L
See entire tombThere are cartouches on the reveals and thicknesses of gate L.
Porter and Moss designation:


Chamber L
See entire tombThe left (west) wall contains three recesses and the right (east) wall two. There are deities on the rear walls of the recesses. The ceiling is vaulted. Champollion and Lefébure reported the fifth gate of the Book of the Gates with the judgment hall of Osiris on the rear (south) wall. This decoration has now fallen away. There has been ceiling collapse and the floor is covered with stone chips and fragments.
Porter and Moss designation:

About
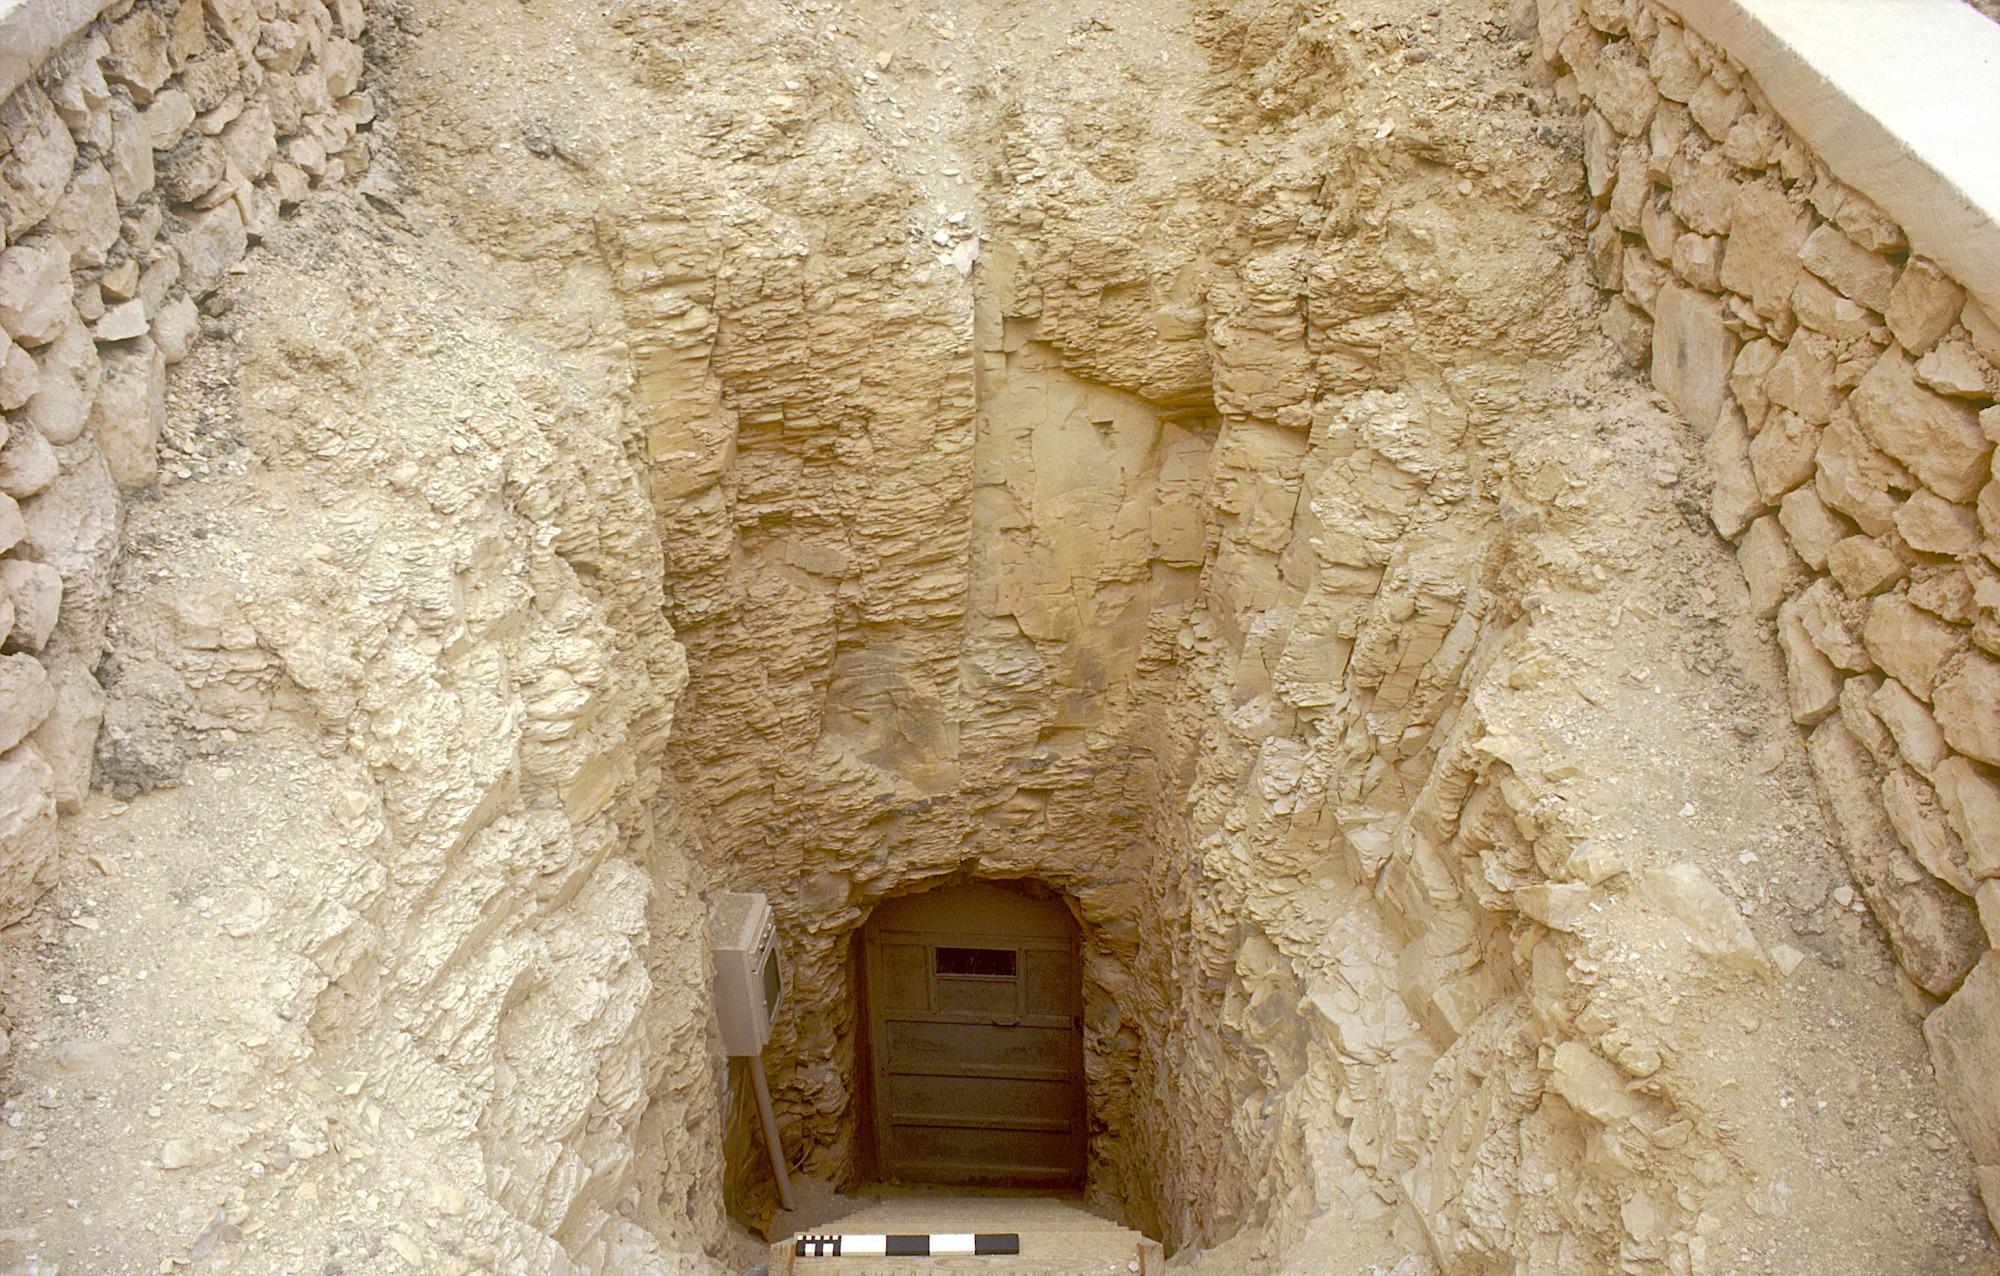
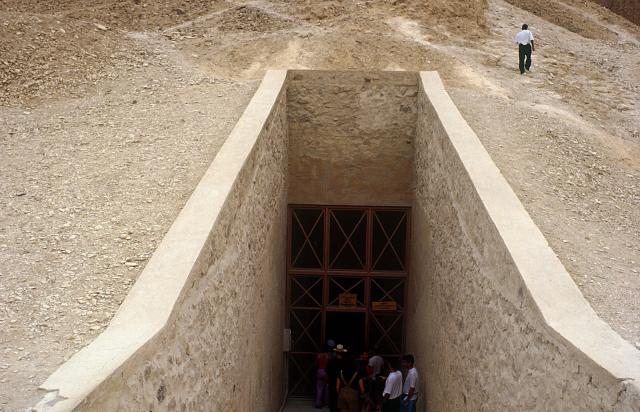
About
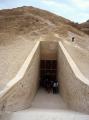
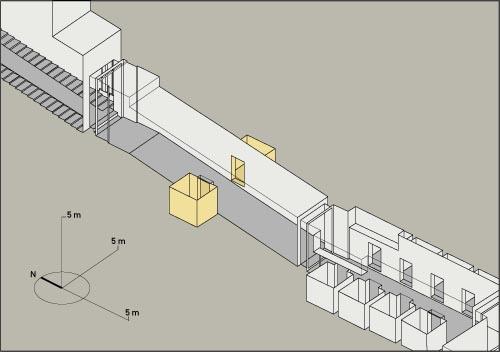
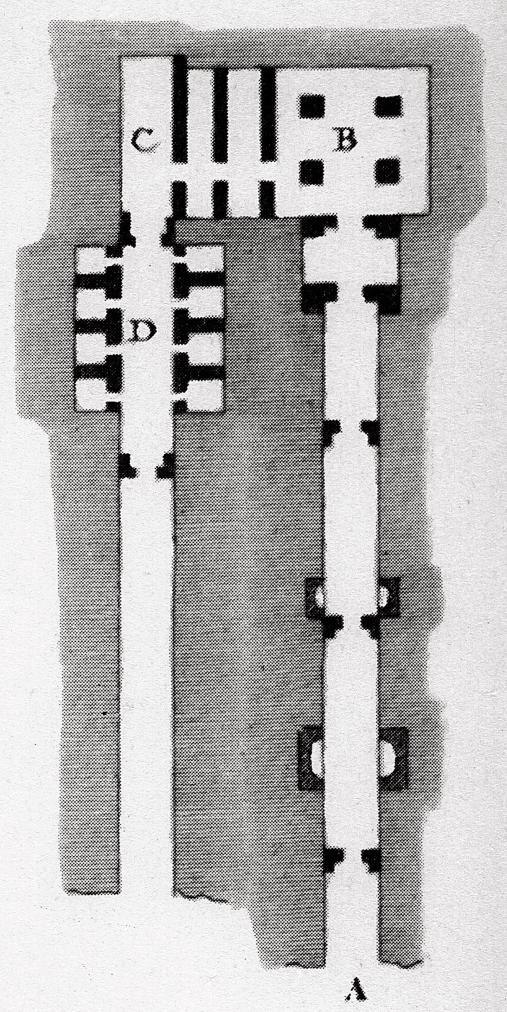
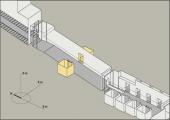
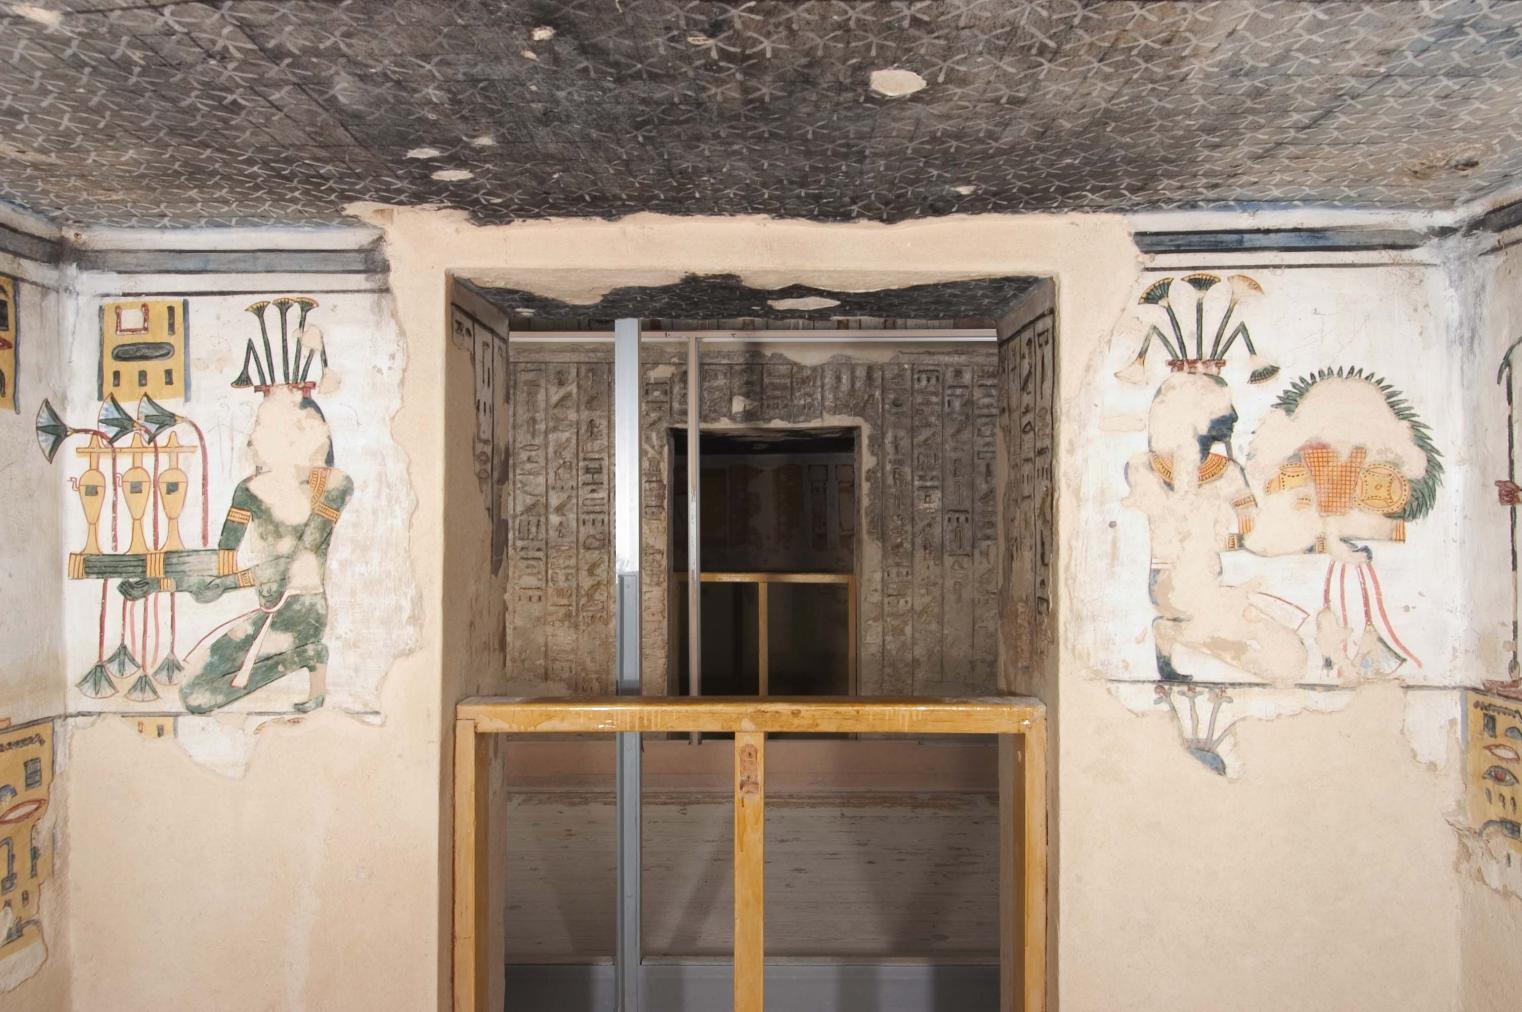
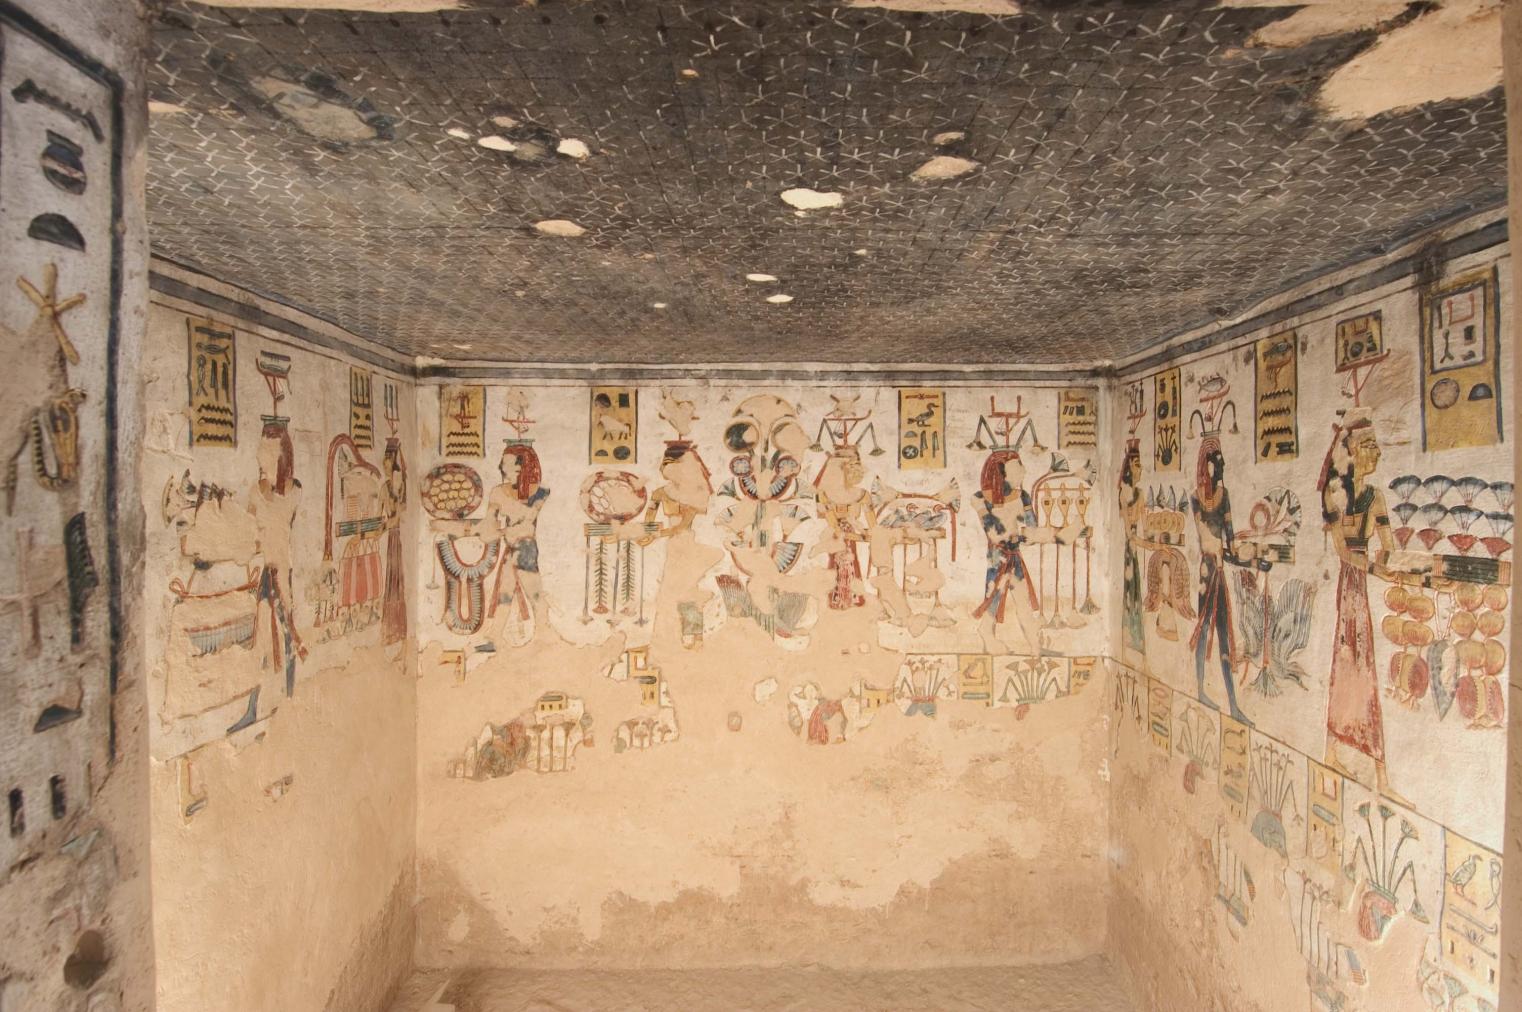
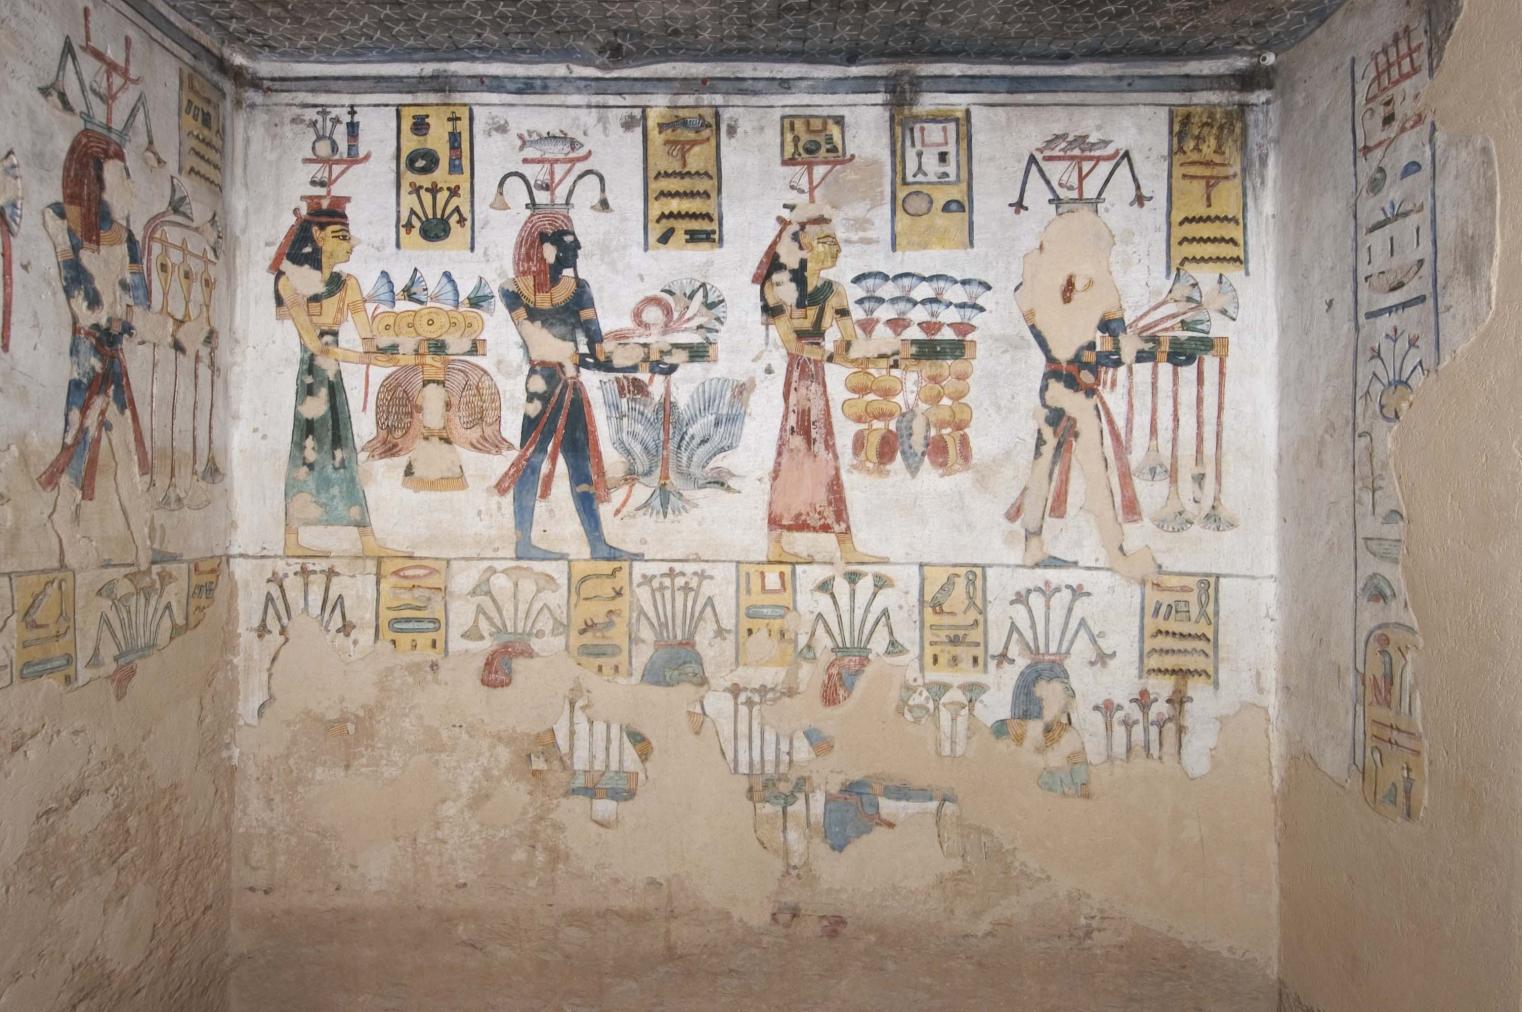
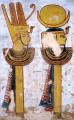
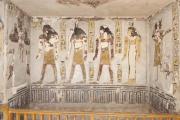
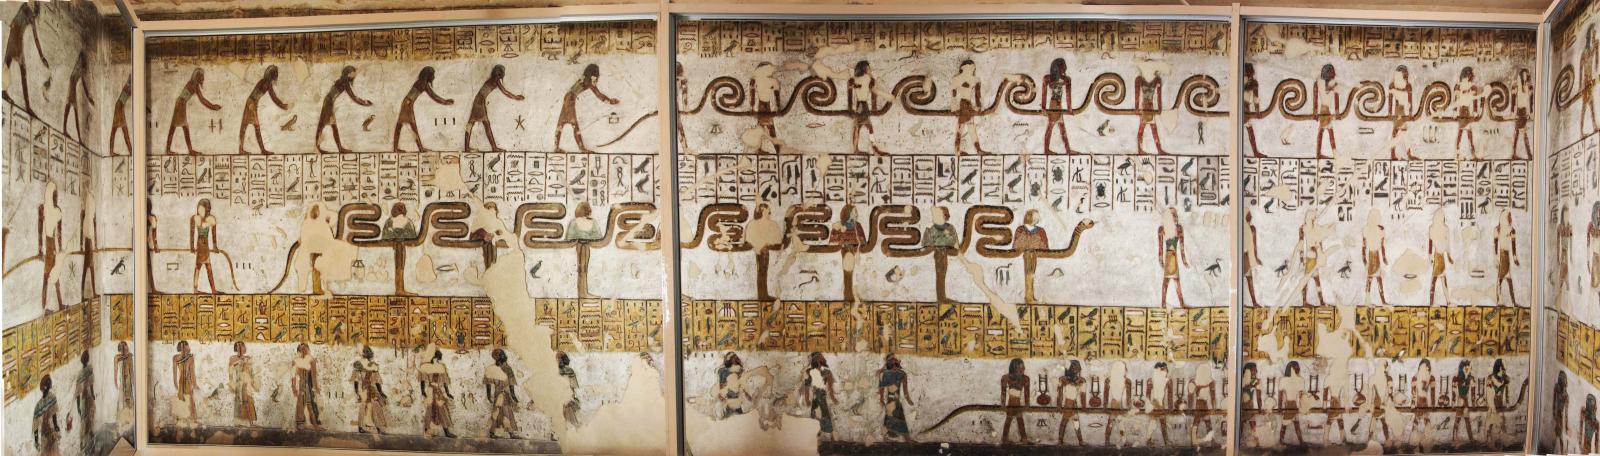
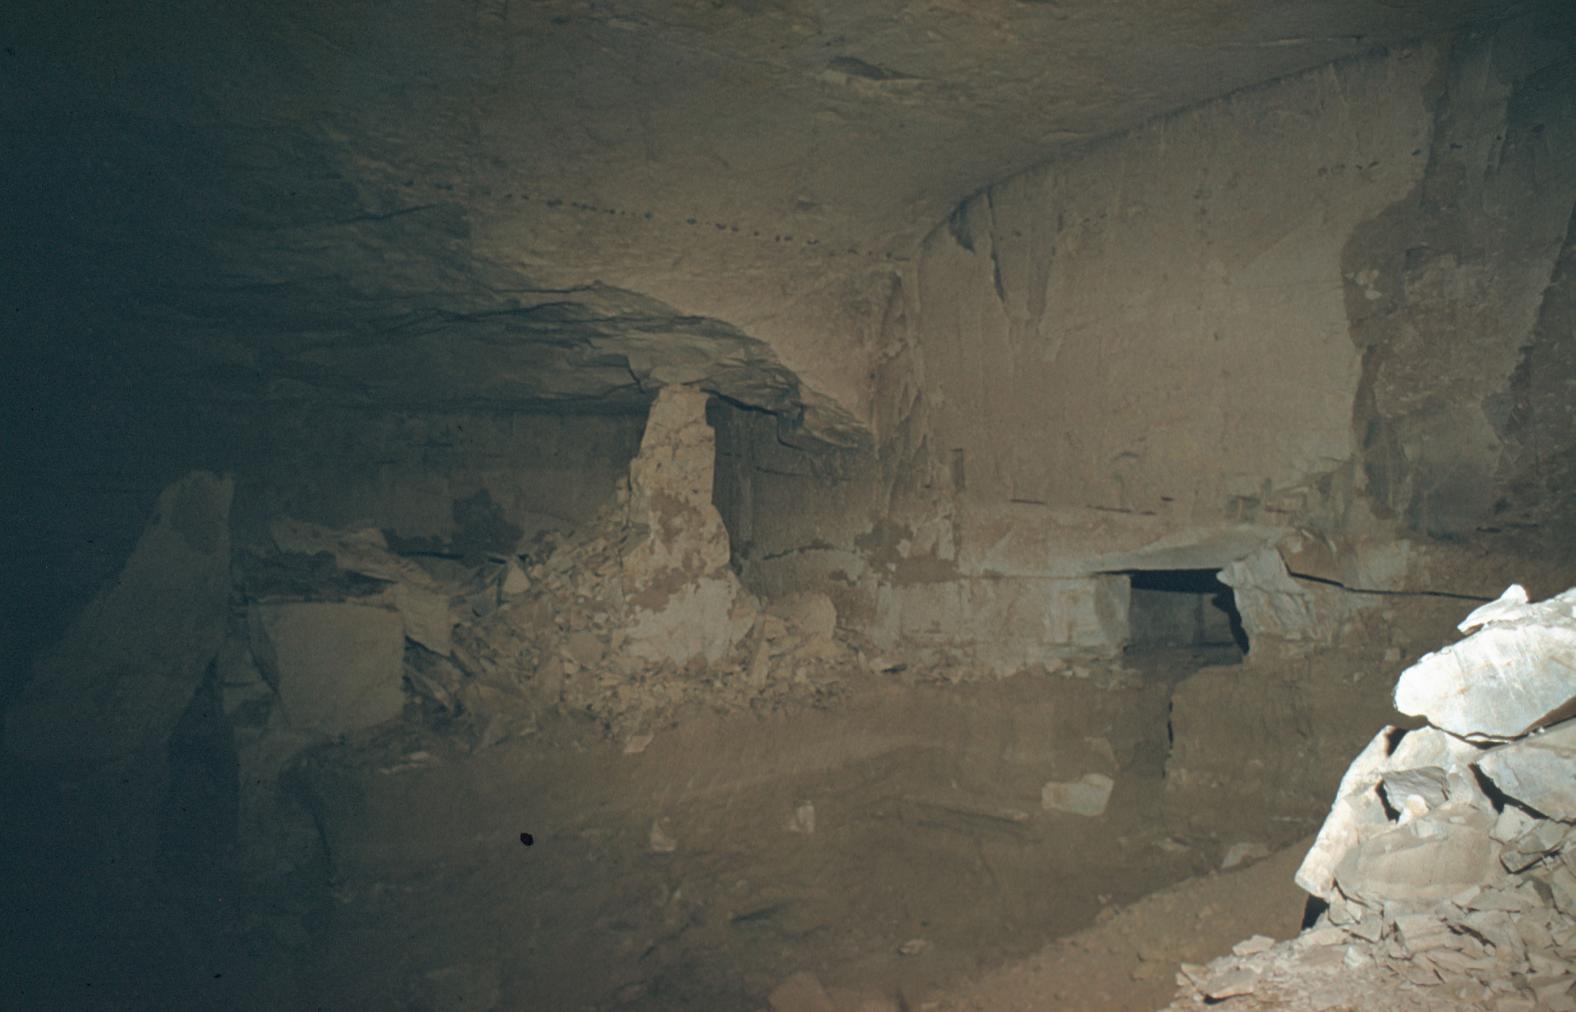
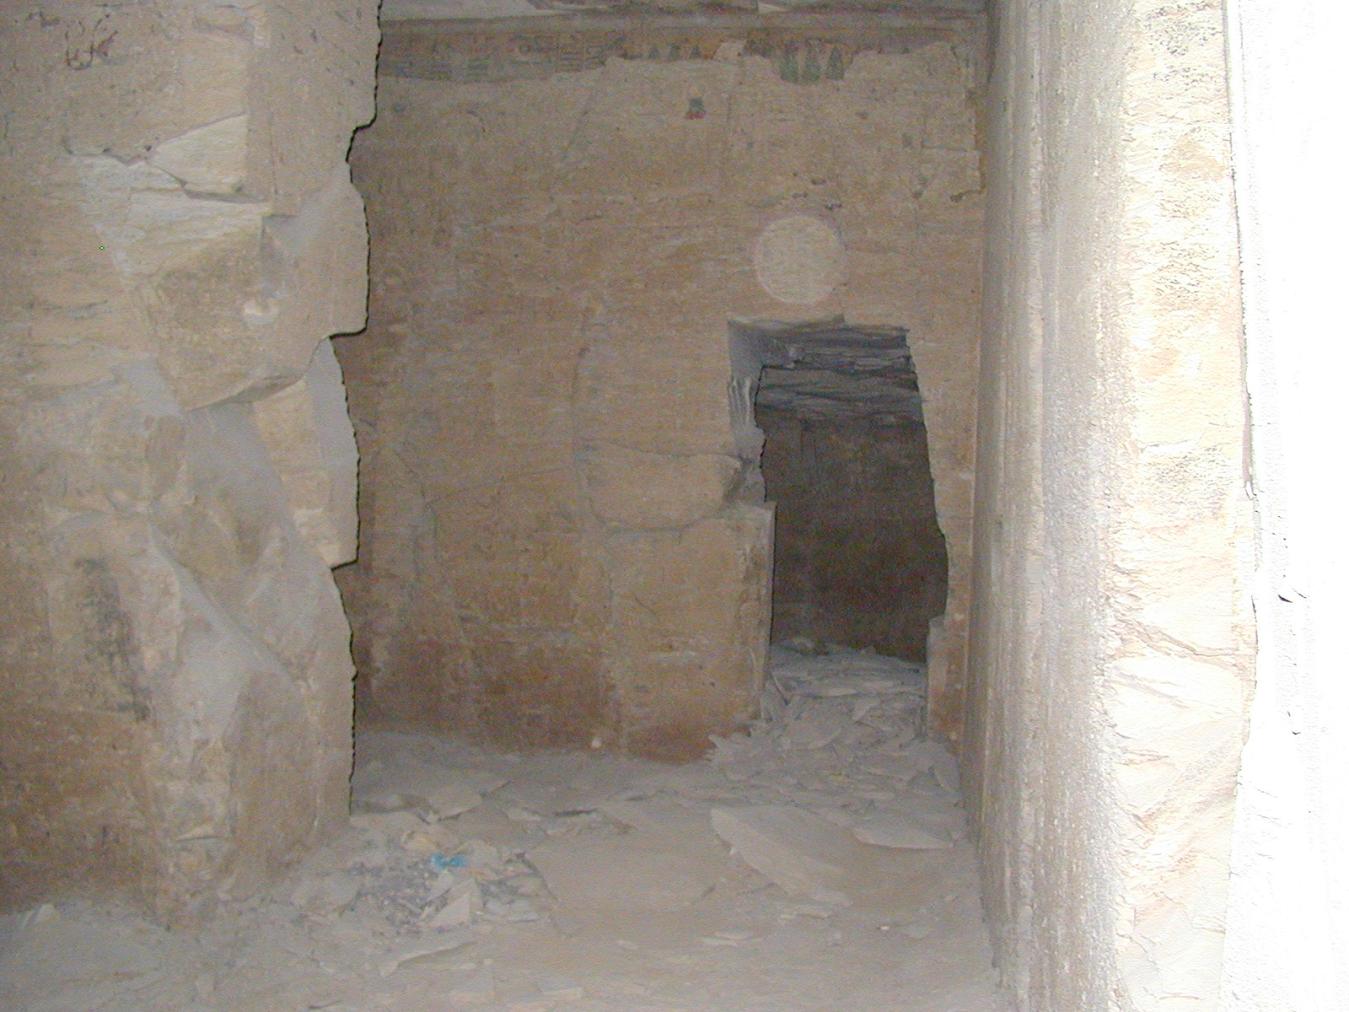
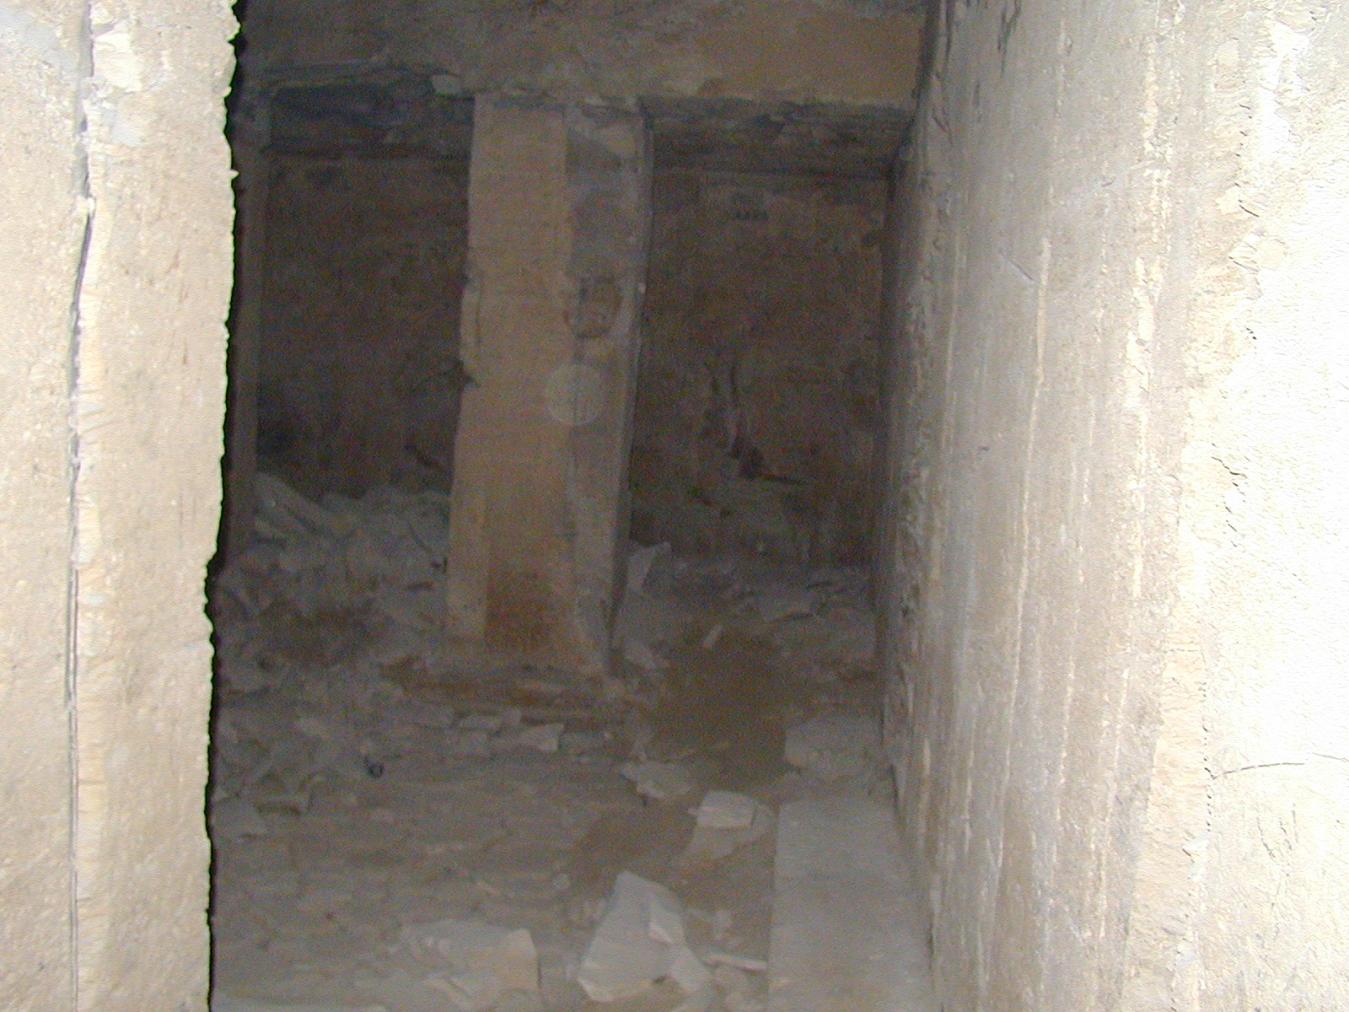
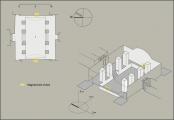
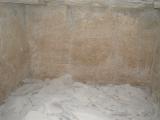
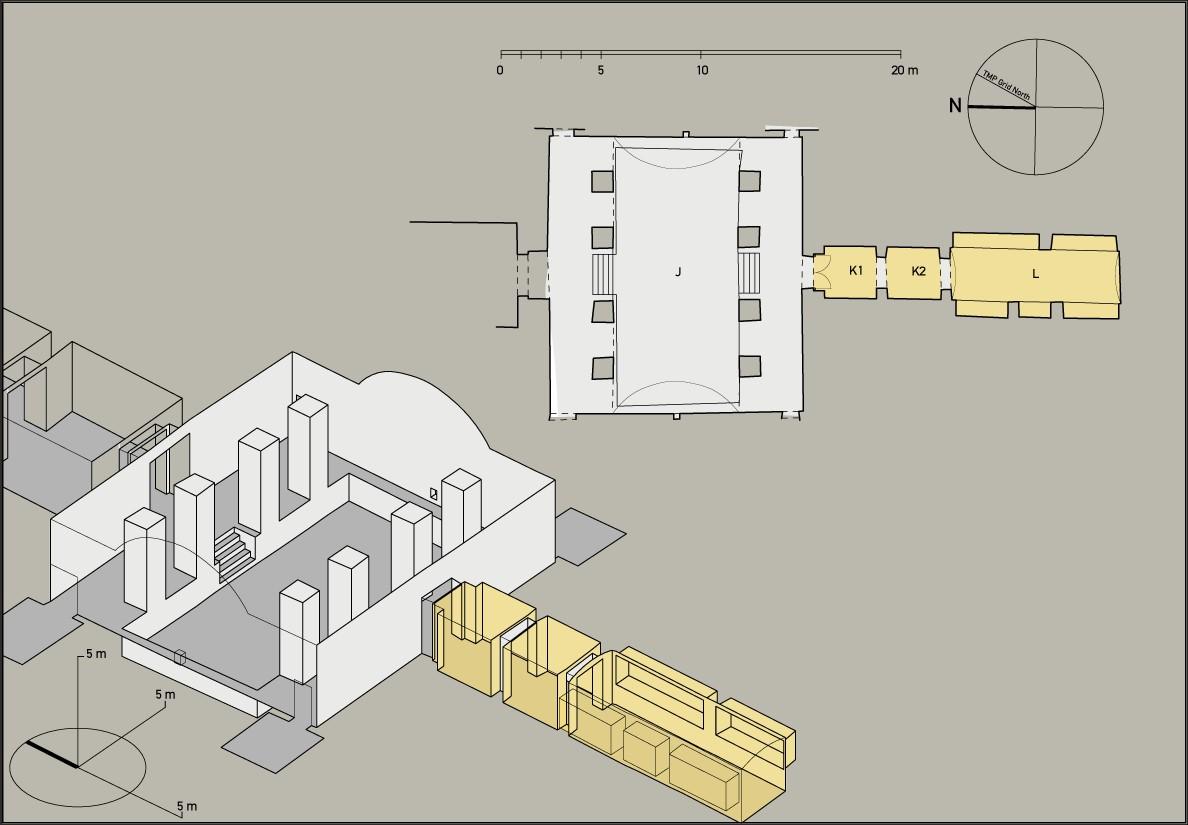
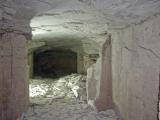
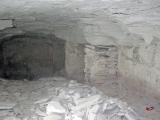
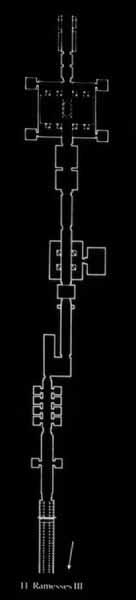
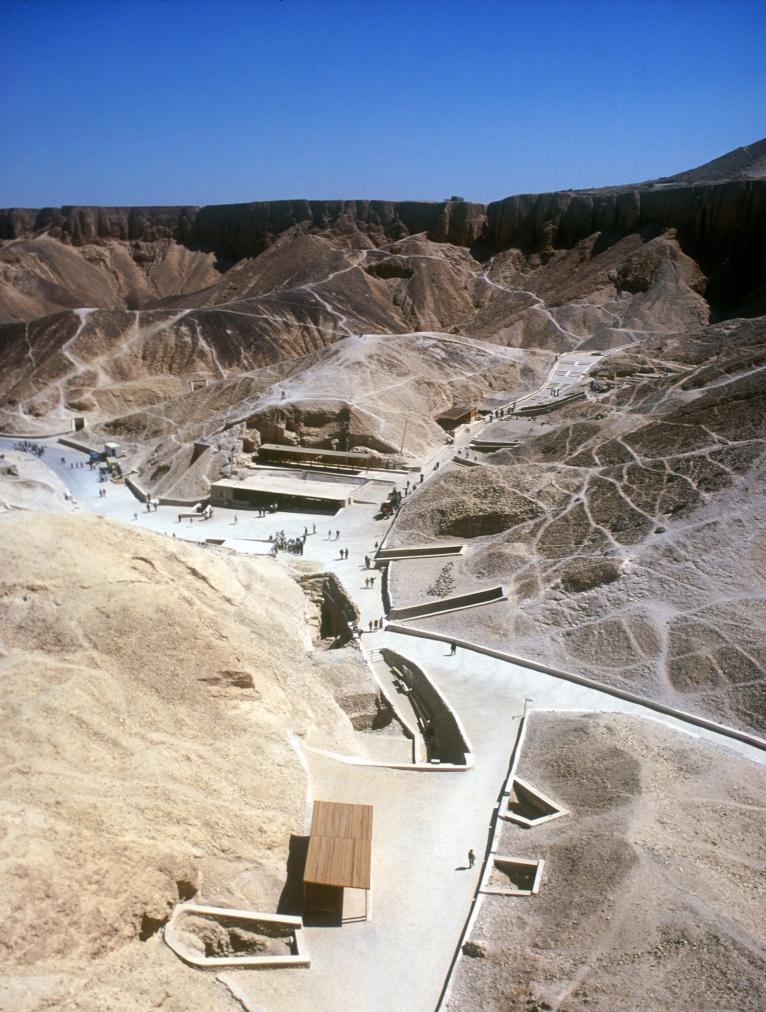
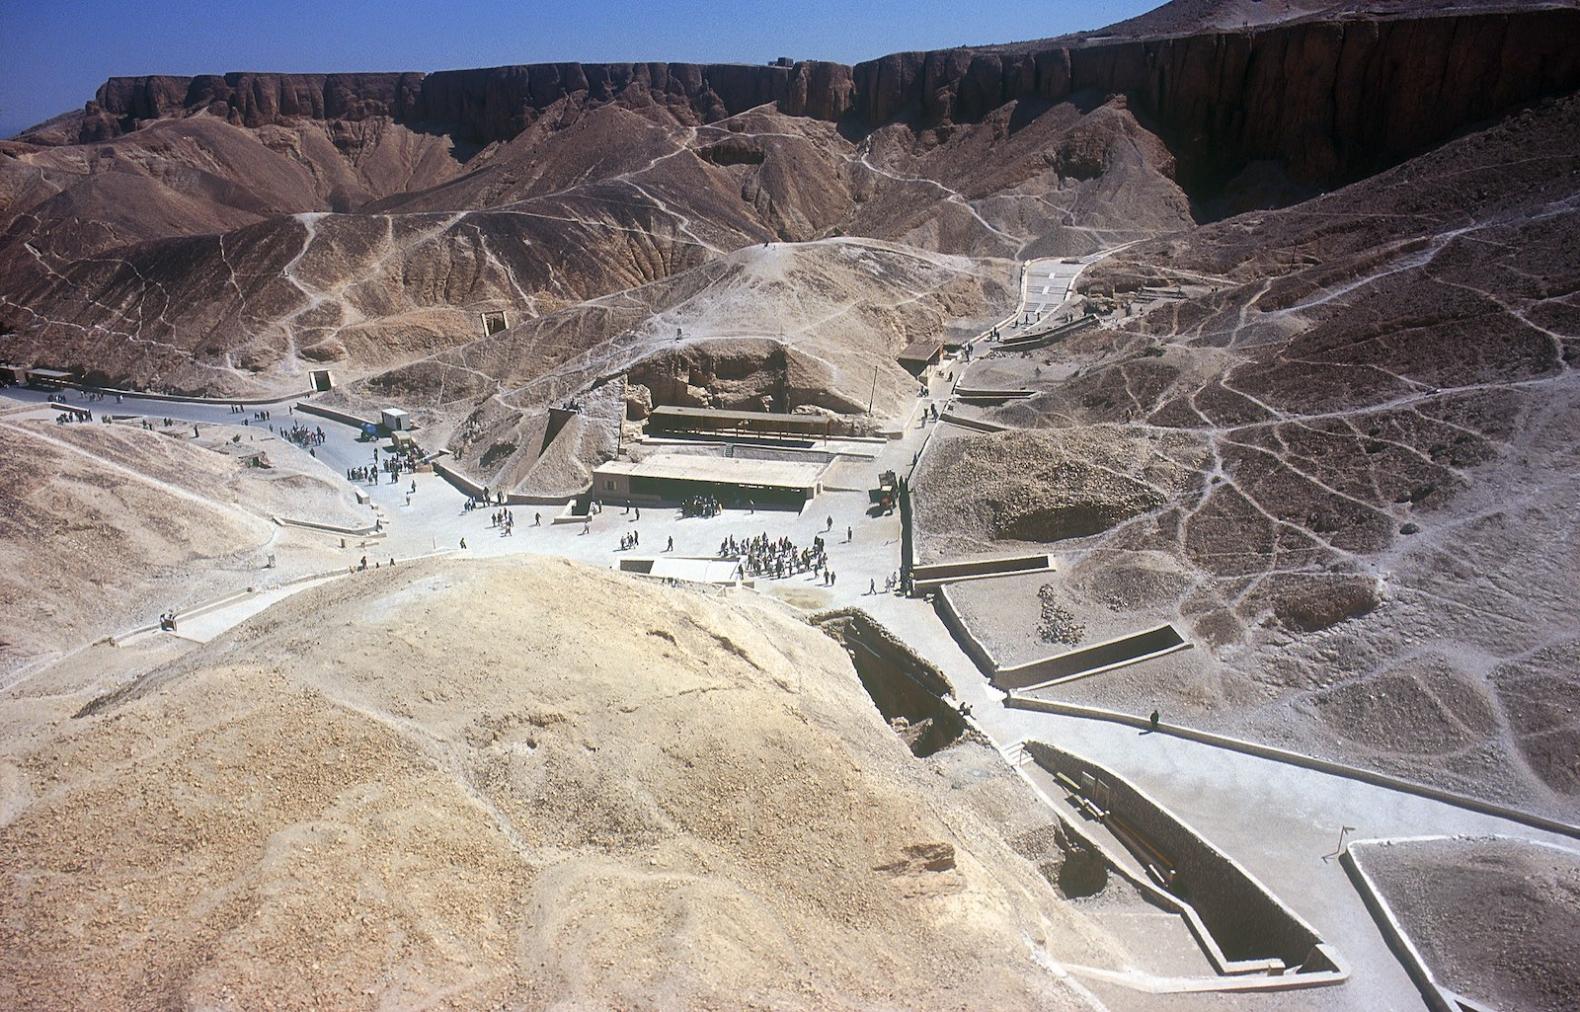
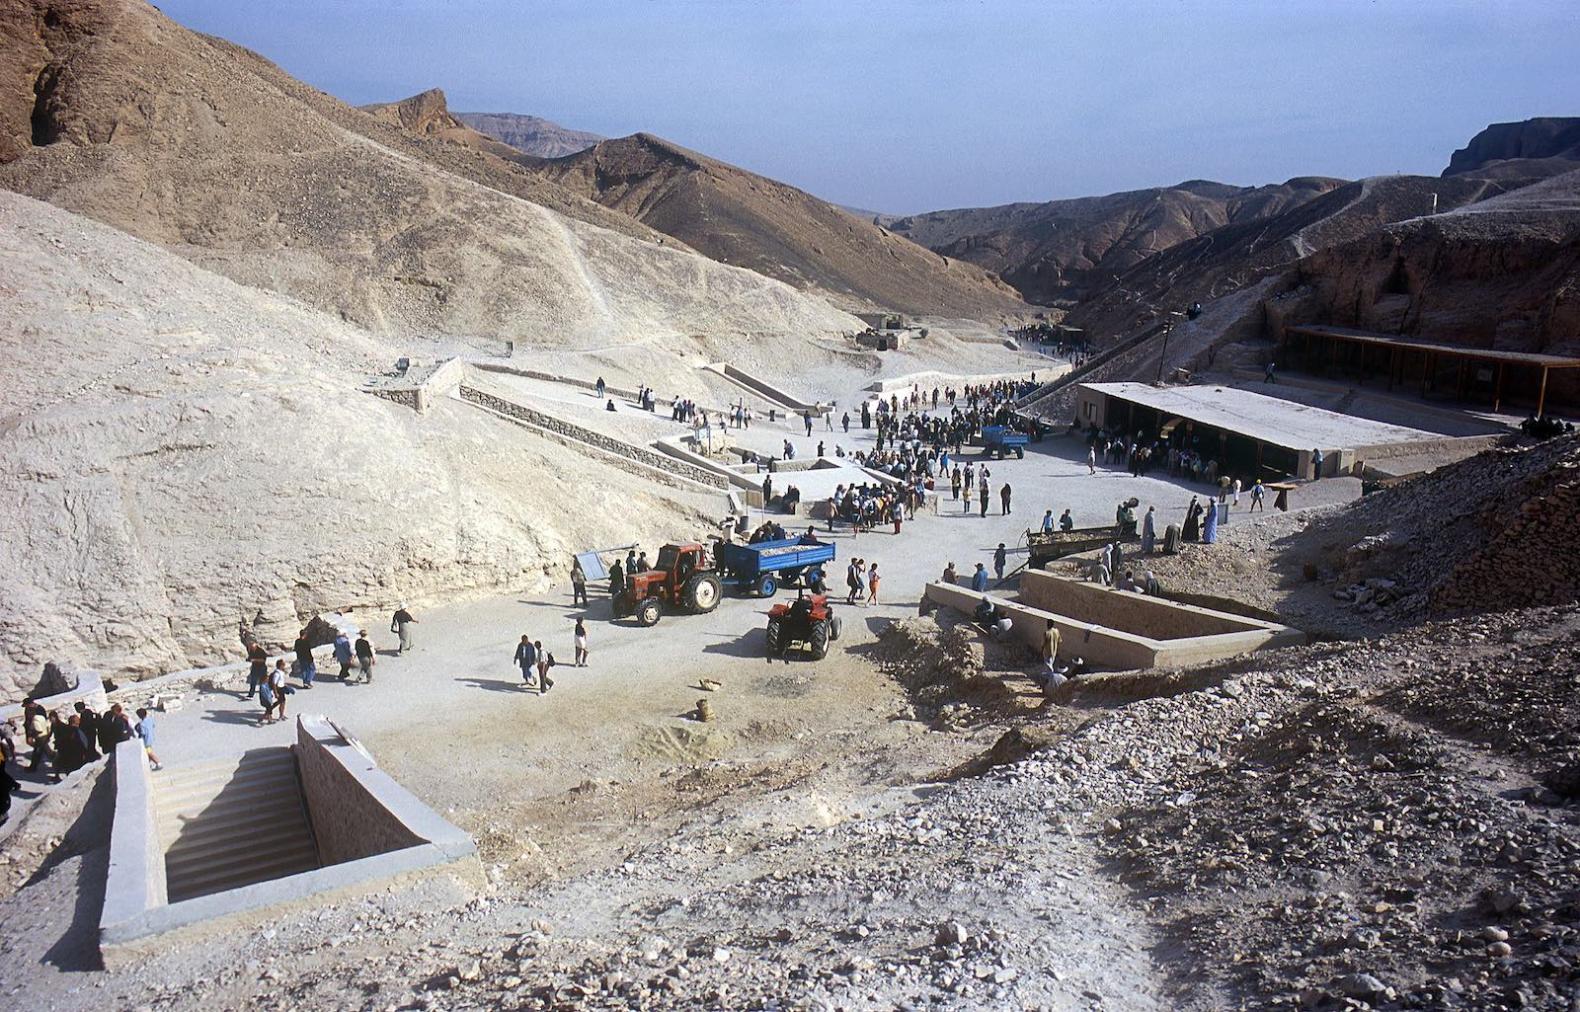
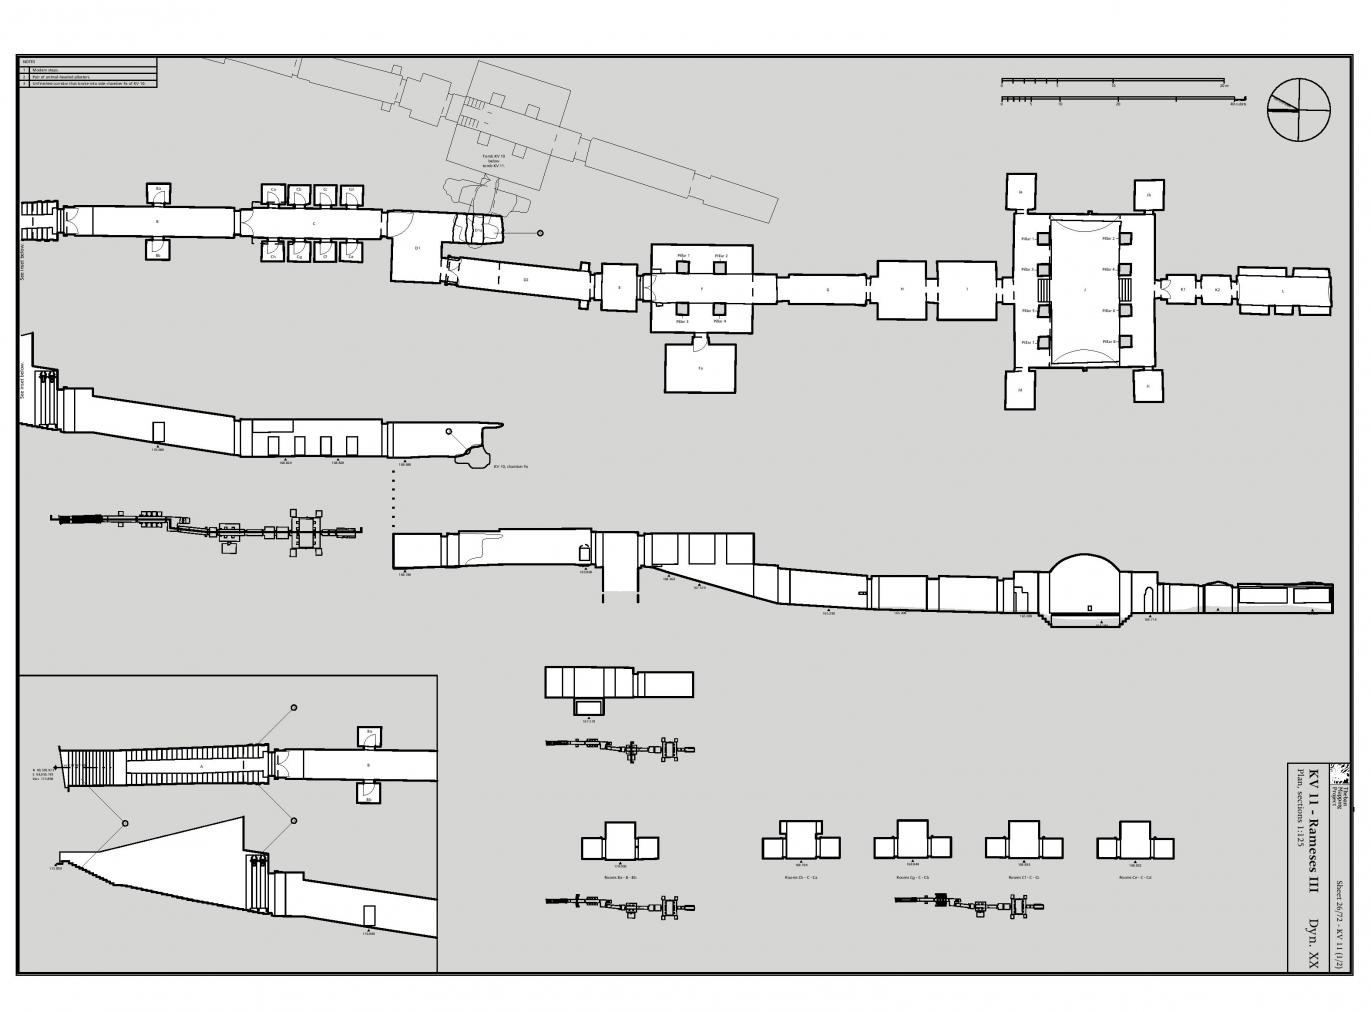
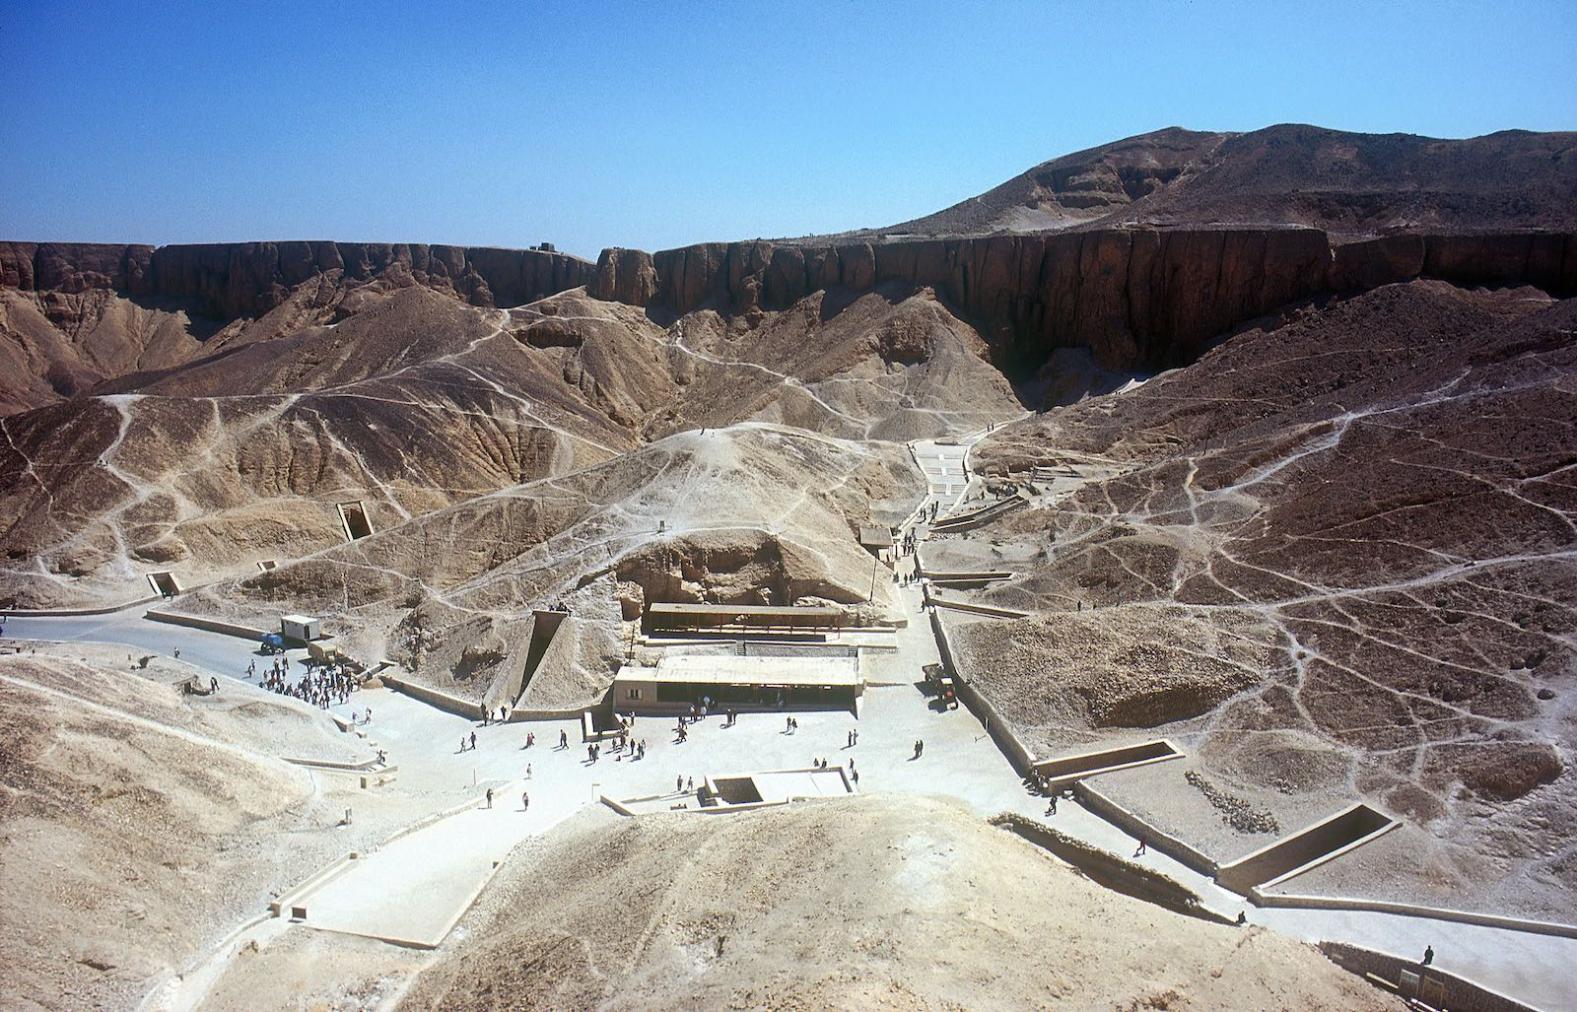
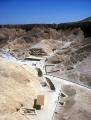
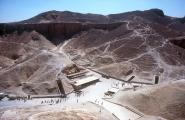
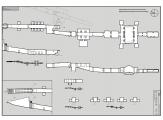
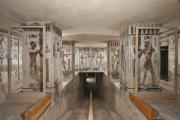
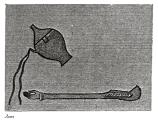
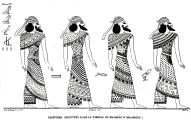
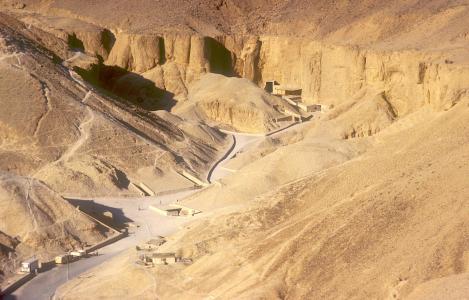
KV 11 is located off the main Wadi in the direct vicinity of the modern rest house. The tomb’s entrance (A) is flanked by two bovine headed pilasters. The entrance is followed by two corridors (B and C), one with two side chambers (Ba-Bb), the other with eight chambers (Ca-Ch). Beyond the second corridor, the cutting of a third corridor (D1a) on the axis of the tomb, broke through the ceiling of KV 10. The right wall was cut further to the west, transforming the corridor into a chamber (D1). A continuation of corridor D2, with its axis shifted to the west and not parallel to the original axis, has a floor inclined upwards, possibly to avoid further collision with KV 10. This corridor is succeeded by well chamber E, a pillared chamber (F) with a side chamber (Fa) and central descent, another corridor (G), two square chambers (H, I), a large burial chamber (J) with four side chambers (Ja-d), and three more small chambers beyond (K1, K2, L).
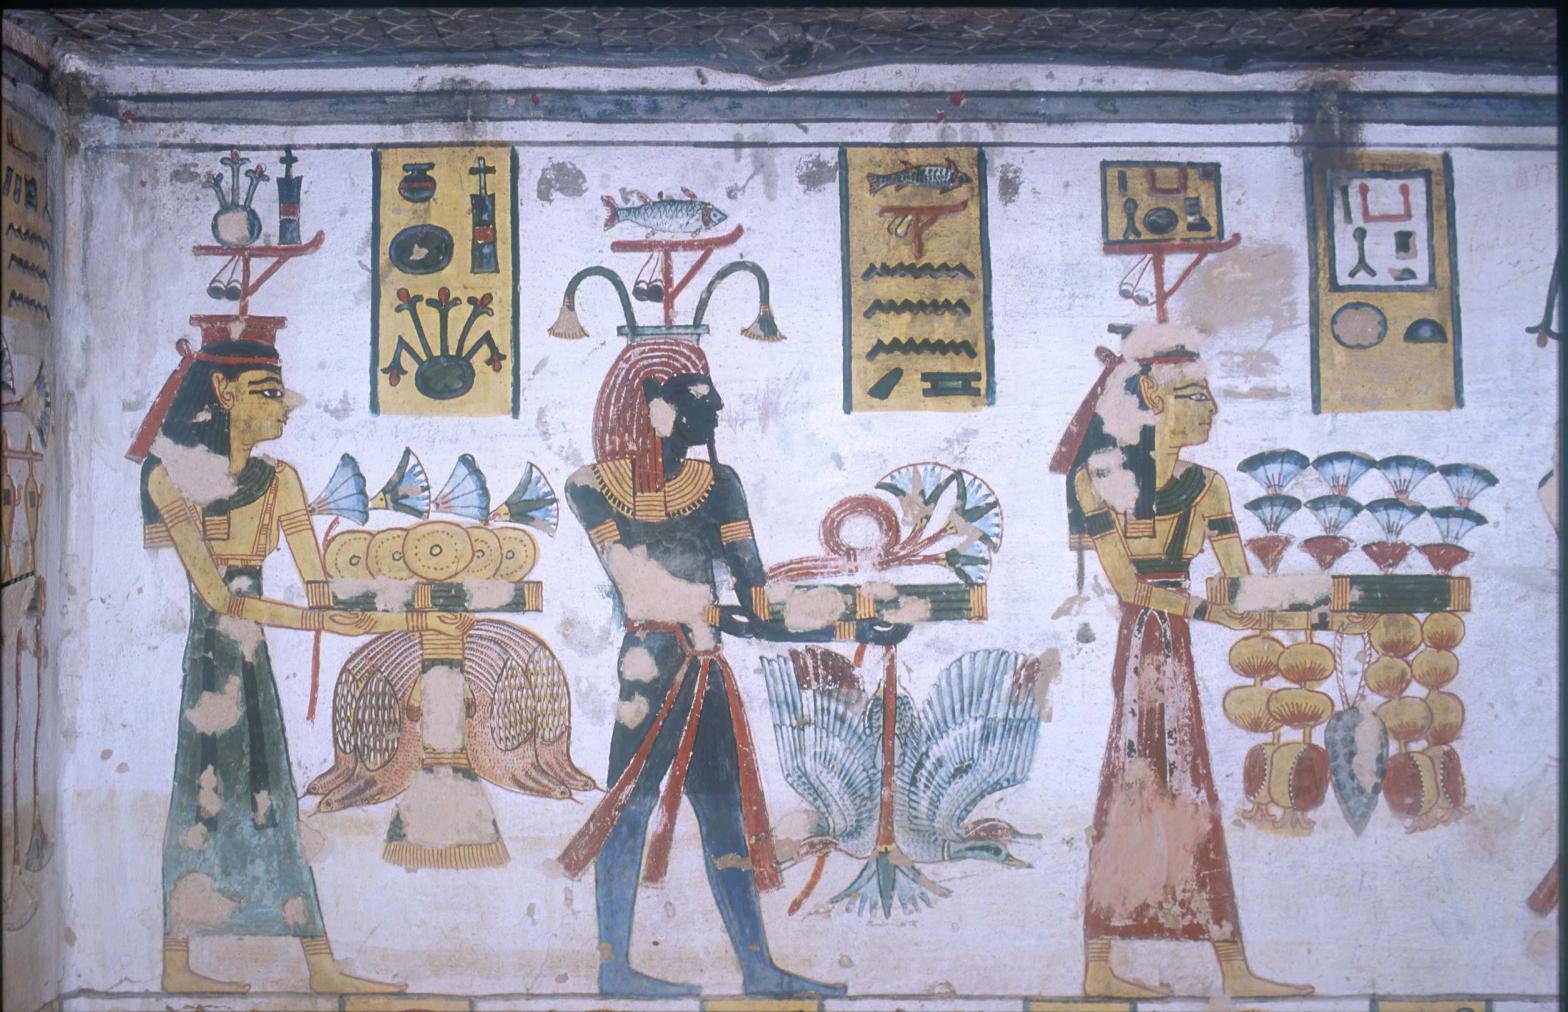
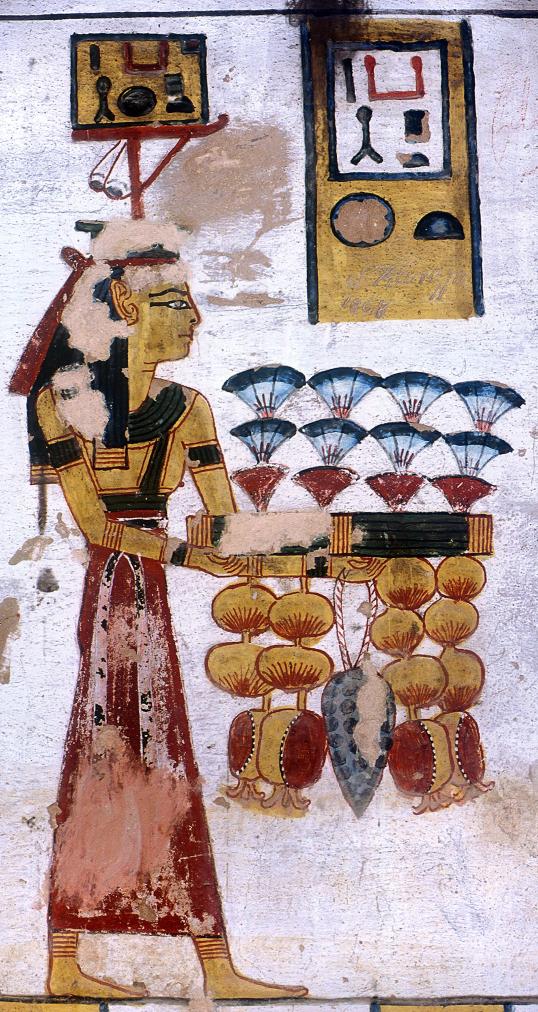
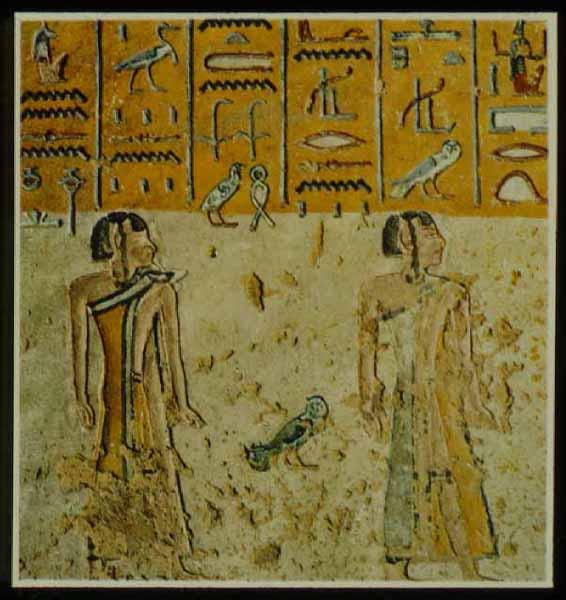
The entrance, the first two corridors, room D1, and the entry to corridor D2, originally bore the names of Setnakht. These were, however, re-inscribed for Rameses III, for whom the remainder of the tomb was decorated as well. The decorative program includes the Litany of Ra (corridor B, side chamber Bb, gate C, corridor C, gate Ca), excerpts from the Imy-dwa.t (corridor B and D2), the Book of Gates (pillared chamber F, side chamber Fa, burial chamber J, room L), the Opening of the Mouth ritual (Gate G, corridor G), the Book of the Earth (burial chamber J), the Book of the Dead (corridor C, side chamber Cc, side chamber Cf, room I, side chambers Ja and Jd), and the Book of the Heavenly Cow (side chamber Jc), as well as the king offering to various deities (corridor C, room D1, hall F, room Fa, burial chamber J). There are unique representations in the subsidiary chambers (Ba-Bb, Ca-Ch) off the first two corridors, that deal with activities such as food preparation and provision, burial equipment, and illustrations of the Book of the Dead spells.
For recent updates on the tomb and its current study, visit https://www.ramesses-iii-project.com. We extend our thanks to Dr. Anke Weber, Field Director of the Ramesses III (KV 11) Publication and Conservation Project, who generously provides us with updated information.
Noteworthy features:
This tomb has multiple side chambers off the first and second corridors B and C, which are decorated with unusual scenes. Workers cutting this tomb accidentally broke through to KV 10. Room D1 is unique in royal burial sites and provides new insights into Ramesside religious beliefs. Another unique feature is that much of the damaged rear part of the tomb (rooms H to L) was decorated with rows of protective deities and demons who kept watch over the king’s burial and rebirth.
Site History
The first three corridors of KV 11 were begun for Setnakht. For a long time it was believed that the tomb was abandoned when the cutting of the third corridor broke into KV 10. However, it was recently proven that Setnakht’s workers covered the unfinished corridor and inserted the new room D1 in order to shift the tomb’s axis. At least parts of corridor D2 were finished under his short reign, but he was eventually buried in KV 14, the tomb of queen Tausret. KV 11 was subsequently completed by Rameses III, who finished it through chamber L. After his burial was disturbed, the mummy of Rameses III was reburied in the cache in TT 320 and discovered in 1881. The tomb has been partly accessible since antiquity.
Dating
This site was used during the following period(s):
Exploration
Conservation
Conservation History
Egyptian conservators have cleaned decoration, patched surface breaks, installed glass panels over the walls, and added wooden walkways and lighting in the early 2000s. In 2019/2020, first measures to restore the tomb’s rear was undergone by The Ramesses III (KV 11) Publication and Conservation Project in order to develop a plan for conservational treatment. In 2021, a massive iron beam construction was inserted behind pillars 1 and 3 in the burial chamber to protect the ceiling from collapse. Parts of the vulnerable wall decoration on plaster were secured, pillars stabilized, and the damage mapping continued as part of a collaborative effort between German and Egyptian conservators in the project.
Site Condition
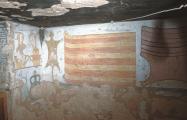
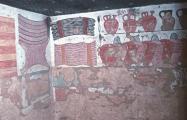
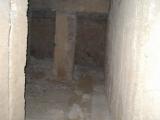
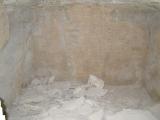
The color of the painted sunk reliefs is well preserved in most of the tomb, but the chambers beyond corridor G have suffered from severe water damage, cracking of walls, and loss of plaster. The tomb is therefore only accessible until this area.
The severe water damage was caused by a number of flooding events within the Valley of the Kings. Dr. Anke Weber of The Ramesses III (KV 11) Publication and Conservation Project has compiled the following history of flooding within the Valley, as documented in meteorological data, graffiti, publications, notes, photographs, and drawings from antiquity until today.:
- reign of Seti I (1289–1279 BC), during his tomb construction
- year 4 of the reign of Merenptah (March)
- year 62 of the reign of Ramesses II (May/June)
- year 2 of one of the successors of Ramesses III (May/June)
- year 2 of the reign of Ramesses IV, V, or VI (May/June)
- 11–12 December 1818
- 1883 (?)
- 1898 (?)
- 1905 (?)
- 1910 (?)
- March 1914
- October 1915
- July 1916
- October 1916
- October 1917
- 25 October 1918
- 1949
- 1975
- 1976
- 3 May 1979
- 1980
- 1989
- 1991
- 1993
- October– November 1994
- May 1995
- October 2001 (?)
- March 2005
- 21 January 2008
- 1 May 2018
- 6 May 2018
- 14 May 2020
- 17 May 2020
- 26 December 2020
Hieroglyphs
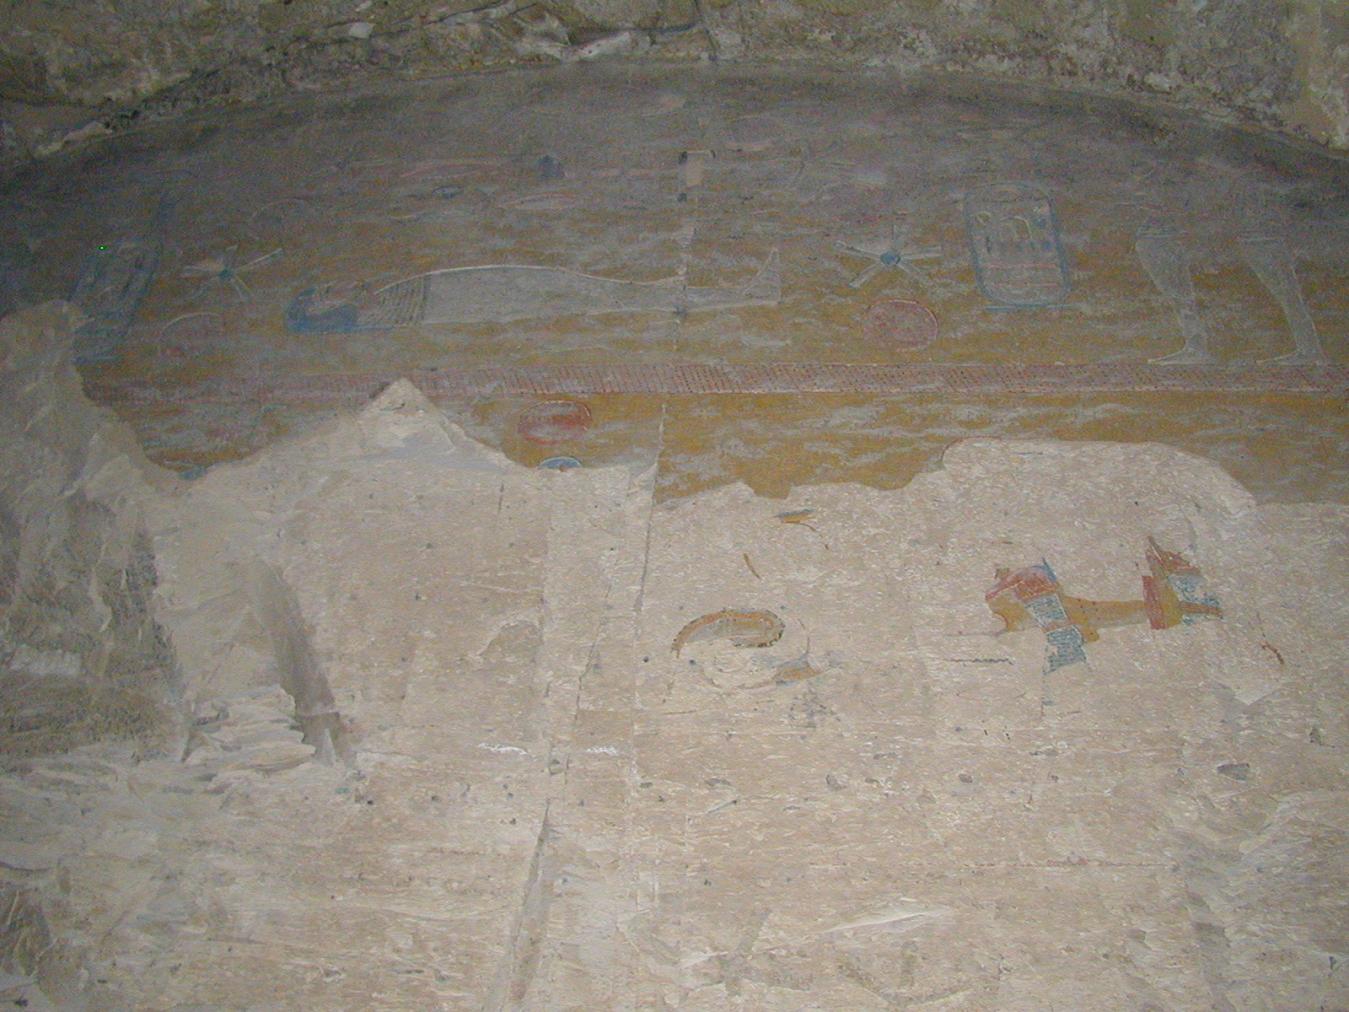
Rameses III
 King of Upper and Lower Egypt, Powerful is the Justice of Ra, Beloved of Amen, Son of Ra, Born of Ra, Ruler of Heliopolis
niswt-bity wAsr-mAat-Raw mry-Imn sA-Raw Raw-msw HqA-Iwnw
King of Upper and Lower Egypt, Powerful is the Justice of Ra, Beloved of Amen, Son of Ra, Born of Ra, Ruler of Heliopolis
niswt-bity wAsr-mAat-Raw mry-Imn sA-Raw Raw-msw HqA-Iwnw

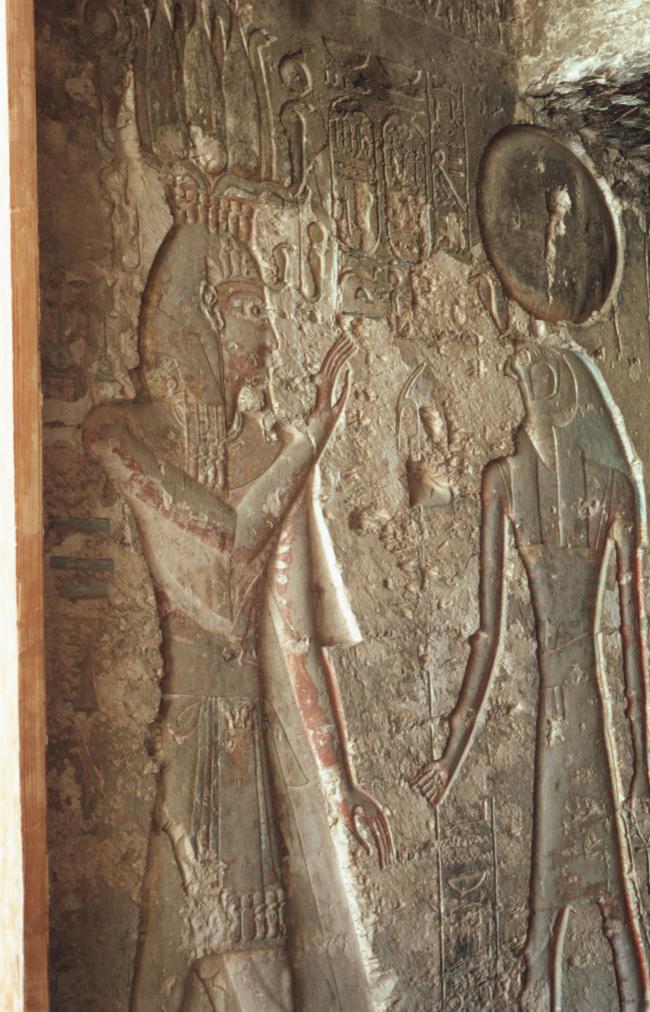
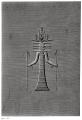
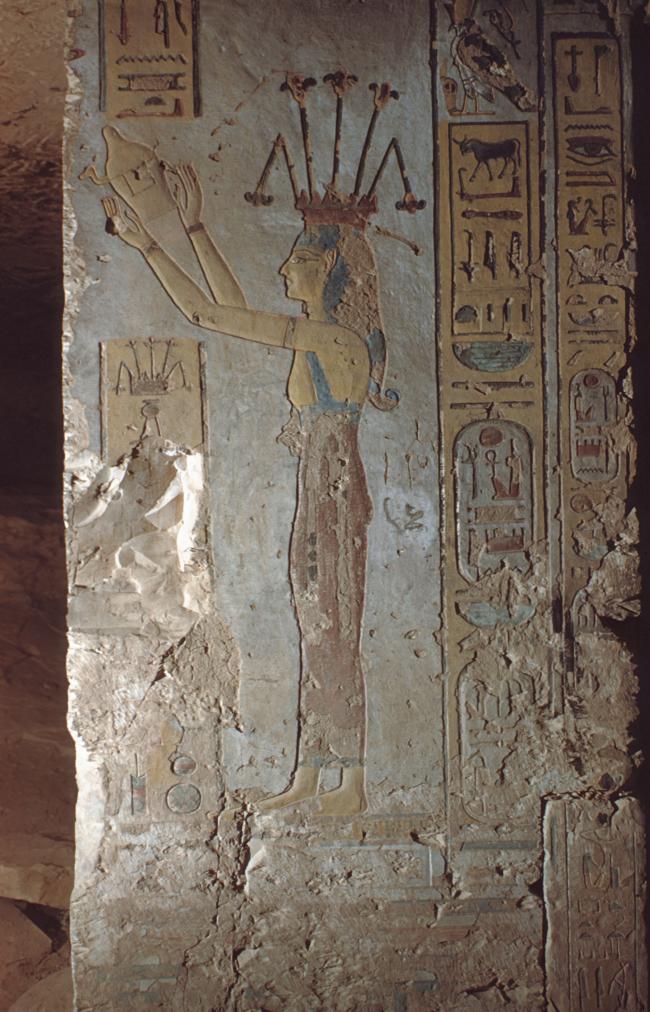
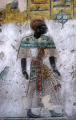
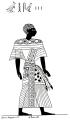
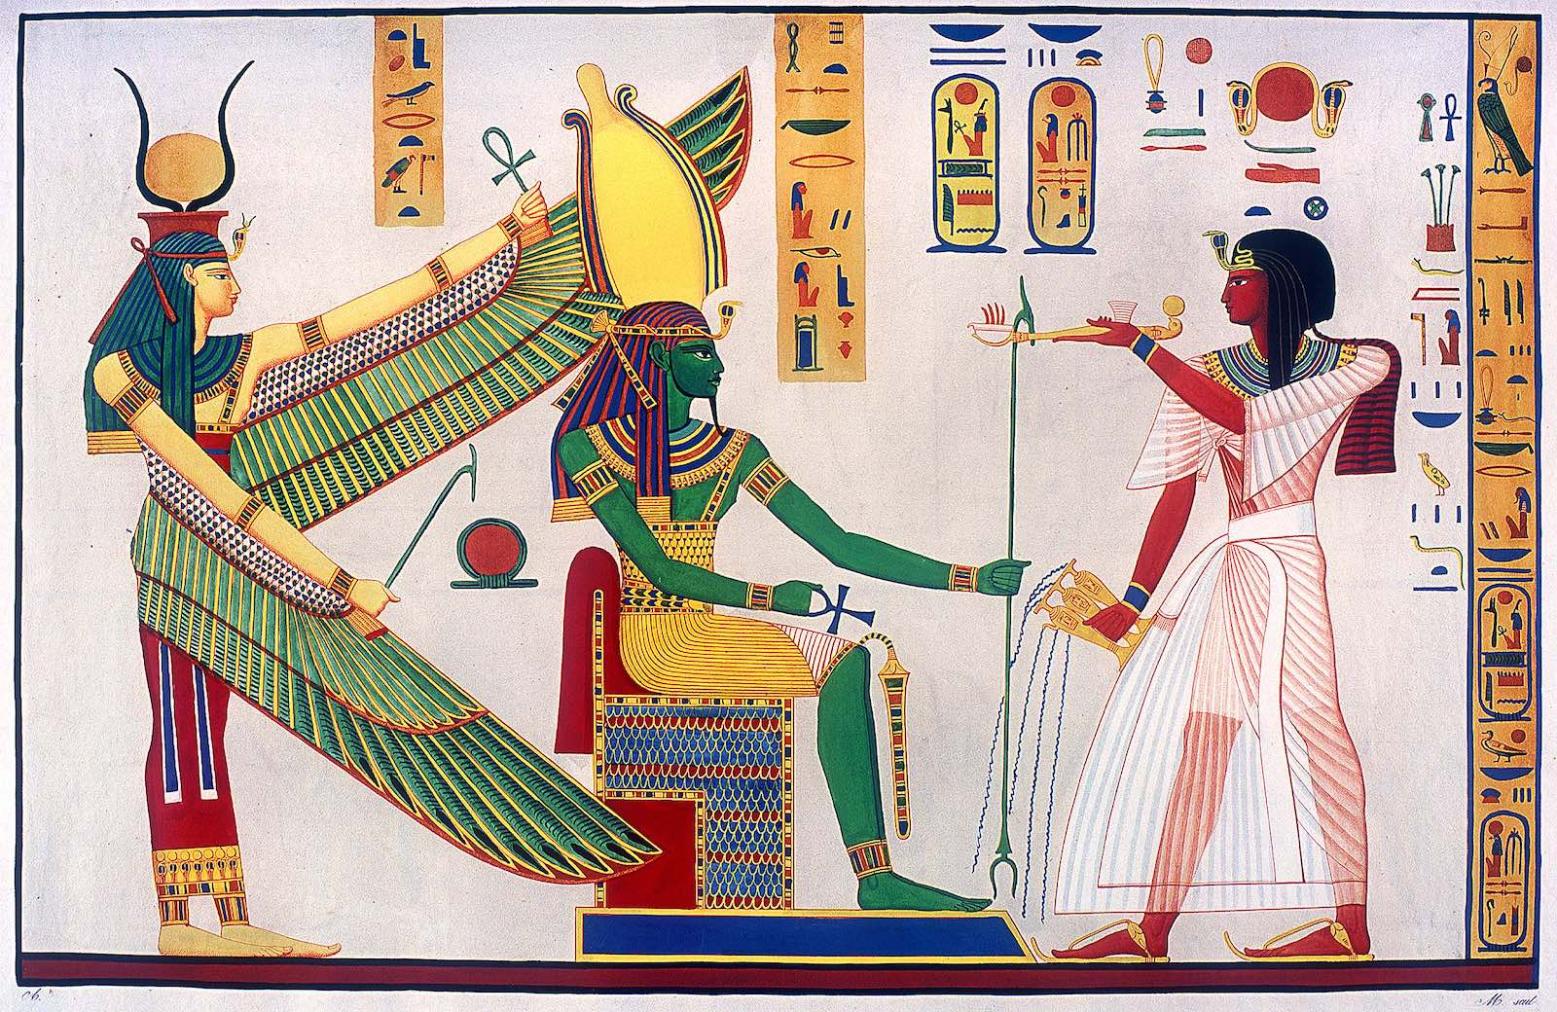
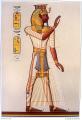
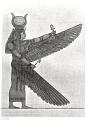
Hathor, "mistress of the west," in the tomb of Rameses III, in a relatively rare represenation with the head of a cow and two tall ostrich feathers, along with the cow horns and sun disk more usual to this goddess. In the background is the monkey-headed

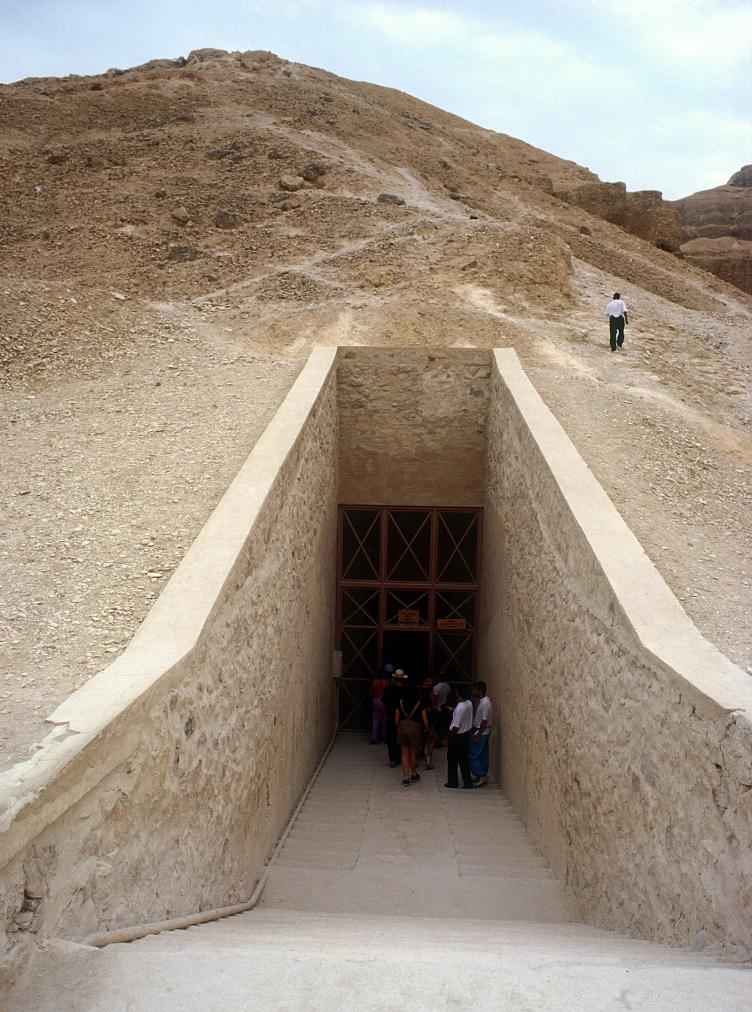
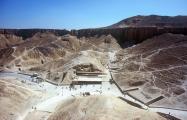
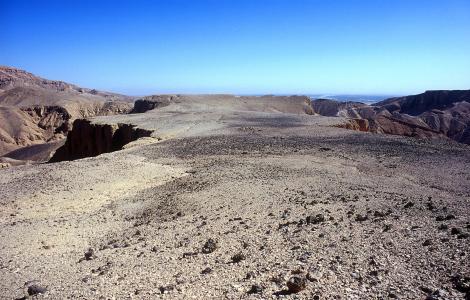
Hill above KV 11.
.")
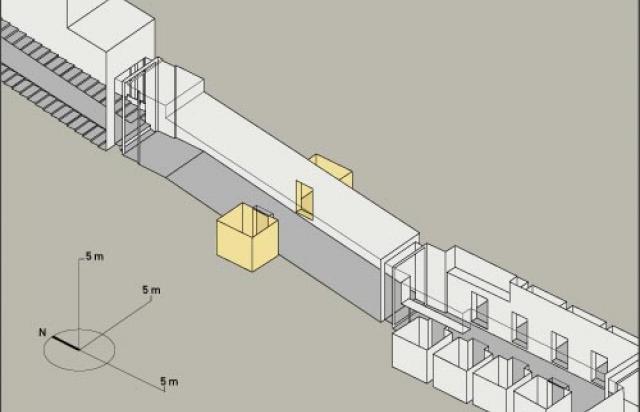
Tomb plans for KV 11 and KV 10 (original positions reversed).

Rameses III offering Ma'at to Osiris.
 and pillared chamber F (KV 10), with orientation of the tombs reversed from actual relationship.")
Tomb plans up until corridor C (KV 11) and pillared chamber F (KV 10), with orientation of the tombs reversed from actual relationship.
Portrait (reversed) of Rameses III offering to [Ptah-Sokar].
Rameses III offering incense [to Ptah].
Winged figure of Isis [protecting Ptah-Sokar Osiris, before Rameses III].

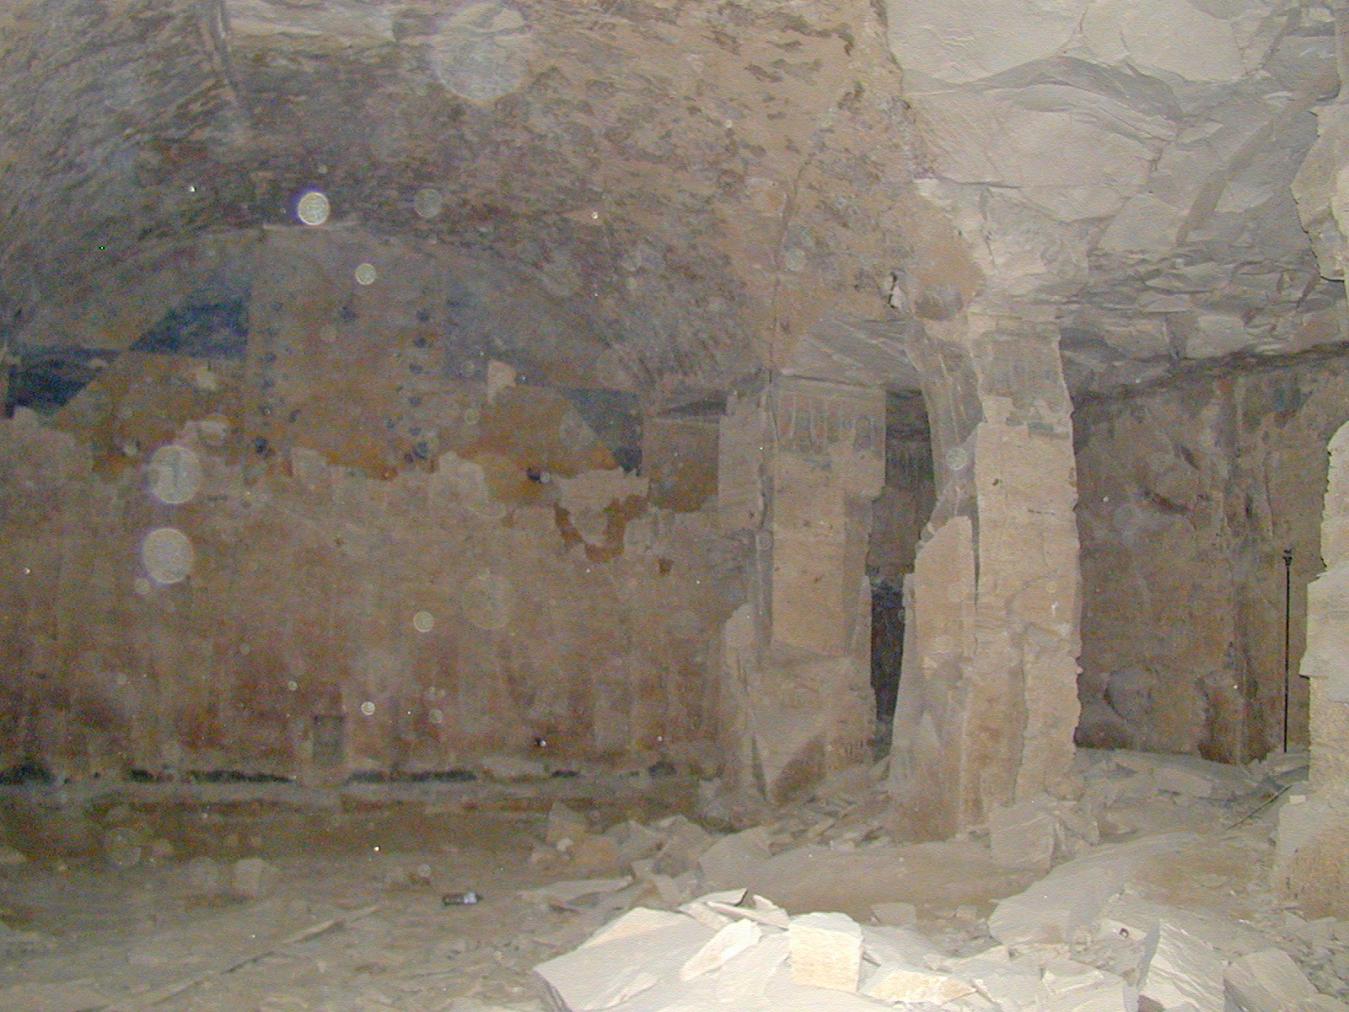
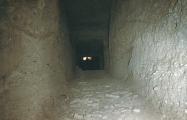
Breakthrough from KV 11 to KV 10.
Mummy of Rameses III: head (side view).
Lateral head x-ray of Rameses III.

Old rest house, KV 18, KV 17, KV 16, KV 55, KV 62, KV 9, KV 10 and KV 11.
KV 11: Pillared Hall F: Pillar 3: left and rear faces Image #20976


.")


 and pillared chamber F (KV 10), with orientation of the tombs reversed from actual relationship.")


Articles
Geography and Geology of the Valley of the Kings
Historical Development of the Valley of the Kings
History of the Valley of the Kings: Third Intermediate Period to the Byzantine Period
Bibliography
Abitz, Friedrich. König und Gott: Die Götterszenen in den ägyptischen Königsgräbern von Thutmosis IV bis Ramses III (= Ägyptologische Abhandlungen, 40). Wiesbaden, 1984.
Andrzejewski, Tadeusz. Le Livre des portes dans la sale du sarcophagi du tombeau de Ramses III. Annales du Service des Antiquités de l’Égypte 57 (1962): 1-6.
Aston, David. Pottery from the Valley of the Kings: Tombs of Merenptah, Ramesses III, Ramesses IV, Ramesses VI and Ramesses VII. Ägypten und Levante 8 (1998): 137-214.
Brock, Edwin C. The Tomb of Ramses III. In: Kent R. Weeks (ed.). The Treasures of the Valley of the Kings: Tombs and Temples of the Theban West Bank in Luxor. Vercelli: WhiteStar, 2001; Cairo: American University in Cairo Press, 2001. Available in English, Italian, French, German, Spanish and Chinese. Pp. 232-239.
Demarée, Rob. Ancient visitor’s Graffiti in the tomb of Ramesses III (KV 11). In: A. Weber, J. Moje, L. Rees and M. Grünhagen (eds.). Akhet Neheh. Studies in Honour of Willem Hovestreydt on Occasion of his 75th Birthday, GHP Egyptology 33. London: Golden House (2020): 65-72
Edgerton, William F. The Strikes in Ramses III’s Twenty-Ninth Year. Journal of Near Eastern Studies 10 (1951): 137-145.
Grist, Jehon. The Identify of the Ramesside Queen Tyti. Journal of Egyptian Archaeology 71 (1985): 71-81.
Helck, Wolfgang. Königsgräbertal. Wolfgang Helck, Eberhart Otto and Wolfhart Westendorf (eds.). Lexikon der Ägyptologie. 7 vols. Wiesbaden, 1972-1992. 3: 516.
Hovestreydt, Willem. Sideshow or Not? On the Side-rooms of the First Two Corridors in the Tomb of Ramesses III. In: B. J. Haring, O. E. Kaper, and R. van Walsem (eds.). The Workman's Progress: Studies in the Village of Deir el-Medina and Other Documents from Western Thebes in Honour of Rob Demarée. Leiden; Leuven, Peeters, 2014. Pp. 103-132.